Presently, there are many ways to add a drop-down menu to blogger blogs but most of these methods are sometime complicated or wrong. So today, a simple and easy method will be explained here on how a beautiful drop-down menu can be added to blogger blogs and how you can easily customize it to your taste.
1. Go to Blogger Dashboard ==>Template ==> Edit HTML
2. Now search for ]]></b:
3. Paste the code below above the code stated in the 2nd step.
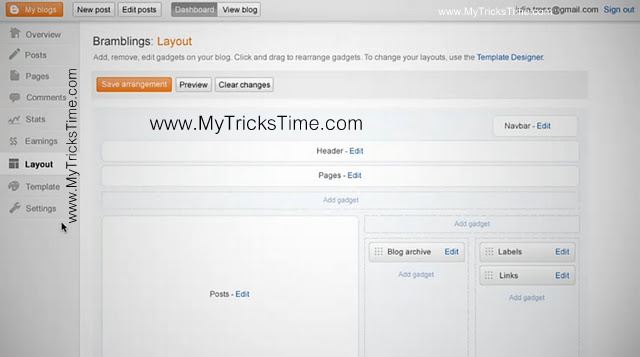
.menu{
border: 2px solid black;
margin:0px;
padding:0px;
font: 67.5% �Century Gothic�, �Bitstream Vera Sans�, �Trebuchet Unicode MS�, �Lucida Grande�, Verdana, Helvetica, sans-serif;
font-size:15px;
font-weight:bold;
}
.menu ul{
background: pink;
height:35px;
list-style:none;
margin:0;
padding:0;
}
.menu li{
float:left;
padding:0px;
}
.menu li a{
background: pink;
color: black;
display:block;
font-weight: normal;
line-height:35px;
margin:0px;
padding:0px 25px;
text-align:center;
text-decoration:none;
}
.menu li a:hover, .menu ul li:hover a{
background: black;
color: lightblue;
text-decoration:none;
}
.menu li ul{
background: pink;
display: none;
height:auto;
padding:0px;
margin:0px;
border:0px;
position:absolute;
width:225px;
z-index:200;
/*top:1em;
/*left:0;*/
}
.menu li:hover ul{
display:block;

}
.menu li li {
background: ;
display:block;
float:none;
margin:0px;
padding:0px;
width:225px;
}
.menu li:hover li a{
background: ;

}
.menu li ul a{
display:block;
height:35px;
font-size:12px;
font-style:normal;
margin:0px;
padding:0px 10px 0px 15px;
text-align:left;
}
.menu li ul a:hover, .menu li ul li:hover a{
background: lightblue;
border: 0px solid black;
color: black;
text-decoration:none;
}
.menu p{
clear:left;
}
4.Now save your template then go back to �Layout� and add an �HTML/JavaScript� widget. Then copy and paste the code below into the �HTML/Javascript Widget� box:
    <!DOCTYPE html PUBLIC �-//W3C//DTD XHTML 1.0 Strict//EN�
    �http://www.w3.org/TR/xhtml1/DTD/xhtml1-strict.dtd�>
    <html xmlns=�http://www.w3.org/1999/xhtml� xml:lang=�en� lang=�en�>
    <head>
    <meta http-equiv=�content-type� content=�text/html; charset=utf-8? />
    <title></title>
    <link rel=�stylesheet� href=�menu_style.css� type=�text/css� />
    </head>
    <body>
    <br>
    <br>
    <div class=�menu�>
    <ul>
    <li><a href=�#� >Home</a></li>
    <li><a href=�#� >About Us</a></li>
    <li><a href=�#�>Recipes</a>
    <ul>
    <li><a href=�#�>Breakfast</a></li>
    <li><a href=�#�>Lunch</a></li>
    <li><a href=�#�>Dinner</a></li>
    <li><a href=�#�>Dessert</a></li>
    </ul>
    </li>
    <li><a href=�#�>Photography<br />
    </a>
    <ul>
    <li><a href=�#�>Babies</a></li>
    <li><a href=�#�>Families</a></li>
    <li><a href=�#�>Seniors</a></li>
    </ul>
    </li>
    <li><a href=�#�>Crafts</a>
    <ul>
    <li><a href=�#�>Scrapbooking</a></li>
    <li><a href=�#�>Kids Crafts</a></li>
    </ul>
    </li>
    <li><a href=�#�>Contact</a></li>
    </ul>
    </div>

    </body>
    </html>
5. Finally, drag the widget to the area where you want it to show.
Enjoy Guys! and don’t forget to post your comments. � MyTricksTime.com


