5 ways to increase traffic to your blog

How to get traffic to your websiteEveryone in this internet world is searching for something. There are trillion of queries each second and billions of result for each query. In this crowd of 2.5 billion internet users, who will ensure that your content is at the top?

People write master pieces, produce quality content and that�s it. They think that the search engines will do the rest and send traffic to their website. Even they don�t dare to share their posts across social media or other content sharing platforms. But let me tell you clearly that if you don�t promote your content and share it properly, you will not get good traffic to your website and in the last, there will be just hopelessness.

How to increase traffic to your website?

All of us writing on the internet want traffic to our websites. We want the audience who will read our content. Here comes the question that how much your content is worthy and where it should be ranked. Here are some awesome tips to get more targeted audience and traffic to your website.

Use social media

how to get traffic to your website

Social media stands first in this list because it is an easy source of getting traffic free of cost even some website totally rely on social media sites for visitors like magazine or news websites are more likely to get clicks from social media sites.

Sites with more social shares and following appears first in the search results and moz has declared the social media presence as an important search engine ranking factor. Because search engine wants the content which is shareable and easy to digest so social media websites are the only way to know that how much the content is shared.

Especially Google plus shares matter a lot as the content with more Google plus shares get higher ranking in the search results and will get more traffic through Google. The following tips will help you to increase your social media following and indirectly increase your website traffic.

  • Use images to make your post more presentable. Post with images are more shared and clicked.
  • Use hash tags with in the post description to categorize your content like one can use #seo for post related to seo.
  • Be active and post regularly.
  • Interact with your users and respond to their problems. This will covert visitors into sincere followers.
  • Choose the correct platform related to your audience. Do search and try to find your audience.
  • Use as much social media sites as you can as there is no harm to use them.

I recommend you to share your content on the following sites to get more visibility and traffic.

  1. Facebook
  2. Google plus
  3. Twitter
  4. Pinterest
  5. Scoop.it
  6. Stumbleupon
  7. Delicious
  8. Reddit
  9. Digg
  10. Linkedin

Read more: How to find good Keywords

Write long post

Longer is usually better� as described by Neil Patel in this post. Long posts are always ranked at the top in the search engines and after the introduction of in-depth articles by Google, it is now important to write well length content to rank it in the search result.

The more content your page will have, the higher it will be in ranking. You can see the below graph showing that post with words more than 2000 are ranked at top positions.

Why this long content is ranked higher? The answer is whenever you are writing long posts you are using a variety of long tail keywords for the targeted keyword. Long content is trusted in the eye of search engines because it accumulates most of the topic.

Don�t do keyword stuffing instead use synonyms to make it lengthy and readable.

Learn how to add meta tags for each post in blogger

Google authorship

how to get traffic to your website

Google has added new feature i.e. authorship to its ranking factors. Google authorship is a markup which helps you to connect with your content in the search engines. This authorship markup includes an image which appear in search results along with your content.

If you want to get your post on the first page of search engine then establish Google authorship for your content. This will not only make you authority but also increase the traffic to your website.

  • It increases click through rate of content
  • Improves authority and search engine ranking.

How to establish Google authorship for BlogSpot blogs?

Keyword research and usage

Keyword research is the first step for writing a post. Whatever you are going to write is oriented about a specific keyword which you are trying to target or which you want traffic on your website. Like if your site is about fashion then you will try to target Fashion news or Latest fashion design. You will not go for fifa world cup or Buy a book.

You need to know your specific keyword and then post your content about that keyword. Do a little keyword research using these tools and find all the relevant keyword about your topic. Then start posting the content by adding these keywords in your content.

When robot will crawl your website and find the keyword again and again then they will rank your website in that specific niche but be careful again, don�t do keyword stuffing. Use maximum keyword density as 3% and don�t go beyond this.

Optimize post properly

On page and off page SEO are extremely important for every webpage. Your content will only appear in search engines if your website is search engine friendly.

  • Use main keyword in your post title as it will appear first in search engines. Use 6o words post title.
  • Add 150 words Meta description including main keyword.
  • Use headings (H1 to H6) to categorize your content. H1 is for the most important part then H2 and so on.
  • Use alt attribute for images.
  • Use bold and italic to make content clear.
  • Add related links
  • Use stunning images

These are some the ways to get traffic to your website. Tell me which method you are using to get traffic to your website by putting a comment below.Enjoy Guys! and don’t forget to post your comments. � MyTricksTime.com

Methods to use Multiple Whatsapp Account in single Android Phone

What if you could use multiple Whatsapp account on a single smartphone ? Wouldn�t it be a great experience operating different accounts on a smartphone? This Whatsapp trick described in this post will help you know how to use multiple whatsapp account on Android.

There are basically two methods to do so, the first one requires rooting of your phone and the other one without rooting. Both the methods are quite easy and can be done easily without having much knowledge.
Here you will get both the tutorial on how to use multiple Whatsapp on Android.

Methods to use Multiple Whatsapp Account in single Android Phone :-

Method � 1 : Requires Rooting
If you are an android user then you may be aware of the rooting power and here also rooting will help you use multiple whatsapp account on android. This can be easily done with the help of an Android application named as Titanium Backup Root.
As it is about rooting so it�s better to take precautions and please try at your won risk, take a full backup of your data.
Follow the steps to know how to use Titanium to do this –
I.) Open Titanium Backup Root and then click on Switch Profile to create two different profiles.
II.) Now click on Create A New Data Profile and enter the name of your first user profile. Your First User Profile will act as administrator profile which will have all the data and controls.

III.) Now after you have created first user profiles now again click on Switch Profiles and create a second profile.
This second user profile will have the second whatsapp, if not already installed then install it from Google Play Store.

IV.) Now you have to click on Backup/Restore tab and browse for Whatsapp app.

V.) then click on Special Features and look for the Disable Multiple profile option for this app, you have to first disable and then ENABLE it again.

VI.) Now as you are working in Second profile , register here your second mobile number for the other Whatsapp account.


Method � 2 : Without Rooting
If you do not want to root your phone and make it more simpler and safer to do this then follow this method.
You will have to install an app called as OGWHATSAPP, this is unofficial whatsapp which works similar to original one and lets you use 2 accounts in single android device.
Follow these steps carefully now :-
I.) Open up the existing Whatsapp in your device and take a full backup of your conversations.
II.) Now navigate to Setting >> Applications >> All >> Select Whatsapp and clear all data.
III.) After you have cleared the data go to your SD card and rename the Whatsapp folder to OGWhatsApp.
IV.) Now uninstall the currently installed Whatsapp account from your device.
V.) Install OGWhatsapp app now by CLICKING HERE.
VI.) That is it, now OGWhatsapp will use your old phone number.
VII.) Now to use secondary whatsapp account go to Google Play Store and download the official whatsapp from there.
This was it, now you have got two whatsapp accounts on a single android device

Enjoy Guys! and don’t forget to post your comments. � MyTricksTime.com

Fast Loading Email Subscription Widget for Blogger

Almost every blogger knows the importance of email subscription widget in your blog. Email subscription helps your readers to reach your blog when you provide new article or update your blog. Moreover, an easy email subscription box attracts your readers to subscribe your blog straightforwardly. So today, this post is about adding a fast loading email subscription widget to your blog and i – See more at: http://labstrikes.blogspot.in/2013/04/fast-loading-email-subscription-widget-blogger.html#sthash.K7KMnmBu.dpuf

Almost every blogger knows the importance of email subscription widget in your blog. Email subscription helps your readers to reach your blog when you provide new article or update your blog. Moreover, an easy email subscription box attracts your readers to subscribe your blog straightforwardly. So today, this post is about adding a fast loading email subscription widget to your blog and it might be helpful for those who doesn�t like default blogger Follow by Email. – See more at: http://labstrikes.blogspot.in/2013/04/fast-loading-email-subscription-widget-blogger.html#sthash.K7KMnmBu.dpuf
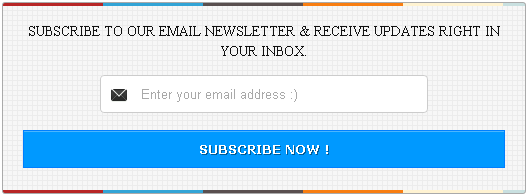
Fast Loading Email Subscription Widget

Almost every blogger knows the importance of email subscription widget in your blog. Email subscription helps your readers to reach your blog when you provide new article or update your blog. Moreover, an easy email subscription box attracts your readers to subscribe your blog straightforwardly. So today, this post is about adding a fast loading
email subscription widget to your blog and it might be helpful for those who doesn�t like default blogger Follow by Email.

 
Fast Loading Email Subscription Widget

Please note: This email subscription widget adjusts the dimension automatically according to the place where it belongs to. But it�s better to have at least 300px if you�re focusing on sidebar. To prove it, if you own a demo blog, try to add this widget in your blog�s sidebar as well as footer to see its automatic dimension.

And you can easily customize your blogger sidebar width if it�s below 300px via Customise.
 Access path: Blogger Dashboard � Template � Customise � Adjust widths � Right sidebar.

Add this Email Subscription Box to your Blog
It�s for guys, who�s experienced adding widgets to their blog earlier. Kindly follow simple steps provided below.

  •     Go to Blogger Dashboard � Layout
  •     Click on Add a Gadget
  •     Copy & paste the below code in it (leave the title column blank)

<style type='text/css'>#sidebar-subscribe-box {
background: url(http://1.bp.blogspot.com/-IyEBRR8yOQQ/UBhYdBd23PI/AAAAAAAAFTU/aeW3JdAlrCs/s1600/colored-strip.png) repeat scroll 0 0 transparent;
border: 1px solid #aaa;
border-radius: 3px;
padding: 3px 0;
}
.sidebar-subscribe-box-wrapper {
background: url(http://2.bp.blogspot.com/-tUlo5p5gP8o/UBhYciGNgwI/AAAAAAAAFTM/x22pIuNLVPw/s1600/bg-pattern.png) repeat scroll 0 0 #f7f7f7;
color: #111;
font-size: 14px;
line-height: 20px;
padding: 1px 20px 10px;
text-align: center;
text-transform: uppercase;
}
.sidebar-subscribe-box-form {
clear: both;
display: block;
margin: 10px 0;
}
form.sidebar-subscribe-box-form {
clear: both;
display: block;
margin: 10px 0 0;
width: auto;
}
.sidebar-subscribe-box-email-field {
-moz-border-radius: 4px;
-webkit-border-radius: 4px;
background: #fff url(http://1.bp.blogspot.com/-JMYdQsIa9WQ/UDZqxqqrTEI/AAAAAAAAFho/AocEv70U8K8/s1600/sprites.png) no-repeat 0 -27px;
border: 1px solid #ccc;
border-radius: 4px;
color: #444;
margin: 0 0 15px;
padding: 10px 40px;
width: 68%;
}
.sidebar-subscribe-box-email-button {
background: #09f;
border: 1px solid #007fff;
box-shadow: 0 1px 0 rgba(255,255,255,0.3) inset, 0 1px 0 transparent;
color: #fff;
cursor: pointer;
font-family: verdana;
font-weight: 700;
padding: 10px;
text-shadow: 1px 1px 0 rgba(0,0,0,.4);
text-transform: uppercase;
width: 100%;
}
.sidebar-subscribe-box-email-button:hover,.sidebar-subscribe-box-email-button:focus {
background: #1ca4ff;
}
.sidebar-subscribe-box-email-button:active {
-moz-box-shadow: 0 1px 4px rgba(0,0,0,0.5) inset;
-webkit-box-shadow: 0 1px 4px rgba(0,0,0,0.5) inset;
box-shadow: 0 1px 4px rgba(0,0,0,0.5) inset;
outline: 0;
}
iframe,object,embed,.yt-border iframe,.yt-border object,.yt-border embed,table {
width: 100%;
}
embed {
border-radius: 3px;
-moz-box-shadow: 0 2px 4px rgba(0,0,0,0.2);
-webkit-box-shadow: 0 2px 4px rgba(0,0,0,0.2);
background: #FFF;
border: 1px solid #ddd;
box-shadow: 0 2px 4px rgba(0,0,0,0.2);
margin: 0;
padding: 4px 4px 4px;
}
#footer-section {
background: #f5f5f5 url(http://1.bp.blogspot.com/-n5s9Bu0JCgg/UA_AfQ5qLkI/AAAAAAAAFMU/G9FOuh4SP7k/s0/bg-pattern.png) repeat top left;
border-top: 1px solid #aaa;
box-shadow: inset 0 4px 6px -3px #aaa;
font-family: cambria;
font-size: 14px;
height: 100px;
margin: 10px -30px 5px;
padding: 0 30px;
text-align: center;
width: 100%;
}</style>
<div id="sidebar-subscribe-box"><div class="sidebar-subscribe-box-wrapper"><p>Subscribe to our email newsletter & receive updates right in your inbox.
</p><div class="sidebar-subscribe-box-form"><form action="http://feedburner.google.com/fb/a/mailverify?uri=MyTricksTime"
class="sidebar-subscribe-box-form" method="post" onsubmit="window.open('http://feedburner.google.com/fb/a/mailverify?uri=MyTricksTime',
'popupwindow', 'scrollbars=yes,width=550,height=520');return true" target="popupwindow">
<input name="uri" type="hidden" value="MyTricksTime" /><input name="loc" type="hidden" value="en_US" />
<input class="sidebar-subscribe-box-email-field" name="email" autocomplete="off" placeholder="Enter your email address :)"/>
<input class="sidebar-subscribe-box-email-button" title="" type="submit" value="Subscribe Now!" /></form></div></div></div>

Don�t forget to replace MyTricksTime [line no: 86, 87 & 89] with your FeedBurner username. Hope you added this attractive subscription widget to your blog. In case you need any more customization, feel free to mention via comment provided below

Almost every blogger knows the importance of email subscription widget in your blog. Email subscription helps your readers to reach your blog when you provide new article or update your blog. Moreover, an easy email subscription box attracts your readers to subscribe your blog straightforwardly. So today, this post is about adding a fast loading email subscription widget to your blog and it might be helpful for those who doesn�t like default blogger Follow by Email. – See more at: http://labstrikes.blogspot.in/2013/04/fast-loading-email-subscription-widget-blogger.html#sthash.K7KMnmBu.dpuf

Enjoy Guys! and don’t forget to post your comments. � MyTricksTime.com
How to get 50rs free recharge via Times Of India app

How to get 50rs free recharge via Times Of India app

Dear readers
After a week I’m back again with 50Rs Free Recharge Trick.
Yes you heard right. You can get free recharge of Rs. 50.
You just have to do one thing followed as below

How to get 50rs free recharge via Times Of India app

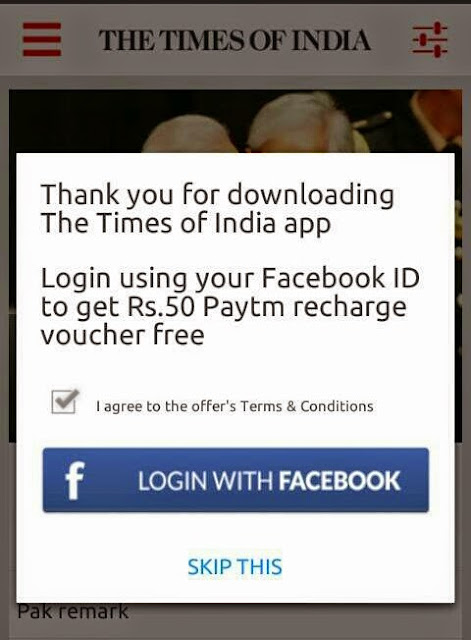
1. Install latest times of India app from play store, login with fb id for get 50cashback on 50 rs recharge paytm coupon

2. Fb id must be 90 day old, 10 friends minimum

3. For get unlimited coupons change android id, clear app of data, login with another fb id again and again

haVe a tRickY DaY

I hope you like this article on�How to get 50rs free recharge via Times Of India app.