How to Create a Stickybar with “Close Button”?
Create a Sticky Bar With Close Button in Blogger
The steps are really simply as we already discussed in our previous tutorials. I will be not be discussing on how to change the font colors and background color of the bar because you can find all such details on my previous tutorials. Kindly have a look at them later in order to change the CSS style properties:
- Create a StickyBar and add it to Top
- Add a StickyBar at Bottom of your page
Follow these easy steps:
-
Go To Blogger > Design > Edit HTML
-
Backup your template
-
Search for this
]]></b:skin>
4. Just above it paste the following CSS code,
#mbt_bar{
background:#333 url(‘http://3.bp.blogspot.com/-zQeUG7PU9Uw/TmkiptyZ1eI/AAAAAAAAE98/At4tRBC9HQc/s400/stickybar.png’) repeat-x;
width:100%;
margin:0 auto;
text-align:center;
padding:0px 0;
border-bottom: 1px solid #888888;
-moz-box-shadow: #666666 0px 1px 3px;
-webkit-box-shadow: #666666 0px 1px 3px;
box-shadow: #666666 0px 1px 3px;
z-index: 999;
height: 28px; position:fixed;
line-height: 1.85em;
vertical-align: baseline;
letter-spacing: 1px;
color:#fff;
font-size:13px;
font-weight:bold;
font-family: arial,”Helvetica”,sans-serif;
}
#mbt_bar a{
text-decoration:underline;
color:#E2E504;
}
#mbt_bar a:hover{
text-decoration:none;
}
#mbt_bar p {margin:0; list-style:none;}
#mbt_bar img {vertical-align: middle;
margin-right: 6px;}
5. Next search for </head> and paste the following Javascript code just above it
<script type=’text/javascript’>
//<![CDATA[
var mbt_arr = new Array();
var mbt_clear = new Array();
function mbtFloat(mbt) {
mbt_arr[mbt_arr.length] = this;
var mbtpointer = eval(mbt_arr.length-1);
this.pagetop = 0;
this.cmode = (document.compatMode && document.compatMode!=”BackCompat”) ? document.documentElement : document.body;
this.mbtsrc = document.all? document.all[mbt] : document.getElementById(mbt);
this.mbtsrc.height = this.mbtsrc.offsetHeight;
this.mbtheight = this.cmode.clientHeight;
this.mbtoffset = mbtGetOffsetY(mbt_arr[mbtpointer]);
var mbtbar = ‘mbt_clear[‘+mbtpointer+’] = setInterval(“mbtFloatInit(mbt_arr[‘+mbtpointer+’])”,1);’;
mbtbar = mbtbar;
eval(mbtbar);
}
function mbtGetOffsetY(mbt) {
var mtaTotOffset = parseInt(mbt.mbtsrc.offsetTop);
var parentOffset = mbt.mbtsrc.offsetParent;
while ( parentOffset != null ) {
mbtTotOffset += parentOffset.offsetTop;
parentOffset = parentOffset.offsetParent;
}
return mbtTotOffset;
}
function mbtFloatInit(mbt) {
mbt.pagetop = mbt.cmode.scrollTop;
mbt.mbtsrc.style.top = mbt.pagetop – mbt.mbtoffset + “px”;
}
function closeTopAds() {
document.getElementById(“mbt_bar”).style.visibility = “hidden”;
}
//]]>
</script>
6. Finally search for <body> and just below it paste the following HTML code
<div id=’mbt_bar’> WRITE YOUR TEXT HERE
<span style=’padding:0px; float:right’>
<img align=’absmiddle’ border=’0′ onClick=’closeTopAds();return false;’ src=’http://1.bp.blogspot.com/-MSEzL6EtjrM/Tt-hrSkKVnI/AAAAAAAAFiQ/AGUGFpnSUHk/s400/cancel.png‘ style=’cursor:hand;cursor:pointer;’/></span></div>
<br/><br/>
To write an announcement, update news or notice to readers, just replace the yellow highlighted text with your message. If you wish to change the Close button image then simply replace the bolded black link with your button’s link.
7. Save your template
8. You are all done!
Visit your blog to see it fixed to the top just beautifully with a close button waiting to be clicked!
How it works?
The close button when clicked triggers the function closeTopAds(); which then searches for function definition. The function is defined such that it sets visibility of bar to hidden. That’s how the bar hides once the button is clicked and reappears only upon page refresh. Indeed a pretty neat way to make a user friendly bar.
Need help?
You are most welcomed to ask for any help if needed. If you wish to share the tutorial and scripts above with your readers then kindly attach attribution to MBT blog. Peace and blessings pal! 🙂
How To Host Files on Google Code For Free?
I must remind you that you can upload anything you want under the limit of 200MB per file. May it be Java, php, MySQL or even pyThon.
Google Project Hosting
This free service is called Google project hosting. We will need to create an account/project first with gmail ID. Lets begin
- Log into this link with your Gmail ID
- Then give your Project a name without spaces and fill up remaining blanks as shown below,
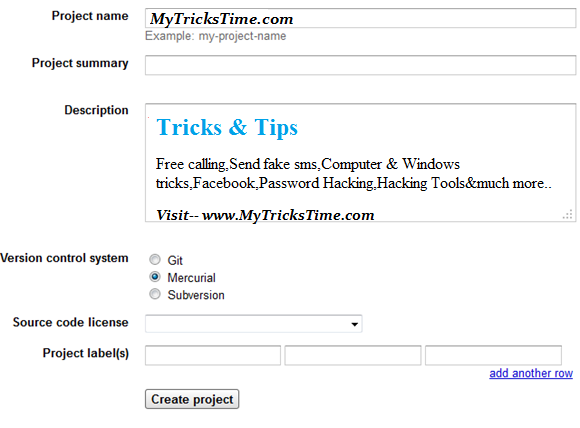
3. Fill up the areas simply with your blog title and choose MIT as the license and choose Mercurial version.
4. Hit “Create Project“
5. On the next window click the New Download link under the Downloads Tab. See the screenshot below:

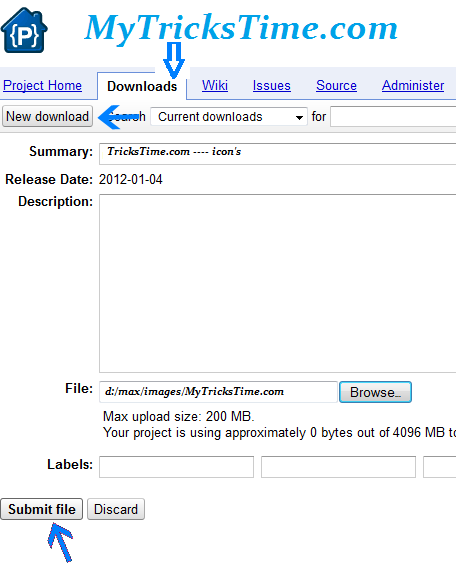
6. Next to summary field give your file a name and hit the browse button to locate your file. Click submit file and bingo you are done!
7. Click your uploaded file and you will be taken to a new page.
8. Clicking it again will popup a download window but we don’t need to download it. Instead rightclick the file and choose “Copy link location” This link is what you would need when linking to the file through your blogger Edit HTML section.

Advantage
I will ask you in future to save your javascripts here in order to make the tutorial length precise and make things look more simple. It wont slow down your widgets load time because the script is located on Google servers with 100% uptime. You can save javascripts on Blogger too but its better to keep your template clean rather pasting large chunks of code inside it. Have fun pals! 🙂
How to Add NetworkedBlogs Widget in Blogger
Create and Add NetworkedBlogs Widget in Blogger. Traffic generation is the main concerns for every publisher in the current social media and social networking ear. NetworkedBlogs is an extension of the NetworkedBlogs Facebook Application to make user-generated blog directory accessible outside Facebook and provide more exposure to your blogs.


I have took some screen shots and prepared step by step tutorial and by using it, i will show you how you can add NetworkedBlogs Widget in your Blogger blog or if you are familiar with wordpress then you can add it to the wordpress also. You will definitely generate some traffic after adding this widget in your blog because there are 500,000 Blogs network is waiting for you.
Steps to Add NetworkedBlogs Widget in Blogger
Step 1. Open this link – http://www.networkedblogs.com/ and click on Add your Blog button.
Step 2. It will now ask your for your Facebook credentials, enter your facebook user name and password and go ahead.
Step 3. Now Open this link – http://apps.facebook.com/blognetworks/editblog.php and Add your blog or site details in it (see below screen shot) and click Next button.

Step 4. It will ask for Are you the author of ‘BLOG NAME’?, just click on YES button and move ahead.
Step 5. Now you need to choose the verification method to verify ownership of ‘BLOG NAME’?
– Ask friends to verify you (easy, but takes a little time)
– Use widget to verify ownership (instant, but some technical skills required)
Click on Use widget to verify ownership (instant, but some technical skills required).
Step 6. Now Click on Install Widget >> button, and give the option to Copy the Following Code for Widget. Copy that code.
Step 7.Insert it into your blog template on the right-side column (not in a new post)
– To add the code in blogger, first Log-in to your blogger account and navigate to Layout >> Page Elements.
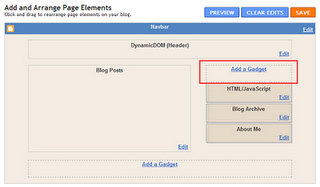
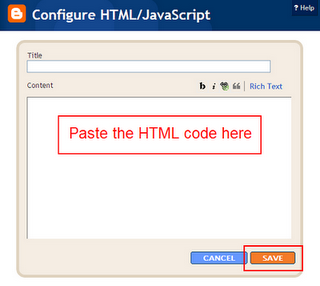
– Click “Add a Gadget”
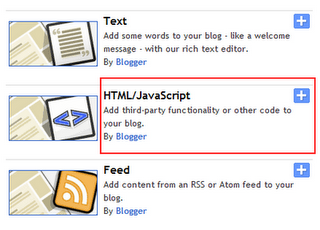
– Paste the HTML code you copied from NetworkedBlogs into the text area and click save. You’re done.
Step 8. Click on Verify Widget button on Networkedblogs page and done!
– So now install your widget in your blog and start getting some extra traffic using Networkedblogs.
Labels: Blogger , Blogger Tips and Tricks , Blogger Widgets , Widgets
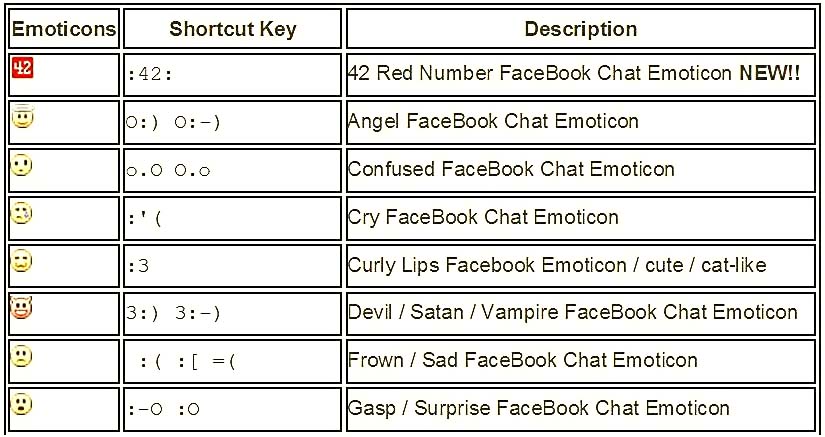
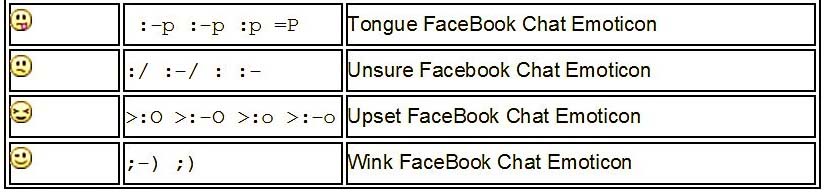
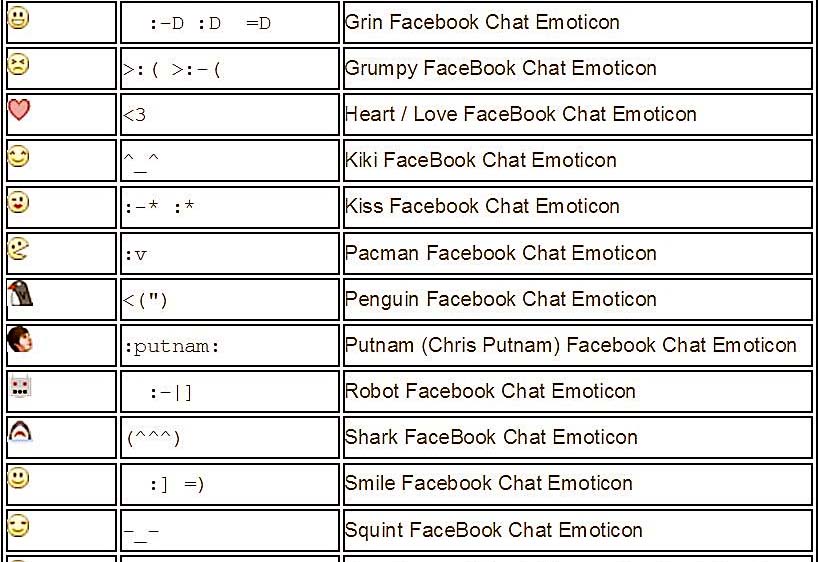
Hidden facebook chat Emotions and Smileys
|
For all the facebook addicts
|