Sound Recorder in Android Development

This example shows how to record sound and save it to SD card it.
Algorithm:


1.) Create a new project by 

File-> 
New -> 
Android Project name it SoundRecorder.


2.) Write following into main.xml:

<?xml version=“1.0” encoding=“utf-8”?>
<LinearLayout xmlns:android=“http://schemas.android.com/apk/res/android”
    android:layout_width=“fill_parent”
    android:layout_height=“fill_parent”
    android:orientation=“horizontal” >     <Button
        android:id=“@+id/start”
        android:layout_width=“wrap_content”
        android:layout_height=“wrap_content”
        android:text=“Start Recording”
        android:onClick=“startRecording” />
    <Button
        android:id=“@+id/stop”
        android:layout_width=“wrap_content”
        android:layout_height=“wrap_content”
        android:text=“Stop Recording”
        android:enabled=“false”
         android:onClick=“stopRecording”
        />
</LinearLayout>


3.) Write following into manifest file:

<manifest xmlns:android=“http://schemas.android.com/apk/res/android”
    package=“com.example.soundrecorder”
    android:versionCode=“1”
    android:versionName=“1.0” >     <usessdk
        android:minSdkVersion=“8”
        android:targetSdkVersion=“15” />
    <usespermission android:name=“android.permission.WRITE_EXTERNAL_STORAGE”/>
    <usespermission android:name=“android.permission.RECORD_AUDIO” />
 
    <application
        android:icon=“@drawable/ic_launcher”
        android:label=“@string/app_name”
        android:theme=“@style/AppTheme” >
        <activity
            android:name=“.SoundRecorder”
            android:label=“@string/title_activity_sound_recorder” >
            <intentfilter>
                <action android:name=“android.intent.action.MAIN” />
                <category android:name=“android.intent.category.LAUNCHER” />
            </intentfilter>
        </activity>
    </application>
</manifest>

4.) Run for output.
Steps:


1.) Create a project named SoundRecorder and set the information as stated in the image.
Build Target: Android 4.0
Application Name: SoundRecorder
Package Name: com. example. SoundRecorder
Activity Name: SoundRecorder
Min SDK Version: 8


2.) Open SoundRecorder.java file and write following code there:

package com.example.soundrecorder; import java.io.File;
import java.io.IOException;
import android.app.Activity;
import android.content.ContentResolver;
import android.content.ContentValues;
import android.content.Intent;
import android.media.MediaRecorder;
import android.net.Uri;
import android.os.Bundle;
import android.os.Environment;
import android.provider.MediaStore;
import android.util.Log;
import android.view.View;
import android.widget.Toast;
public class SoundRecorder extends Activity {
        MediaRecorder recorder;
        File audiofile = null;
        private static final String TAG =“SoundRecordingActivity”;
        private View startButton;
        private View stopButton;
        @Override
        public void onCreate(Bundle savedInstanceState) {
                super.onCreate(savedInstanceState);
                setContentView(R.layout.main);
                startButton = findViewById(R.id.start);
                stopButton = findViewById(R.id.stop);
        }
        public void startRecording(View view) throwsIOException {
                startButton.setEnabled(false);
                stopButton.setEnabled(true);
                File sampleDir =Environment.getExternalStorageDirectory();
                try {
                        audiofile =File.createTempFile(“sound”“.3gp”, sampleDir);
                } catch (IOException e) {
                        Log.e(TAG, “sdcard access error”);
                        return;
                }
                recorder = new MediaRecorder();
                recorder.setAudioSource(MediaRecorder.AudioSource.MIC);
                recorder.setOutputFormat(MediaRecorder.OutputFormat.THREE_GPP);
                recorder.setAudioEncoder(MediaRecorder.AudioEncoder.AMR_NB);
                recorder.setOutputFile(audiofile.getAbsolutePath());
                recorder.prepare();
                recorder.start();
        }
        public void stopRecording(View view) {
                startButton.setEnabled(true);
                stopButton.setEnabled(false);
                recorder.stop();
                recorder.release();
                addRecordingToMediaLibrary();
        }
        protected void addRecordingToMediaLibrary() {
                ContentValues values = new ContentValues(4);
                long current = System.currentTimeMillis();
                values.put(MediaStore.Audio.Media.TITLE,“audio” + audiofile.getName());
                values.put(MediaStore.Audio.Media.DATE_ADDED(int) (current/ 1000));
                values.put(MediaStore.Audio.Media.MIME_TYPE,“audio/3gpp”);
                values.put(MediaStore.Audio.Media.DATA, audiofile.getAbsolutePath());
                ContentResolver contentResolver =getContentResolver();
                Uri base =MediaStore.Audio.Media.EXTERNAL_CONTENT_URI;
                Uri newUri = contentResolver.insert(base, values);
                sendBroadcast(newIntent(Intent.ACTION_MEDIA_SCANNER_SCAN_FILE, newUri));
                Toast.makeText(this“Added File “ + newUri, Toast.LENGTH_LONG).show();
        }
}

3.) Compile and build the project.
Output


Enjoy Guys! and don’t forget to post your comments. � MyTricksTime.com

How to Use your extra Gmail space as a hard drive

Hi! Guys Did you know that If you�re having extra space on your Gmail account and you don�t have extra space on your hard disk, you can use that free Gmail space as a hard drive. Using a cool freeware program called Gdrive will create an extra drive inside My Computer, and every time you use this drive i.e. use files from it, is actually downloading and uploading to your Gmail account. Let’s start it………
1. First download Gmail Drive
2. Extract the files from the downloaded file and click Setup.


3. After the installation go to My Computer and an extra drive called Gmail Drive will appear
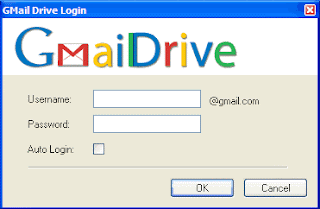
4. Double click it and a window with the user name and password will appear


Enjoy Guys! and don’t forget to post your comments. � MyTricksTime.com

HOW TO INSTAL ECLIPSSE IN EASY MANER FOR ANDROID

download eclipse from internet and it will be contain one floder . in that eclipse icon is there click that eclicplse will be run.
note:you need to be instal java


it will ask folder to set output u need set location
after that eclipse will be run


>windows

>propeties
>android
>browse sdk files .
or 
>download fro net .


now go to 
>AVDMANGER
>CREATE NEW AVD
>give name and size 6
>emultor will run.

Read also : NAVDROYD 1.4.0 Offline GPS Navigation Software for Android

Enjoy Guys! and don’t forget to post your comments. � MyTricksTime.com

FREE GPRS ON AIRTEL

Airtel GPRS Settings ( India )

Common settings for all phones.


Data Bearer: GPRS
Access Point Name: airtelfun.com
User & Password: no need ( leave blank)
Homepage: http://live.airtel.in
Connection Security: Off
Proxy server. address ( IP address ): 100.1.200.99
Proxy port number: 8080

Dialup no: *99# , *99***1#

Enjoy Guys! and don’t forget to post your comments. � MyTricksTime.com

Optimize your post title to H1 tags better SEO Blogger Hack

This is an important SEO Blogger trick to increase SEO. Heading tags have a great importance in Search engine results, Heading tags helps Search engines to recognize what is important in your blog.Heading are form H1 to H6 .H1 tags have higher priority.So we are going to
hack blogger template by changing H3 tags to H1 tags. By default blogger post title is in H3 tag,here is a trick to change it to H1 tag for more SEO.

  • Go to Blogger Account
  • Select Template -> Edit HTML [click Proceed
  • Find the code like below [Find easily using Crtl+F]
  • Or simply find <H3


<h3 class=’post-title entry-title’>
      <b:if cond=’data:post.link’>
        <a expr:href=’data:post.link’><data:post.title/></a>
      <b:else/>
        <b:if cond=’data:post.url’>
          <b:if cond=’data:blog.url != data:post.url’>
            <a expr:href=’data:post.url’><data:post.title/></a>
          <b:else/>
            <data:post.title/>
          </b:if>
        <b:else/>
          <data:post.title/>
        </b:if>
      </b:if>
  </h3>
  • and Change it with <H1 [Change all H3 to H1]
  • Change all H3 tags with H1 tag
  • Done ..Wait for few weeks you can find the change in Google SERP.
  • Your Blog pages will show in Google Search Page.

I think you enjoyed this ..if so please share… 
Enjoy Guys! and don’t forget to post your comments. � MyTricksTime.com