How To Show Blogger Gadget/ Widget In Specific Pages

In this tutorial im going to explain How To Show 

Blogger Gadget/ Widget In Specific Pages. When we designing the 

blogger templates. sometime we want to change out gadget/

widget.Sometime need to show gadget/ widget homepage 

only.some time inside post only. At that time we don’t have

any option for customize like that. We need to understand 

about code.But most of are not good at coding.So in this 

tutorial will helps to arrange your gadget/ widget as you want.

follow these steps.


1. Log in to blogger account and Go to Design >> Edit HTML
    (make sure backup your template first)

2. Put checked mark in Expand Widget Templates

3. Now you have to press  Ctrl+F  key and type the unique  title that you gave to gadget or widget.
Lets say you gave title as Subscribe, the code will show like this.

<b:widget id='HTML1' locked='false' title='Subscribe' type='HTML'>
<b:includable id='main'>
<!-- only display title if it's non-empty -->
<b:if cond='data:title != ""'>
<h2 class='title'><data:title/></h2>
</b:if>
<div class='widget-content'>
<data:content/>
</div>
<b:include name='quickedit'/>
</b:includable>


So,code start with <b:includable id=’main’>  and end with </b:includable>
you have to find this both code.
lets see how to show this gadget in specific pages.

How to show blogger gadget in home page and other pages.(Except post pages.)

So,show gadget in home page and other pages.You have to add that red code like below.

<b:includable id='main'>
<b:if cond='data:blog.pageType == &quot;index&quot;'>
<!-- only display title if it's non-empty -->
<b:if cond='data:title != ""'>
<h2 class='title'><data:title/></h2>
</b:if>
<div class='widget-content'>
<data:content/>
</div>
<b:include name='quickedit'/>
</b:if>
</b:includable>


How to show blogger gadget in Post pages only.

<b:includable id='main'>
<b:if cond='data:blog.pageType == &quot;item&quot;'>
<!-- only display title if it's non-empty -->
<b:if cond='data:title != ""'>
<h2 class='title'><data:title/></h2>
</b:if>
<div class='widget-content'>
<data:content/>
</div>
<b:include name='quickedit'/>
</b:if>
</b:includable>


How to show blogger gadget in only specific page

<b:includable id='main'>
<b:if cond='data:blog.url == &quot;URL of the page&quot;'>
<!-- only display title if it's non-empty -->
<b:if cond='data:title != ""'>
<h2 class='title'><data:title/></h2>
</b:if>
<div class='widget-content'>
<data:content/>
</div>
<b:include name='quickedit'/>
</b:if>
</b:includable>


you can replace URL of the page with URL which you want to show the gadget only that page.

7. Now save your template
 you are done.
Enjoy Guys! and don’t forget to post your comments. � MyTricksTime.com

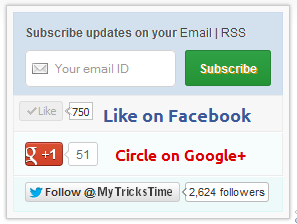
Customized and Stylized Subscription Widget

Many of this blog readers asked me which plugin/code I�m using in sidebar for Stylized Subscription Widget. So today I decide to share this with you! because It�s almost more than 2 months. I�ve not shared any Stylized Subscription for Widget Blogger and WordPress Widget.
Coming back to topic this widget simple uses HTML and CSS. 
It�ll keep your sidebar clean! ;) It contains FeedBurner Form, Twitter Follow Button, Facebook and Google buttons.

Adding Customized And Stylized Subscription Widget

You just need to place a code to your blog widget Follow following steps to add Customized and Stylized Subscription Widget to WordPress and Blogger both!
Adding Subscription Widget To Blogger
  1. Go to Dashboard > Design > Page Elements.
  2. Click Add A Gadget. In window, select HTML/Javascript .
  3. Copy the code below and paste it inside the box.
  4. Save the gadget. Drag the gadget and reposition it under Blog Posts gadget.
  5. Click Save button.
Adding Subscription Widget To WordPress
  1. Go to Dashboard > Appearance > Widgets > Available Widgets.
  2. Drag Text widget into a sidebar.
  3. Paste in the code.
  4. Save.

Code for Stylized Subscription Widget

<style>

#ABT-mashable-bar {
background-color: #f9f9f9; box-shadow: 0 0 3px #b0b0b0;
border:1px solid #ccc;
padding:6px;
width: 270px;

}

#subscribe-box .fb-like-box { border: 1px solid #EBEBEB; padding: 5px; background:#f7f7f7;}
#subscribe-box .gplusone { background: #f7fcfc; border: 1px solid #EBEBEB; border-top: 1px solid #fff; color: #000; font-size: 10px; line-height: 1px; padding: 9px 11px;}
#subscribe-box .twitter-follow { background: #eef9f9; border: 1px solid #dff6f6; border-top: 1px solid #fff; padding:5px 11px;}

#subscribe-box .email-box {
border-right: 1px solid #C7DBE2;
border-left: 1px solid #C7DBE2; background: #d3e0ed;

border: 1px solid #ccdaed; padding:11px; margin-bottom: -4px;}

#subscribe-box .email-box h4{color: #555;font-family: Arial;font-size: 12px; margin: 0 0 10px;}

#subscribe-box .email-box .txt,#subscribe-box .email-box .txt:focus{

border: 1px solid #d2d2d2;

color: #a19999; font-size: 12px;

border-radius: 5px;
-moz-border-radius: 5px;
-webkit-border-radius: 5px;

height:21px;

padding: 6px 28px 8px; width: 93px;

}

#subscribe-box .email-box .btn,#subscribe-box .email-box .btn:focus{ float:right;

margin-top: 0px;

background: #30a146; background: linear-gradient(top, #30a146 0%, #249334 100%); background: -moz-linear-gradient(top, #30a146 0%, #249334 100%); background: -webkit-gradient(linear, left top, left bottom, color-stop(0%, #30a146), color-stop(100%, #249334)); background: -webkit-linear-gradient(top, #30a146 0%, #249334 100%); text-shadow: 1px 1px 0 rgba(0, 0, 0, .4); font-weight:bold; font-family: "Droid Sans","Lucida Grande",Tahoma,sans-serif;

font-family: "Arial","Helvetica",sans-serif;
border-radius:3px;
-moz-border-radius:3px;
-webkit-border-radius:3px;
border:1px solid #248334 ;
color:white;
text-shadow:#d08d00 1px 1px 0;
padding:8.5px 10px;
margin-left:3px;
font-weight:bold;
font-size:12.2px;
cursor:pointer;
border-image: initial;}

#subscribe-box .email-box .btn:hover{

opacity: .8;
border-radius:3px;
-moz-border-radius:3px;
-webkit-border-radius:3px;
border:1px solid #248334 ;
color:#FFFFFF;
text-shadow:#d08d00 1px 1px 0}

</style>

<div id="ABT-mashable-bar">
<div id="subscribe-box">
<div class="email-box">
<h4>Subscribe updates on your <a href="http://feedburner.google.com/fb/a/mailverify?uri=
MyTricksTime" target="_blank">Email</a> | <a href="http://feeds.feedburner.com/MyTricksTime" target="_blank">RSS</a></h4>
<form action="http://feedburner.google.com/fb/a/mailverify" method="post" onsubmit="window.open('http://feedburner.google.com/fb/a/mailverify?uri=
MyTricksTime', 'popupwindow', 'scrollbars=yes,width=700px,height=700px');return true" target="popupwindow">
<input class="txt" style="background: #FFF url('http://i.imgur.com/2BCD0.png') no-repeat 6px !important;" onfocus="if (this.value == 'Your email ID ') {this.value = '';}" onblur="if (this.value == '') {this.value = 'Your email ID ';}" type="text" name="email" value="Your email ID " />

<input type="hidden" name="uri" value="
MyTricksTime" />

<input type="hidden" name="loc" value="en_US" />

<input class="btn" style="margin-left: 4px;" type="submit" value="Subscribe" />
<div style="clear: both;"></div>
</form></div>

<div class="fb-like-box"><iframe style="border: none; overflow: hidden; width: 80px; height: 21px;" src="//www.facebook.com/plugins/like.php?href=http%3A%2F%2Fwww.facebook.com%2
MyTricksTime&send=false&layout=button_count&width=80&show_faces=false&action=like&colorscheme=light&font&height=21" frameborder="0" scrolling="no" width="320" height="240"></iframe><a style="color: #3b5998; font-family: ubuntu; font-size: 18px; font-weight: bold; line-height: 20px;" href="http://www.facebook.com/MyTricksTime" rel="nofollow" target="_blank"> Like on Facebook </a>
<div class="clear"></div>
</div>

<div class="gplusone">
<div style="float: left; width: 90px;">
<div id="___plusone_0" style="height: 24px; width: 106px; display: inline-block; text-indent: 0pt; margin: 0pt; padding: 0pt; background: none repeat scroll 0% 0% transparent; border-style: none; float: none; line-height: normal; font-size: 1px; vertical-align: baseline;"><iframe id="I1_1322986463651" style="position: static; left: 0pt; top: 0pt; width: 106px; margin: 0px; border-style: none; height: 24px; visibility: visible;" title="+1" name="I1_1322986463651" src="https://plusone.google.com/_/+1/fastbutton?url=http%3A%2F%2Fwww.MyTricksTime.com%2F&size=standard&count=true&annotation=&hl=en-US&jsh=m%3B%2F_%2Fapps-static%2F_%2Fjs%2Fwidget%2F__features__%2Frt%3Dj%2Fver%3D-8uDua_W7bo.en_GB.%2Fsv%3D1%2Fam%3D%218NuGo4ypxRCIwtBaLA%2Fd%3D1%2F#id=I1_1322986463651&parent=http%3A%2F%2Fwww.
MyTricksTime.com&rpctoken=511986996&_methods=onPlusOne%2C_ready%2C_close%2C_open%2C_resizeMe" frameborder="0" marginwidth="0" marginheight="0" scrolling="no" width="100%" height="240"></iframe></div>
</div>
<a style="color: #dd0000; font-family: ubuntu; font-size: 16px; font-weight: bold; line-height: 24px;" href="https://plus.google.com/
102588571388484646448" rel="author" target="_blank">Circle on Google+</a>
<div class="clear"></div>
<!-- Place this render call where appropriate -->

<script type="text/javascript">// <![CDATA[
(function() {

var po = document.createElement('script'); po.type = 'text/javascript'; po.async = true;

po.src = 'https://apis.google.com/js/plusone.js';

var s = document.getElementsByTagName('script')[0]; s.parentNode.insertBefore(po, s);

})();
// ]]></script></div>
<div class="twitter-follow">
<iframe style="width: 300px; height: 20px;" title="" src="http://platform.twitter.com/widgets/follow_button.html#_=1322986464549&button=blue&id=twitter-widget-22&lang=en&screen_name=
MyTricksTime" frameborder="0" scrolling="no" width="320" height="240"></iframe>

<script type="text/javascript" src="//platform.twitter.com/widgets.js"></script></div>
<div id="mashable" style="height: 12px; background: #f9f9f9; border: 0px solid #CCC; border-top: 1px solid white; text-align: right; border-image: initial; font-size: 10px;"><span class="author-credit" style="font-family: Arial, Helvetica, sans-serif;"><a href="http://www.MyTricksTime.com" target="_blank">Widget �</a></span></div>
</div>
</div>
If you face any problem with code. Please Let Us Know Contact US

Customization!

Due to some issue. I can�t highlight changes you�ve to make in above code. Hope you won�t mind ;) . Now look for bold letter above and replace it with your Username, IDs like;
  • Replace MyTricksTime with your feedburner Feed URL.
  • Replace MyTricksTime with your facebook Page URL.
  • Replace MyTricksTime with your twitter url.
  • Replace www.MyTricksTime.com with your blog URL.
  • And at least replace https://plus.google.com/102588571388484646448 with your Google+ Profile Link.

Credits!

This widget is first shared on MyTricksTime. Readers are requested to link back if you�re going to share this widget on their blog!
That�s all. I hope you�ll like this widget. Let me know if I missed anything or you face any issue!
Happy Blogging :D
Enjoy Guys! and don’t forget to post your comments. � MyTricksTime.com

Free 5 Way To Send Online Large Files via Email


Would you like to send out big files via an e-mail? Mailing big data files or archives  via email is actually hard challenge that lots of people suffer from. The email service usually permits us to send out files as attachments however the maximum size allowed is usually fairly small.like we all  know most famous email service aroud us such like gmail and yahoo.these both  are allows us to send files 25 mb file each time.its means we can  not send more than 25mb file by gmail or yahoo. but Imagin if you need to send large files as large as 400MB via email?
currently My goal is to explain to you how you can send lage file via email. here i am i am listed  Best 5 service which allowe you send more than 25 mb
via email.

1.Dropsend


dropsend proposes to send files at least 2 gb via email without cost They permit basically 5 file transfers each month, but its also provied you 250MB of forever online storage space.if you want to use this service than Registration is needed, they will ask you your full name, email and chose a username and password for Registration.you find an estimate for any remaining amount of time in 
min�s.

2.Pando Email


One more free service for send free large file via email pando allowe you to Send and receive big files upto 1GB for Absolutely free.You merely upload your own file via Pando, afterward Pando sends to friends and family a url to download the file through email,you know you also use that link for share on Twitter,facebook You are able to send from inside Hotmail, AOL Mail,Yahoo Mail, Gmail or Microsoft Outlook .The particular file remains alive on Pando�s servers for 1 week.so you can use this link until 7 days.


3.Zeta Uploader

This is a free program which makes it simple for anyone to send a file by around 500MB.you can send  files to numerous email addresses as same time ,if you want to protect your file via password than also you can use  password protect the files if required. Plus, you can even set the program to inform you once the files have been downloaded by the individuals.

4.TransferBigFiles


Allows you send large files of size 1 GB each by email. Any data files can easily be password covered and also you can insert a individual message to the email you send to the recipients. Whenever your recipients download that file, you will get e-mail notices .You can send the uploaded file to several email recipients using one single click.


5.File Dropper


This similar site like Pando Email but This site allows you to send files upto  5 GB in space. You are able to transfer videos,data file photos,movies, and quite possibly any kind of file with this service. The only real problem using File Dropper is that you are not able to add numerous files at one time. As soon as the upload is finish,you will get one url link copy that you can e-mail that link to your recipients so your  recipients  can download that file. Generally there are no sign ups or registration  involved with File dropper. But, registrations provide you  advantages because you will be able to keep track of your files, protect your file via password and label data files as personal and also you can remove files afterwards.

Guest Post By :
Mr. Ankit Varma
You want to download all Games like : HD Games, Latest Games   CLICK HERE

5 Cool Numbered Page Navigation Widgets For Blogger

Page Navigation Widgets For Blogger

It�s been a long time, I�ve posted here. I was very very busy (since I�m a student, I have weekend tests, home-works etc..!), hope you understand! Well, in this post I�m gonna show you 7 different Numbered Page Navigations Widget. I�ve posted some Numbered Page Navigations before, please check them too.

Step 1 –

Go to Awesome Numbered Page Navigaiton Widget and follow all the steps except adding the CSS code. After adding the JavaScript and HTML codes then add any of the below CSS and click Save Template

Style 1

Page Navigation Widgets For Blogger

Add the below code above </b:skin>

.pagenavi span, .pagenavi a {
display
: inline-block;
padding
: 0px 9px;
margin
-right: 4px;
border
-radius: 3px;
border
: solid 1px #c0c0c0;
background
: #e9e9e9;
box
-shadow: inset 0px 1px 0px rgba(255,255,255, .8), 0px 1px 3px rgba(0,0,0, .1);
font
-size: .875em;
font
-weight: bold;
text
-decoration: none;
color
: #717171;
text
-shadow: 0px 1px 0px rgba(255,255,255, 1);
}
.pagenavi span:hover,.pagenavi a:hover {
background
: #fefefe;
background
: -webkit-gradient(linear, 0% 0%, 0% 100%, from(#FEFEFE), to(#f0f0f0));
background
: -moz-linear-gradient(0% 0% 270deg,#FEFEFE, #f0f0f0);
}
.pagenavi a.current {
border
: none;
background
: #616161;
box
-shadow: inset 0px 0px 8px rgba(0,0,0, .5), 0px 1px 0px rgba(255,255,255, .8);
color
: #f0f0f0;
text
-shadow: 0px 0px 3px rgba(0,0,0, .5);
}


Style 2

Numbered Page Navigation Widgets For Blogger

Add the below code above </b:skin>
.pagenavi span, .pagenavi a {
display
: inline-block;
padding
: 0px 9px;
margin
-right: 4px;
border
-radius: 3px;
border
: solid 1px #32373b;
background
: #3e4347;
box
-shadow: inset 0px 1px 1px rgba(255,255,255, .1), 0px 1px 3px rgba(0,0,0, .1);
font
-size: .875em;
font
-weight: bold;
text
-decoration: none;
color
: #feffff;
text
-shadow: 0px 1px 0px rgba(0,0,0, .5);
}
.pagenavi span:hover,.pagenavi a:hover {
background
: #3d4f5d;
background
: -webkit-gradient(linear, 0% 0%, 0% 100%, from(#547085), to(#3d4f5d));
background
: -moz-linear-gradient(0% 0% 270deg,#547085, #3d4f5d);
}
.pagenavi a.current {
border
: none;
background
: #616161;
box
-shadow: inset 0px 0px 8px rgba(0,0,0, .5), 0px 1px 0px rgba(255,255,255, .8);
color
: #f0f0f0;
text
-shadow: 0px 0px 3px rgba(0,0,0, .5);
}

Style 3

Numbered Page Navigation Widgets For Blogger

Add the below code above </b:skin>
.pagenavi {
width
:300px;
margin
: 50px auto;
}
.pagenavi span, .pagenavi a {
background
: #f7f7f7;
background
: -webkit-linear-gradient(top, #f7f7f7 0%,#f5f5f5 52%,#ebebeb 100%);
background
: -moz-linear-gradient(top, #f7f7f7 0%,#f5f5f5 52%,#ebebeb 100%);
background
: -o-linear-gradient(top, #f7f7f7 0%,#f5f5f5 52%,#ebebeb 100%);
background
: -ms-linear-gradient(top, #f7f7f7 0%,#f5f5f5 52%,#ebebeb 100%);
background
: linear-gradient(top, #f7f7f7 0%,#f5f5f5 52%,#ebebeb 100%);
padding
: 5px 10px;
text
-decoration: none;
color
: #7e7e7e;
border
: 1px solid #c6c6c6;
-webkit-box-shadow: inset 0 4px 3px rgba(255,255,255,0.6), 0 1px 3px rgba(0,0,0,.2);
-moz-box-shadow: inset 0 4px 3px rgba(255,255,255,0.6), 0 1px 3px rgba(0,0,0,.2);
box
-shadow: inset 0 4px 3px rgba(255,255,255,0.6), 0 1px 3px rgba(0,0,0,.2);
font
-weight: bold;
border
-radius:3px;
}
.pagenavi span:hover,.pagenavi a:hover, .pagenavi a.current {
background
: #9ad6fb;
background
: -webkit-linear-gradient(top, #9ad6fb 0%,#77c4fc 100%);
background
: -moz-linear-gradient(top, #9ad6fb 0%,#77c4fc 100%);
background
: -o-linear-gradient(top, #9ad6fb 0%,#77c4fc 100%);
background
: -ms-linear-gradient(top, #9ad6fb 0%,#77c4fc 100%);
background
: linear-gradient(top, #9ad6fb 0%,#77c4fc 100%);
border
: 1px solid #72ade4;
color
: #4879a6;
-webkit-box-shadow: inset 0 1px 4px rgba(255,255,255,0.75), 0 1px 3px rgba(79,126,167,.5);
-moz-box-shadow: inset 0 1px 4px rgba(255,255,255,0.75), 0 1px 3px rgba(79,126,167,.5);
box
-shadow: inset 0 1px 4px rgba(255,255,255,0.75), 0 1px 3px rgba(79,126,167,.5);
-webkit-transition: all 0.25s ease 0s;
-moz-transition: all 0.25s ease 0s;
-o-transition: all 0.25s ease 0s;
transition
: all 0.25s ease 0s;
}
.pagenavi { border:none; }

Style 4

numbered Page Navigation Widgets For Blogger

Add the below code above </b:skin>
.pagenavi {
width
:300px;
margin
: 50px auto;
}
.pagenavi span, .pagenavi a {
display
: block;
text
-decoration: none;
color
: #717171;
font
: bold 11px Arial, sans-serif;
text
-shadow: 0px 1px white;
padding
: 5px 8px;
-webkit-border-radius: 3px;
-moz-border-radius: 3px;
border
-radius: 3px;
-webkit-box-shadow: 0px 1px 3px 0px rgba(0,0,0,0.35);
-moz-box-shadow: 0px 1px 3px 0px rgba(0,0,0,0.35);
box
-shadow: 0px 1px 3px 0px rgba(0,0,0,0.35);
background
: #f9f9f9;
background
: -webkit-linear-gradient(top, #f9f9f9 0%, #e8e8e8 100%);
background
: -moz-linear-gradient(top, #f9f9f9 0%, #e8e8e8 100%);
background
: -o-linear-gradient(top, #f9f9f9 0%, #e8e8e8 100%);
background
: -ms-linear-gradient(top, #f9f9f9 0%, #e8e8e8 100%);
background
: linear-gradient(top, #f9f9f9 0%, #e8e8e8 100%);
filter
: progid:DXImageTransform.Microsoft.gradient( startColorstr='#f9f9f9', endColorstr='#e8e8e8',GradientType=0 );
}
.pagenavi span:hover,.pagenavi a:hover {
-webkit-box-shadow: 0px 1px 3px 0px rgba(0,0,0,0.55);
-moz-box-shadow: 0px 1px 3px 0px rgba(0,0,0,0.55);
box
-shadow: 0px 1px 3px 0px rgba(0,0,0,0.55);
background
: #fff;
background
: -webkit-linear-gradient(top, #fff 0%, #e8e8e8 100%);
background
: -moz-linear-gradient(top, #fff 0%, #e8e8e8 100%);
background
: -o-linear-gradient(top, #fff 0%, #e8e8e8 100%);
background
: -ms-linear-gradient(top, #fff 0%, #e8e8e8 100%);
background
: linear-gradient(top, #fff 0%, #e8e8e8 100%);
filter
: progid:DXImageTransform.Microsoft.gradient( startColorstr='#fff', endColorstr='#e8e8e8',GradientType=0 );
border
:none;
color
:#575757;
}
.pagenavi a.current {
color
: white;
text
-shadow: 0px 1px #3f789f;
-webkit-box-shadow: 0px 1px 2px 0px rgba(0,0,0,0.8);
-moz-box-shadow: 0px 1px 2px 0px rgba(0,0,0,0.8);
box
-shadow: 0px 1px 2px 0px rgba(0,0,0,0.8);
background
: #7cb9e5;
background
: -webkit-linear-gradient(top, #7cb9e5 0%, #57a1d8 100%);
background
: -moz-linear-gradient(top, #7cb9e5 0%, #57a1d8 100%);
background
: -o-linear-gradient(top, #7cb9e5 0%, #57a1d8 100%);
background
: -ms-linear-gradient(top, #7cb9e5 0%, #57a1d8 100%);
background
: linear-gradient(top, #7cb9e5 0%, #57a1d8 100%);
filter
: progid:DXImageTransform.Microsoft.gradient( startColorstr='#7cb9e5', endColorstr='#57a1d8',GradientType=0 );
}
.pagenavi a.current:hover {
-webkit-box-shadow: 0px 1px 2px 0px rgba(0,0,0,0.9);
-moz-box-shadow: 0px 1px 2px 0px rgba(0,0,0,0.9);
box
-shadow: 0px 1px 2px 0px rgba(0,0,0,0.9);
background
: #99cefc;
background
: -webkit-linear-gradient(top, #99cefc 0%, #57a1d8 100%);
background
: -moz-linear-gradient(top, #99cefc 0%, #57a1d8 100%);
background
: -o-linear-gradient(top, #99cefc 0%, #57a1d8 100%);
background
: -ms-linear-gradient(top, #99cefc 0%, #57a1d8 100%);
background
: linear-gradient(top, #99cefc 0%, #57a1d8 100%);
filter
: progid:DXImageTransform.Microsoft.gradient( startColorstr='#99cefc', endColorstr='#57a1d8',GradientType=0 );

}
.pagenavi a.current:active {
-webkit-box-shadow: inset 0px 1px 3px 0px rgba(0,0,0,0.5), 0px 1px 1px 0px rgba(255,255,255,1) !important;
-moz-box-shadow: inset 0px 1px 3px 0px rgba(0,0,0,0.5), 0px 1px 1px 0px rgba(255,255,255,1) !important;
box
-shadow: inset 0px 1px 3px 0px rgba(0,0,0,0.5), 0px 1px 1px 0px rgba(255,255,255,1) !important;
}

Style 5

Add the below code above </b:skin>
.pagenavi span, .pagenavi a {
display
: block;
text
-decoration: none;
color
: #717171;
font
: bold 11px Arial, sans-serif;
text
-shadow: 0px 1px white;
padding
: 5px 8px;
-webkit-border-radius: 3px;
-moz-border-radius: 3px;
border
-radius: 3px;
-webkit-box-shadow: 0px 1px 3px 0px rgba(0,0,0,0.35);
-moz-box-shadow: 0px 1px 3px 0px rgba(0,0,0,0.35);
box
-shadow: 0px 1px 3px 0px rgba(0,0,0,0.35);
background
: #f9f9f9;
background
: -webkit-linear-gradient(top, #f9f9f9 0%, #e8e8e8 100%);
background
: -moz-linear-gradient(top, #f9f9f9 0%, #e8e8e8 100%);
background
: -o-linear-gradient(top, #f9f9f9 0%, #e8e8e8 100%);
background
: -ms-linear-gradient(top, #f9f9f9 0%, #e8e8e8 100%);
background
: linear-gradient(top, #f9f9f9 0%, #e8e8e8 100%);
filter
: progid:DXImageTransform.Microsoft.gradient( startColorstr='#f9f9f9', endColorstr='#e8e8e8',GradientType=0 );
}
.pagenavi span:hover,.pagenavi a:hover {
-webkit-box-shadow: 0px 1px 3px 0px rgba(0,0,0,0.55);
-moz-box-shadow: 0px 1px 3px 0px rgba(0,0,0,0.55);
box
-shadow: 0px 1px 3px 0px rgba(0,0,0,0.55);
background
: #fff;
background
: -webkit-linear-gradient(top, #fff 0%, #e8e8e8 100%);
background
: -moz-linear-gradient(top, #fff 0%, #e8e8e8 100%);
background
: -o-linear-gradient(top, #fff 0%, #e8e8e8 100%);
background
: -ms-linear-gradient(top, #fff 0%, #e8e8e8 100%);
background
: linear-gradient(top, #fff 0%, #e8e8e8 100%);
filter
: progid:DXImageTransform.Microsoft.gradient( startColorstr='#fff', endColorstr='#e8e8e8',GradientType=0 );
}
.pagenavi span:active,.pagenavi a:active, .pagenavi a.current:hover {
-webkit-box-shadow: inset 0px 1px 3px 0px rgba(0,0,0,0.5), 0px 1px 1px 0px rgba(255,255,255,1) !important;
-moz-box-shadow: inset 0px 1px 3px 0px rgba(0,0,0,0.5), 0px 1px 1px 0px rgba(255,255,255,1) !important;
box
-shadow: inset 0px 1px 3px 0px rgba(0,0,0,0.5), 0px 1px 1px 0px rgba(255,255,255,1) !important;
}
.pagenavi a.current {
color
: white;
text
-shadow: 0px 1px #3f789f;
-webkit-box-shadow: 0px 1px 2px 0px rgba(0,0,0,0.8);
-moz-box-shadow: 0px 1px 2px 0px rgba(0,0,0,0.8);
box
-shadow: 0px 1px 2px 0px rgba(0,0,0,0.8);
background
: #7cb9e5;
background
: -webkit-linear-gradient(top, #7cb9e5 0%, #57a1d8 100%);
background
: -moz-linear-gradient(top, #7cb9e5 0%, #57a1d8 100%);
background
: -o-linear-gradient(top, #7cb9e5 0%, #57a1d8 100%);
background
: -ms-linear-gradient(top, #7cb9e5 0%, #57a1d8 100%);
background
: linear-gradient(top, #7cb9e5 0%, #57a1d8 100%);
filter
: progid:DXImageTransform.Microsoft.gradient( startColorstr='#7cb9e5', endColorstr='#57a1d8',GradientType=0 );
}
.pagenavi a.current:hover {
-webkit-box-shadow: 0px 1px 2px 0px rgba(0,0,0,0.9);
-moz-box-shadow: 0px 1px 2px 0px rgba(0,0,0,0.9);
box
-shadow: 0px 1px 2px 0px rgba(0,0,0,0.9);
background
: #99cefc;
background
: -webkit-linear-gradient(top, #99cefc 0%, #57a1d8 100%);
background
: -moz-linear-gradient(top, #99cefc 0%, #57a1d8 100%);
background
: -o-linear-gradient(top, #99cefc 0%, #57a1d8 100%);
background
: -ms-linear-gradient(top, #99cefc 0%, #57a1d8 100%);
background
: linear-gradient(top, #99cefc 0%, #57a1d8 100%);
filter
: progid:DXImageTransform.Microsoft.gradient( startColorstr='#99cefc', endColorstr='#57a1d8',GradientType=0 );
}
Enjoy Guys! and don’t forget to post your comments. � MyTricksTime.com

Pure CSS3 Expanding Vertical Navigation Menu For Blogger

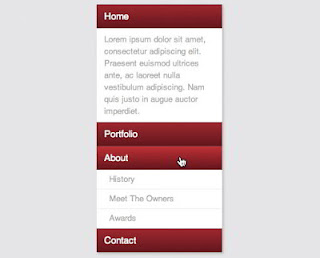
This time around we�re going to build a super useful expanding vertical navigation menu. It�s a great way to hide a lot of links in a fairly small space and the animations will add a nice touch to your site. Even if you�re a complete beginner, you should be able to pull this off.

DEMO


As you can see ( in demo ), the sections on the bottom are closed by default and slide open when you over over them. However, to add some nice variation we�ll also include a section that stays open all of the time. In the main section that is always open we�ll include a brief welcome message and in the sections that slide open will be sub-sections of navigation links.

Read also : 
Red Down Full Mobile Movie

Now that we have a good idea of where we�re going, Let�s get started!

The HTML

The first thing we�re going to do is toss in some nice HTML5 codes to wrap the menu in.

<nav>
    <div class=”menu-item alpha”>
      <h4><a href=”http://www.abushaleh.net/”>Home</a></h4>
      <p>Lorem ipsum dolor sit…</p>
    </div>
    <div class=”menu-item”>
      <h4><a href=”#”>Portfolio</a></h4>
      <ul>
        <li><a href=”#”>Web</a></li>
        <li><a href=”#”>Print</a></li>
        <li><a href=”#”>Other</a></li>
      </ul>
    </div>
    <div class=”menu-item”>
      <h4><a href=”#”>About</a></h4>
      <ul>
        <li><a href=”#”>History</a></li>
        <li><a href=”#”>Meet The Owners</a></li>
        <li><a href=”#”>Awards</a></li>
      </ul>
    </div>
    <div class=”menu-item”>
      <h4><a href=”#”>Contact</a></h4>
      <ul>
        <li><a href=”#”>Phone</a></li>
        <li><a href=”#”>Email</a></li>
        <li><a href=”#”>Location</a></li>
      </ul>
    </div>
</nav>


Though it�s not styled at all, the live preview perfectly showcases the hierarchy of our navigation menu.

The CSS

We�re already finished with the HTML. Now time to start with css styles.

* {
  margin: 0px;
  padding: 0px;
}
nav {
  font-family: Helvetica, Arial, sans-serif;
  line-height: 1.5;
  margin: 50px auto; /*for display only*/
  width: 200px;
  -webkit-box-shadow: 2px 2px 5px rgba(0,0,0,0.2);
     -moz-box-shadow: 2px 2px 5px rgba(0,0,0,0.2);
          box-shadow: 2px 2px 5px rgba(0,0,0,0.2);
}
.menu-item {
  background: #fff;
  width: 200px;
}
/*Menu Header Styles 1*/
.menu-item h4 {
  color: #fff;
  font-size: 15px;
  font-weight: 500;
  padding: 7px 12px;
  background: #a90329;
}
.menu-item h4 a {
  color: white;
  display: block;
  text-decoration: none;
  width: 200px;
}
/*Menu Header Styles 2*/
.menu-item h4 {
  border-bottom: 1px solid rgba(0,0,0,0.3);
  border-top: 1px solid rgba(255,255,255,0.2);
  color: #fff;
  font-size: 15px;
  font-weight: 500;
  padding: 7px 12px;
  background: #a90329; /* Old browsers */
  background: -moz-linear-gradient(top, #a90329 0%, #8f0222 44%, #6d0019 100%); /* FF3.6+ */
  background: -webkit-gradient(linear, left top, left bottom, color-stop(0%,#a90329), color-stop(44%,#8f0222), color-stop(100%,#6d0019)); /* Chrome,Safari4+ */
  background: -webkit-linear-gradient(top, #a90329 0%,#8f0222 44%,#6d0019 100%); /* Chrome10+,Safari5.1+ */
  background: -o-linear-gradient(top, #a90329 0%,#8f0222 44%,#6d0019 100%); /* Opera 11.10+ */
  background: -ms-linear-gradient(top, #a90329 0%,#8f0222 44%,#6d0019 100%); /* IE10+ */
  background: linear-gradient(top, #a90329 0%,#8f0222 44%,#6d0019 100%); /* W3C */
  filter: progid:DXImageTransform.Microsoft.gradient( startColorstr=’#a90329′, endColorstr=’#6d0019′,GradientType=0 ); /* IE6-9 */
}
.menu-item h4:hover {
  background: #cc002c; /* Old browsers */
  background: -moz-linear-gradient(top,  #cc002c 0%, #6d0019 100%); /* FF3.6+ */
  background: -webkit-gradient(linear, left top, left bottom, color-stop(0%,#cc002c), color-stop(100%,#6d0019)); /* Chrome,Safari4+ */
  background: -webkit-linear-gradient(top,  #cc002c 0%,#6d0019 100%); /* Chrome10+,Safari5.1+ */
  background: -o-linear-gradient(top,  #cc002c 0%,#6d0019 100%); /* Opera 11.10+ */
  background: -ms-linear-gradient(top,  #cc002c 0%,#6d0019 100%); /* IE10+ */
  background: linear-gradient(top,  #cc002c 0%,#6d0019 100%); /* W3C */
  filter: progid:DXImageTransform.Microsoft.gradient( startColorstr=’#cc002c’, endColorstr=’#6d0019′,GradientType=0 ); /* IE6-9 */
}
.alpha p {
  font-size: 13px;
  padding: 8px 12px;
  color: #aaa;
}
/*ul Styles*/
.menu-item ul {
  background: #fff;
  font-size: 13px;
  line-height: 30px;
  list-style-type: none;
  overflow: hidden;
  padding: 0px;
}
.menu-item ul a {
  margin-left: 20px;
  text-decoration: none;
  color: #aaa;
  display: block;
  width: 200px;
}
/*li Styles*/
.menu-item li {
  border-bottom: 1px solid #eee;
}
.menu-item li:hover {
  background: #eee;
}
/*ul Styles*/
.menu-item ul {
  background: #fff;
  font-size: 13px;
  line-height: 30px;
  height: 0px; /*Collapses the menu*/
  list-style-type: none;
  overflow: hidden;
  padding: 0px;
}
/*ul Styles*/
.menu-item ul {
  background: #fff;
  font-size: 13px;
  line-height: 30px;
  height: 0px;
  list-style-type: none;
  overflow: hidden;
  padding: 0px;
  /*Animation*/
  -webkit-transition: height 1s ease;
     -moz-transition: height 1s ease;
       -o-transition: height 1s ease;
      -ms-transition: height 1s ease;
          transition: height 1s ease;
}
.menu-item:hover ul {
  height: 115px;
}


The menu is Done!

Customizations

One important thing to note here is that we can�t just set the height to auto ( in css section bolded italic red ) because for some reason this disables the animation. If you don�t want the animation, a height of auto is much more flexible and allows you to vary the number of sub-menu items. If you want to do this with the animation, you�ll have to target the height for each individually.

To add more Menu Item Section, just customize and add below codes:

    <div class=”menu-item”>
      <h4><a href=”link-here“>menu-title</a></h4>
      <ul>
        <li><a href=”link-here“>sub-menu-title</a></li>
        <li><a href=”link-here“>sub-menu-title</a></li>
        <li><a href=”link-here“>sub-menu-title</a></li>
      </ul>
    </div>


One Step Installation For Blogger/Blogspot Blogs

This step for Beginner Bloggers and Blogger/blogspot users. Not every one have compatibility with coding.

To add this Menu to your blogger blog follow below steps:

1. Go to Blogger Dashboard > Layout
2. Add a HTML/Javascript widget and paste the below codes:

<style type=”text/css”>
* {
  margin: 0px;
  padding: 0px;
}
nav {
  font-family: Helvetica, Arial, sans-serif;
  line-height: 1.5;
  margin: 50px auto; /*for display only*/
  width: 200px;
  -webkit-box-shadow: 2px 2px 5px rgba(0,0,0,0.2);
     -moz-box-shadow: 2px 2px 5px rgba(0,0,0,0.2);
          box-shadow: 2px 2px 5px rgba(0,0,0,0.2);
}
.menu-item {
  background: #fff;
  width: 200px;
}
/*Menu Header Styles 1*/
.menu-item h4 {
  color: #fff;
  font-size: 15px;
  font-weight: 500;
  padding: 7px 12px;
  background: #a90329;
}
.menu-item h4 a {
  color: white;
  display: block;
  text-decoration: none;
  width: 200px;
}
/*Menu Header Styles 2*/
.menu-item h4 {
  border-bottom: 1px solid rgba(0,0,0,0.3);
  border-top: 1px solid rgba(255,255,255,0.2);
  color: #fff;
  font-size: 15px;
  font-weight: 500;
  padding: 7px 12px;
  background: #a90329; /* Old browsers */
  background: -moz-linear-gradient(top, #a90329 0%, #8f0222 44%, #6d0019 100%); /* FF3.6+ */
  background: -webkit-gradient(linear, left top, left bottom, color-stop(0%,#a90329), color-stop(44%,#8f0222), color-stop(100%,#6d0019)); /* Chrome,Safari4+ */
  background: -webkit-linear-gradient(top, #a90329 0%,#8f0222 44%,#6d0019 100%); /* Chrome10+,Safari5.1+ */
  background: -o-linear-gradient(top, #a90329 0%,#8f0222 44%,#6d0019 100%); /* Opera 11.10+ */
  background: -ms-linear-gradient(top, #a90329 0%,#8f0222 44%,#6d0019 100%); /* IE10+ */
  background: linear-gradient(top, #a90329 0%,#8f0222 44%,#6d0019 100%); /* W3C */
  filter: progid:DXImageTransform.Microsoft.gradient( startColorstr=’#a90329′, endColorstr=’#6d0019′,GradientType=0 ); /* IE6-9 */
}
.menu-item h4:hover {
  background: #cc002c; /* Old browsers */
  background: -moz-linear-gradient(top,  #cc002c 0%, #6d0019 100%); /* FF3.6+ */
  background: -webkit-gradient(linear, left top, left bottom, color-stop(0%,#cc002c), color-stop(100%,#6d0019)); /* Chrome,Safari4+ */
  background: -webkit-linear-gradient(top,  #cc002c 0%,#6d0019 100%); /* Chrome10+,Safari5.1+ */
  background: -o-linear-gradient(top,  #cc002c 0%,#6d0019 100%); /* Opera 11.10+ */
  background: -ms-linear-gradient(top,  #cc002c 0%,#6d0019 100%); /* IE10+ */
  background: linear-gradient(top,  #cc002c 0%,#6d0019 100%); /* W3C */
  filter: progid:DXImageTransform.Microsoft.gradient( startColorstr=’#cc002c’, endColorstr=’#6d0019′,GradientType=0 ); /* IE6-9 */
}
.alpha p {
  font-size: 13px;
  padding: 8px 12px;
  color: #aaa;
}
/*ul Styles*/
.menu-item ul {
  background: #fff;
  font-size: 13px;
  line-height: 30px;
  list-style-type: none;
  overflow: hidden;
  padding: 0px;
}
.menu-item ul a {
  margin-left: 20px;
  text-decoration: none;
  color: #aaa;
  display: block;
  width: 200px;
}
/*li Styles*/
.menu-item li {
  border-bottom: 1px solid #eee;
}
.menu-item li:hover {
  background: #eee;
}
/*ul Styles*/
.menu-item ul {
  background: #fff;
  font-size: 13px;
  line-height: 30px;
  height: 0px; /*Collapses the menu*/
  list-style-type: none;
  overflow: hidden;
  padding: 0px;
}
/*ul Styles*/
.menu-item ul {
  background: #fff;
  font-size: 13px;
  line-height: 30px;
  height: 0px;
  list-style-type: none;
  overflow: hidden;
  padding: 0px;
  /*Animation*/
  -webkit-transition: height 1s ease;
     -moz-transition: height 1s ease;
       -o-transition: height 1s ease;
      -ms-transition: height 1s ease;
          transition: height 1s ease;
}
.menu-item:hover ul {
  height: 115px;
}
</style>
<nav>
    <div class=”menu-item alpha”>
      <h4><a href=”http://www.abushaleh.net/”>Home</a></h4>
      <p>Lorem ipsum dolor sit…</p>
    </div>
    <div class=”menu-item”>
      <h4><a href=”#”>Portfolio</a></h4>
      <ul>
        <li><a href=”#”>Web</a></li>
        <li><a href=”#”>Print</a></li>
        <li><a href=”#”>Other</a></li>
      </ul>
    </div>
    <div class=”menu-item”>
      <h4><a href=”#”>About</a></h4>
      <ul>
        <li><a href=”#”>History</a></li>
        <li><a href=”#”>Meet The Owners</a></li>
        <li><a href=”#”>Awards</a></li>
      </ul>
    </div>
    <div class=”menu-item”>
      <h4><a href=”#”>Contact</a></h4>
      <ul>
        <li><a href=”#”>Phone</a></li>
        <li><a href=”#”>Email</a></li>
        <li><a href=”#”>Location</a></li>
      </ul>
    </div>
</nav>


3. Save and Drag it in your sidebar. Done 🙂

I hope you enjoyed this walkthrough of building an animated vertical navigation menu. If you can spot any Bug or you face any problem please let us know.

Enjoy Guys! and don’t forget to post your comments. � MyTricksTime.com