Error 651 � Methods to Fix it in Windows 7/8 Error 651 � Methods to Fix it in Windows 7/8

If you are a windows user then it is possible that you have Face Error 651 Anytime. There are many windows user who get affected by this error code 651 while working online. If you are from those windows user, then keep reading this article and carefully read out the following Detailed solutions which I have gathered after reasearching various websites, articles, forums etc. So, without consuming more time I�ll directly come over the main point of this article.

Error code 651 usually occurs when user tries to connect it�s broadband in windows 7 operating system. It shows a message that Your moderm (or other connecting devices) has reported an error and Usually the message will be connection failed with error 651� .Fix Error 651
In such cases user tries to restart the whole computer, router or modem and if this solution doesn�t work then he/she tries to find the solution online but its rare that they find out the solution as they cannot get online.
You can easily make out when you are facing this problem in your windows 7 as this error code 651 shows an error message when user is working online.

How to Fix Error 651 in Windows


There are  ofcourse lots of suggestions and solution available online to solve Error 651 Error but let me tell you that there is no official solution available online or guarantee for fixing this problem inwindows 7. So, for helping out those users I have tried to gathered all types of solution which can help you out in solving this problem on your windows 7 operating system.

1. Uninstall Modem

By uninstalling the modem user can solve this problem. This solution is Most Common to get rid of Error 651. Its applicable for all type of dial up modems. There are many people who had solved out this problem by this method.

2. Replace raspppse.sys from windows 7 drivers directory

I have seen that many users has successfully solved this problem by replacing the raspppse.sys file from the windows 7 directory. This method will only work for those users who are currently usingwindows 7 operating system and are facing this problem.

3. Disable IPv6 for your internet connection

User can also solve this problem by turning off the IPv6 for their dialer modem. This is one of the most easiest way for solving out this problem successfully. Right click on the Connections, Select Properties, Then Uncheck the box which says Internet Protocol Version 6 (TCP/IPv6).

4. Disable Windows 7 auto tuning feature

There are many people who suggested that by turning off the auto tuning feature we can solve out this problem. This method is useful for only those users who are using router. To Disable Auto tuning follow the below steps.
  • Start command prompt as administrator.
  • Type in the below command and Press Enter
Netsh interface tcp set global autotuning=disabled

5. Reinstall LAN card drivers

It have seen that by reinstalling the LAN card driver Error 651 problem can be solved. Sometimes it is possible that drives may get corrupted and this is the reason by I will suggest you to install your drivers again.

6. Performing Clean Boot

performing clean boot can help the user in finding the root cause of this problem. If there is no problem in your windows services then this method will not be working for you.

7. Recreate Dialer and Restart ADSL modem router

It is possible that your internet modem could get hanged during the connection. By removing the dialer and then creating the new dialer can help the user a lot. Restarting ADSL modem/router can also work during such type of cases.

Overall Verdict on Fixing Error 651

So, these are the solutions which I have found while researching to Solve the Error 651 Windows Error . If you are facing this problem in your windows 7 Pc then I will strongly recommend you to try these methods once.
Hope, you have liked the above article. If you face any type of problem after reading the above article carefully then you can surely leave your comments below in the comment box. Also if you have liked anything about the above article then kindly share this article with your friends to help them too�  🙂

Enjoy Guys! and don’t forget to post your comments. � MyTricksTime.com

How to Restore your Computer from a System Image

Recently we had taught you,how to make a System Image Disc in Windows 7,Now it’s time to see if it is working or not.First of all make sure that your system is set up to boot from disc drive,because we will boot the PC with System Repair Disc,which we had created.
restore windows 7

Steps to Restore Computer From System Image

  • Insert your Repair Disc into Disk Drive and restart your Computer
  • Now you will see a black screen asking “Press any key to boot from disc“.Just follow the instruction given by your computer and wait until Windows loads up all the required files
  • Now,Select a Keyboard input method: US and click on the “Next” button
  • You will see different-different options.Just you have to select “Restore your computer using a system image that your created earlier” and click on Next button.
  • Now windows will look for the drive for system image.
  • Click on Next button.
  • Now click on Finish to restart the restoring process.

Enjoy Guys! and don’t forget to post your comments. � MyTricksTime.com

How to increase your RAM and make your computer system faster


These tips will help you to increase your Desktop or Laptops speed and make your system quick

It includes to main steps . from these you will learn How to increase your RAM and make your computer system faster 


1.Increase virtual Ram (Paging)       2.Check for errors, Analyze and defragment. 3. Deleting %temp% and temp

1.   Increase virtual Ram (Paging) It will increase the virtual Ram .just follow the steps

    •  Hold down the ‘Windows’ Key and Press the ‘Pause/Break’ button at the top right of your keyboard.

Another way is Right-Clicking ‘My Computer’ and then Select ‘Properties’.

    • Click on the ‘Advanced’ tab.


    • Under ‘Performance’, click ‘Settings’.


    • Then click the ‘Advanced’ tab on the button that pops up.


    • Under ‘Virtual Memory’ at the bottom, click ‘Change’.


    • Click the ‘Custom Size’ button.


    •  For the initial size (depending on your HD space), type in anywhere from 1000-1500 (although I use 4000), and for the Maximum size type in anywhere from 2000-2500 (although I use 6000).


    •  Click ‘Set’, and then exit out of all of the windows.


    •  Finally, Restart your computer.


    •  You now have a faster computer and 1-2GB of Virtual RAM..!


2.Check for errors, Analyze and defragment.

    • go to my computer


    •  right click on c drive, click properties


    • click on tools tab


    • Click check now and start disk check. It will scan the system for errors.sometimes it show , disk check will take place when you restart computer, if it show such message then click yes and it will automatically check when you restart.


    • follow step 1-4 for all drives.


    • if no message is shown then manually check for errors and then click analyze and after analyzing click defragment.


    • On your next restart you will see the changes in speed.


3. Deleting %temp% and temp


    • go to run 
    • type:-  %temp%
    • and press enter
    • select all by using ctrl+a delete all files. This are temparary files taking the disk space. Deleting files would not affect the system.some files may not be deleted so just ignore them.

Follow all this steps every week or every month for better performance from your system.
Enjoy Guys! and don’t forget to post your comments. � MyTricksTime.com

How to Install Windows quickly

How to Install Windows quickly OR Save your time while installing new windows

How to Install Windows quickly

RICK TO SAVE YOUR TIME WHILE INSTALLING WINDOWS

  • Boot through windows XP CD.
  • After all the files are completely loaded, you get the option to select the partition. Select �c�.
  • Now Format the partition, whether it is normal or quick with NTFS or FAT
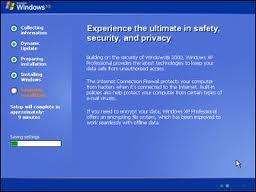
  • Once the formatting is completed, All the setup files required for instllation are copied.Restart your system by pressing Enter.Now, here begins the Simple trick to save 10-15 minutes.
  • After rebooting, you get a screen where it takes 40 minutes to complete or finalize the OSinstallation.
  • Now, Press SHIFT + F10 Key -> This opens command prompt.
  • Type �Taskmgr� and press enter. This will open Task Manager.
  • Click the Process Tab, here we find a process Setup.exe. Right Click on Setup.exe and Set Priority -> Select High or Above Normal. Initially it will be Normal

Enjoy Guys! and don’t forget to post your comments. � MyTricksTime.com

Top 5 Best Free Password Managers for Windows

Password Manager
Password Manager is a software tool that will help user to remember all his passwords. As we all know that today�s life is so full of technology that from banking to shopping we have numerous passwords or PIN or pass codes. It is actually very difficult to remember all these passwords and names, especially if you are an internet user too. One solution to this problem is that, you may write them down and store it in your PC but that�s risky as anyone can read that and gain access to your valuable data, it gets worse if someone reads your banking details and may take undue advantage. Here comes the need of password manager which will store your valuable

data in encrypted form and only you can access that, hence its completely secure. Password manager can protect your logins and passwords, PIN codes, credit card numbers and much more. Here is the list of top five free password management programs.

Read Also :  How to Make Strong Password

Top Pick: Password Dragon

Before we go further into the top 5 list, we would like you to explore our own Password Dragon software. We didn�t purposefully add this in our top 5, as we don�t want to rate our own software. We�ll let you be the judge.
The great advantage of password dragon is that it works on Windows, Mac and Unix as this is written in Java. This can also be launched directly from USB thumb drive. This has lot more to offer, check-out the full list of features of password dragon.

1. LastPass

LastPass is a freeware password manager which makes your browsing secure and easier. It is integrated with high class and very fine encryption algorithms to keep your data protected and secure. Except the user, no one else could decrypt the information. Not only can it create strong passwords, it can also store unlimited passwords. It can import passwords from other password managers and has ability to manage data from multiple computers. It is a very effective software program.
  • Our Rating: 5 Stars
  • Download LastPass
  • Home Page
  • Pros: It is almost the best freeware available which works with almost all browsers. It generates secure password and great online support is available by LastPass team. It has seamless integration with firefox.
  • Cons: It is not very easy to use
  • OS: Wndows XP, Windows Vista and iphone.

2. KeePass

KeePass Password manager is a free open source software which helps you to store your valuable passwords in a highly secure encrypted database whose key to decryption is only with you. You can lock all your passwords in one master key, so that you can unlock all the information with one single master password. It has strong password generator and requires no installation. It is a very handy tool that makes your password management very easy.

3. LockCrypt

LockCrypt is also a freeware password manager for Windows OS. To store passwords,phone numbers, PINs and other private and personal information, this account management program provides a secure, central database. It uses Cipher Block Chaining and AES encryption which makes it very secure and reliable. It has strong password generator and native translations into Spanish, German etc. with a secure clipboard to protect passwords.
  • Our Rating: 4.5 Stars
  • Download LockCrypt
  • Home Page
  • Pros: The best part about this software is that it can be fully customizable.
  • Cons: This software is resource expensive as it is written in Java. Moreover, it doesn�t have very well furnished user interface.
  • OS: Windows 7, Windows XP, Windows Vista

4. Password Safe

Password Safe is another freeware password management tool which can manage your old passwords, quickly generate new passwords, organize them, retrieve and store them in one single master combination. Through this software the users can keep their passwords encrypted on their computers.
  • Our Rating: 4 Stars
  • Download Password Safe
  • Home Page
  • Pros: Easy to use, convenient and has the ability to go directly to a URL
  • Cons: Unable to recover the data, if user forgets the master keyword.
  • OS: Windows7 32-bit and 64-bit, Windows XP, Windows Vista

5. RoboForm

RoboForm password manager is a freeware which reliably and safely stores passwords on your PC or laptop. The passwords can be both online and offline. It has fine features and a very fine user interface. It not only auto-logs the user into online accounts but also completes online registration and checks out forms with a single click. It is probably one of the oldest and uses strong Encryption algorithms like BlowFish and AES for complete security and protection.

Enjoy Guys! and don’t forget to post your comments. � MyTricksTime.com