
-
Link To All images Inside Your Template From Blogger
I shared an important tip tomorrow about creating an Image Backup in Blogger and then Linking to All Images From there. Most of you use templates that are not officially provided by Blogger. These templates often contain images that are saved on services like tinypic or photobucket. When your blog loads the browser has to connect to all servers which link to your images, as a result leading to immense delay in the loading time of your blog. What you must do is replace all such images with those that you have saved inside blogger as explained in the my previous post. The advantage of doing so will be this that the browser will need to connect only to blogger while loading your images. Thus saving time. -
Save All Images in GIF or PNG Format
GIF stands for �Graphics Interchange Format� and PNG stands for �Portable Network Graphics� Both these formats are well compressed, smaller in size and widely supported by all browsers. But if size is concerned PNG compresses far better than GIF. In typical cases up to 5-25%. There are some transparency issues with PNG in IE6 but since IE7 is widely used these days, transparency is nor more an issue. Using any of these image formats will tremendously reduce the load time of your blogs by 60% i.e 70-90KB The size is an approximate for my blog and true size depends on the number of images you use. -
Give Proper Dimensions To Images
Giving each image a specific width and height will make it easy for the browser to load the image quickly. Always decrease the size of an image if the original size is larger. The general HTML code for an image looks like the one below,<img width=�� height=�� src=�URL Of Image� />
The width and height will require a value in pixels. One pixel equals a dot on the screen. A Full size image on my blog will have a width=�590px� and height can be as long as I want. 590px almost equals the width of my posts. Hope that gives you an idea on how to choose width and height values for your images. Browsers find it easy to load images whose dimensions are specified. Make sure you make it your habit to specify a proper size for your images. If you use Windows Live Writer your life will become far easy. -
Don�t Use An Image As A Background
If you are using any image as a background then kindly remove it. A background Image repeats itself horizontally and vertically and is responsible for 50% slow load time. Just remove it and see the difference. To remove a background image simply find this CSS code inside your template, (Tip:- Its located just at the top of your blog. Simply search for body)
body { background: #7AA1C3 url(http://xyz.com/blabla.jpg);width: 980px;color: #333;font-size: 14px;font-family: Georgia;margin: 0 auto 0;padding: 0; }This code will look different in your template but you should be concerned only with thebolded black text. Simply Delete url(http://xyz.com/blabla.jpg) and save your template. Give a simple color to your background. #7AA1C3 refers to Background Color. You can change it by using my Hexadecimal Color Chart
-
Save All JavaScript Inside Blogger
Why should you link to external sites for storing your JavaScript whilst you can easily save it in Blogger! Save All your JavaScript codes inside your templates just above </head> using the code below,<script type=’text/javascript’>//<![CDATA[Paste Your JavaScript Code Here//]]></script>The bolded text is where you must paste the JavaScript code that you use in your template by linking to an external site.To find a JavaScript URL that links to external site, search for <script type=’text/javascript’> inside your template (Make sure to check �expand widget templates� box at top-right corner). Once you find such linking, open that link in a browser. You will see large piece of complex text in the window and that is your JavaScript code. Simply copy it and paste it in the code shared above. Replace All JavaScript codes inside your template with the code above, ensuring that you have extracted the code from the link and pasted it in the code above. -
Always Accept Quality and Well Scripted Blogger Templates
The major mistake most bloggers make is to upload any template that attracts them. Most un-official Blogger templates that are available in blogosphere are often created by people who are not well aware with proper use of HTML and JavaScript. A improper scripted template with empty tags ,unwanted tags and broken JavaScript often make Job tough for search engine spiders to crawl the content of your weblog. Further Browsers also waste precious time in reading broken scripts. If a JavaScript is not well coded or optimized, it can cause a readers PC to hang! Imagine this happening to readers accessing your blog. In Short use templates from authorities who have respect in blogosphere and from those who are certified professionals. -
Use Limited Advertisements
If you are blogging only to get paid by displaying large chunks of ads from several sources than you are surely misusing this beautiful experience of blogging. Don�t make a blog a Fish Market. Display only few ads at major areas in your blog. Doing so will keep your blog interface clean and easy to be crawled and browse able. Each add that you display uses JavaScript that prolongs the page Load time. Make sure you limit all your ads to three. -
Don�t Link To Blog Directories
It is a wrong perception that linking to several blog directories will bring you immense Traffic. When you link to several blog directories on your homepage, search engines loose trust on your blog due to excessive linking and browsers find it difficult to browse those tiny images that link to blog directories. All blog directories ask you to link back using a small image link on your blogs but doing so will only damage the success of your blog. I believe only on blogcatalog and mybloglog as relevant authorities to expect Traffic from. If you really want some amount of traffic from blog directories then trust only on blogcatalog and mybloglog. Moreover accept only the small piece of meta tag from them rather linking to them. -
Don�t Use Widgets From Blog Directories that Use Images
I refer to the famous recent Viewers widget by blogcatalog and mybloglog. These widgets use JavaScript that link to these sites and also display images that add up to the load time of your blog. I use meta tags provided by them rather using their widgets. This helps in reducing the time taken for my pages to load. If you really want to use these widgets then try displaying few images on them, as low as 10.
-
Summarize your Posts Using The Read More Link
Full Length Posts at homepage is one of the biggest reasons why a blog has high load time. Summarize all your posts by using the continue Reading Link or Read More Link. To know how to add it, read this post-> Read More Link
-
Show Only Four-Five Posts At Home Page
Don�t show more than 4-5 posts at Homepage. Doing so will keep your readers busy reading different posts and they will also find it interesting to see how fast the homepage loads.
-
Eliminate External Links
Don�t use widgets that are from external sites other than blogger. Get rid of stat counters and use Google Analytics. Don�t store images on other services but Blogger. Save all JavaScript code inside blogger as discussed above. Don�t add links from blog directories, they don�t bring Traffic with exception of blogcatalog and mybloglog.
Note:-


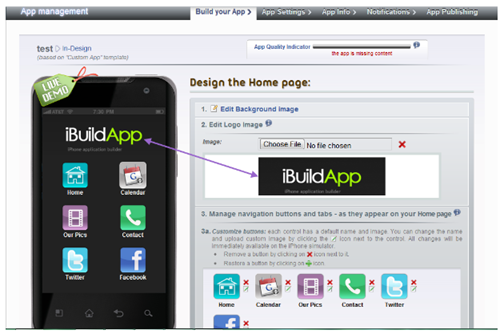
 In this post i will teach you how to make a free App of your blog for Android and Nokia Touch Phones. First little description on its importance :
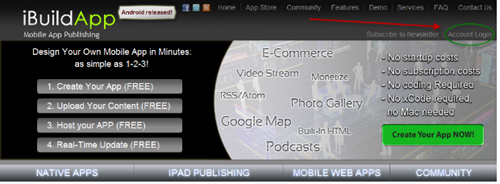


 I am really amazed at the new look of Bloggers Directory which in fact has all features that a Directory must have. You can no doubt expect to
  Driving continuous flow of traffic to your blog is a wish that never seems to end. With the growing expansion of social media networks and creation of more advanced search engines, traditional methods of driving traffic to your blog is slowly loosing its importance. Indeed Blog directories that once flooded the blogosphere are loosing reputation considerably. Check your Google Analytics and discover it for yourselves that how much Traffic are these directories paying you in return for their reciprocal links and banners? I am sure the answer would not be a delightful one. So today we are going to remove all doubts regarding directory submission and will try to educate you all with something that may be worth trying.

