Related Posts Widget in Blogger With Thumbnails

Now Like wise WordPress Blogger Users can also have Related Posts with Thumbnails in Blogspot Blogs.

To increase page views per user this widget can be very helpful, you can easily display the Related Posts with thumbnails below every post or below the post area with very ease.


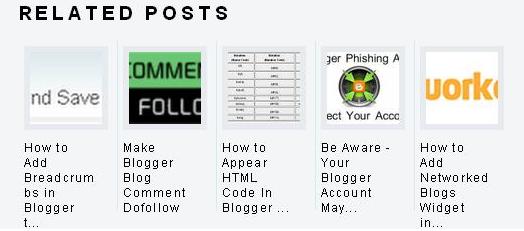
For displaying the thumbnails you need not to worry about anything, this thing is taken care by the widget automatically, but you must have at-least one image in the post.


Follow the steps to display Related Posts Widget in Blogger With Thumbnails.

Step 1: First Login to your blogger dashboard and navigate to Layout > Edit HTML and check the “Expand Widget Templates” checkbox.
Step 2: Find the

              </head>

Step 3: Replace it with

              <!–Related Posts with thumbnails Scripts and Styles Start–>
              <b:if cond=’data:blog.pageType == “item”‘>
              <style type=”text/css”>
              #related-posts {
              float:center;
              text-transform:none;
              height:100%;
              min-height:100%;
              padding-top:5px;
              padding-left:5px;
              }
              #related-posts h2{
              font-size: 1.6em;
              font-weight: bold;
             color: black;
             font-family: Georgia, �Times New Roman�, Times, serif;
             margin-bottom: 0.75em;
             margin-top: 0em;
             padding-top: 0em;
             }
             #related-posts a{
             color:black;
             }
             #related-posts a:hover{
             color:black;
             }
             #related-posts  a:hover {
             background-color:#d4eaf2;
             }
            </style>
            <script src=’http://blogergadgets.googlecode.com/files/relatedthumbs21.js’         type=’text/javascript’/>
            </b:if>
            <!–Related Posts with thumbnails Scripts and Styles End–>
            </head>

Step 4: Find the either line given below

            <div class=’post-footer-line post-footer-line-1′>
            OR
            <p class=’post-footer-line post-footer-line-1′>

Step 5: Put the code given below immediately after the above one.

<!– Related Posts with Thumbnails Code Start–>
<b:if cond=’data:blog.pageType == “item”‘>
<div id=’related-posts’>
<b:loop values=’data:post.labels’ var=’label’>
<b:if cond=’data:label.isLast != “true”‘>
</b:if>
<b:if cond=’data:blog.pageType == “item”‘>
<script expr:src='”/feeds/posts/default/-/” + data:label.name + “?alt=json- in-script&callback=related_results_labels_thumbs&max-results=6″‘ type=’text/javascript’ /></b:if></b:loop>
<script type=’text/javascript’>
var currentposturl=”<data:post.url/>”;
var maxresults=5;
var relatedpoststitle=”Related Posts”;
removeRelatedDuplicates_thumbs();
printRelatedLabels_thumbs();
</script>
</div><div style=’clear:both’/>
</b:if>
<!– Related Posts with Thumbnails Code End–>

Now Save Template and View your blog you will find Results, if you don’t see the images then keep patient it will show you withing 24 Hours.


Note: You can adjust the maximum number of related posts being displayed by editing this line in the code.

var maxresults=5;


5.To edit the title of the widget you can change this line of code:

var relatedpoststitle=”Related Posts”;


If you have any issue please comment here.

Notification Bar For BlogSpot With Facebook Like Button

notification bar
Most of you liked the new sticky notification bar which is an important way of seizing visitor attention towards an important headline, news or any update or announcement you may wish to share. Today we will take a step further by adding Facebook like button to the sticky bar. This is a great way of increasing your fans on FB. All visitors will be able to see the bar at the top of your blogger header and it will stay fixed their and would scroll as the user scrolls down. It will always be attracting your visitors to like your blog. Lets first see a demo.

Scroll to the bottom of this demo page to see it:

Add Notification bar to Blogger

Go To Blogger > Design > Edit HTML

Backup your template

Search for this,

]]></b:skin>

4. Just above it paste the follow code,

#mbt-stickybar{
background:#FF0000 url(‘http://3.bp.blogspot.com/-zQeUG7PU9Uw/TmkiptyZ1eI/AAAAAAAAE98/At4tRBC9HQc/s400/stickybar.png’) repeat-x;
width:100%;
margin:0 auto;
text-align:center;
padding:0px 0;
border-bottom: 1px solid #888888;
  -moz-box-shadow: #666666 0px 1px 3px;
  -webkit-box-shadow: #666666 0px 1px 3px;
  box-shadow: #666666 0px 1px 3px;
  z-index: 999;
height: 28px;
line-height: 1.85em;
vertical-align: baseline;
letter-spacing: 1px;
}
#mbt-stickybar a{
text-decoration:none;
color:#fff;
font-size:13px;
font-weight:bold;
font-family: arial,”Helvetica”,sans-serif;
line-height: 24px;
}
#mbt-stickybar a:hover{
text-decoration:underline;
}
#mbt-stickybar p {margin:0; list-style:none;}
#mbt-stickybar img {vertical-align: middle;
      margin-right: 6px;}

To change the background color of the sticky bar, simply change  #FF0000  with any hexadecimal color of your choice. Try our color chart.

5.  If you wish to add the bar above header then search for this code

<body>

else if you wish to add the bar below footer then search for this code

</body>

and  Just below it paste the following code,

<div id=’mbt-stickybar1′>
<div style=’float:left; width:400px;’>
<a href=’#’>Receive Free Updates Via Email. Subscribe Now!</a>
</div>
<div style=’float:right; width:300px;’>
<table style=’margin:0; padding:0;’>
<tr>
<td>
<div id=’fb-root’/><script src=’http://connect.facebook.net/en_US/all.js#xfbml=1’/><fb:like font=” href=’BLOG LINK’ layout=’button_count’ send=’false’ show_faces=’false’ width=’80’/>
</td>
</tr>
</table>
</div>
</div>

Replace with your RSS link and replace

Replace BLOG LINK with your blog homepage URL. If you wish to replace the link with your Facebook like page URL then better read the post on link like button to like page.

   6.   Save your template and you are all done!

Visit your blog to see it hanging either at top or at bottom as you may have set it up. Have fun buddies. do let me know if you needed any help.

Make Sticky Bar For BlogSpot

Make a stickybar with close button
You can add sticky notification bar in blogger blogs by showing the bar either at the top of header or just below the footer. A sticky bar can is now used widely by all blogs and sites(mashable for instance) for notifying visitors of important updates, offers, coupons and latest news. You can even add your RSS link there and ask you visitors to subscribe to your blog. In this tutorial I will try to keep things simply and will share how to create such a sticky bar widget with simple text and image. I have added drop shadow effects to it using CSS3. The widget is compatible with all browsers. View the demo below and on the demo page scroll to the top to see the bar.


Add Sticky Bar To Blogger


Go To Blogger > Design > Edit HTML


Backup your template


Search for this,


]]></b:skin>


   4.  Just above it paste the CSS code below,


#mbt-stickybar{ 
background:#0080ff url(‘http://3.bp.blogspot.com/-zQeUG7PU9Uw/TmkiptyZ1eI/AAAAAAAAE98/At4tRBC9HQc/s400/stickybar.png’) repeat-x; 
width:100%; 
margin:0 auto; 
text-align:center; 
padding:0px 0; 
border-bottom: 1px solid #888888; 
  -moz-box-shadow: #666666 0px 1px 3px; 
  -webkit-box-shadow: #666666 0px 1px 3px; 
  box-shadow: #666666 0px 1px 3px; 
  z-index: 999; 
height: 28px; position:fixed;
line-height: 1.85em; 
vertical-align: baseline; 
letter-spacing: 1px;
}
#mbt-stickybar a{ 
text-decoration:none; 
color:#fff; 
font-size:13px; 
font-weight:bold; 
font-family: arial,”Helvetica”,sans-serif; 
line-height: 24px; 
}
#mbt-stickybar a:hover{ 
text-decoration:underline; 

#mbt-stickybar p {margin:0; list-style:none;} 
#mbt-stickybar img {vertical-align: middle; 
      margin-right: 6px;}


To change the background colour of the bar then simply change this #0080ff  Use our Color code generator for doing this.     


5.  Next search for this code


<body>


 6.  Just below it paste the following code,


<div id=’mbt-stickybar’> 
<a href=’#’>ADD TEXT HERE</a> 
</div>


Now replace # with your text link (can be your RSS link, important post link etc.) and ADD TEXT HERE with anything you wish to write.


      7.    Save your template and bingo you are done! 🙂
If you wish to add an image next to the link of text just like the one in the demo page, then use this code instead of the one shared in 
Step#6,


<div id=’mbt-stickybar’> 
<img src=’IMAGE LINK’/><a href=’#’>ADD TEXT HERE</a> 
</div>


Simply replace IMAGE LINK with the URL of your image, picture etc.
Advance versions


In my coming posts I will be sharing more on this topic. We will also learn how to add plugins like FB Like and G+ buttons. We will also learn how to add this sticky bar to the bottom of your blog homepage, how to hide it on specific pages and how to add a close button to it. So it would be great fun trying new versions. Kindly let me know if you needed any further help.

Free High Quality Flash Clocks For Your Blogs

A clock gives a beautiful look to a website. A clock is a must for a personal homepage, forum, blog etc. Isn�t it exciting when you get a highly quality flash Clock absolutely Free?FreeFlashclocks.eu is offering Free download plus embedding of hundreds of highly professional Clocks in different shapes, sizes, colors, themes and styles. Below I have shared some of the clocks from FreeFlashclocks.eu and have provided the embedding code. Simply copy the code below each clock and past that code in Edit Html Section of your blogger editor to display the clock in your posts just like I did! See a Screenshot below,

edit-html
To add a clock to your sidebar simply paste the code provided in HTML/JavaScript Page Element . Go To Layout > Click Add a Gadget > From the list Select HTML/JavaScript
See screen shots below,
Layout
add-a-gadget
html-javascript
You add these clocks to your websites just the way you embed  YouTube Videos. I have altered the code so that it may work just perfectly alright in your BlogSpot blogs.
  1. A Clock plus a Calendar
<object><param name=”movie” value=”http://flash-clocks.com/free-flash-clocks-for-websites/free-flash-clock-1.swf”> <embed src=”http://flash-clocks.com/free-flash-clocks-for-websites/free-flash-clock-1.swf” width=”150″ height=”250″ wmode=”transparent”></object>
2.     A rotating Silver Clock
<object><param name=”movie” value=”http://flash-clocks.com/free-flash-clocks-for-websites/free-flash-clock-11.swf”><embed src=”http://flash-clocks.com/free-flash-clocks-for-websites/free-flash-clock-11.swf” width=”150″ height=”150″ wmode=”transparent”> </embed></object>
3.     A rotating Red belt Round the Clock
<object><param name=”movie” value=”http://flash-clocks.com/free-flash-clocks-for-websites/free-flash-clock-58.swf”><embed src=”http://flash-clocks.com/free-flash-clocks-for-websites/free-flash-clock-58.swf” width=”150″ height=”150″ wmode=”transparent”></embed></object>
4.     An Open space Clock with attracting face
<object><param name=”movie” value=”http://flash-clocks.com/free-flash-clocks-for-websites/free-flash-clock-63.swf”><embed src=”http://flash-clocks.com/free-flash-clocks-for-websites/free-flash-clock-63.swf” width=”150″ height=”150″ wmode=”transparent”> </embed></object>
5.     Wooden Clock, with A Light Brown Outline
<object><param name=”movie” value=”http://flash-clocks.com/free-flash-clocks-for-websites/free-flash-clock-15.swf”><embed src=”http://flash-clocks.com/free-flash-clocks-for-websites/free-flash-clock-15.swf” width=”150″ height=”150″ wmode=”transparent”> </embed></object>
6.      A Clock with a Lively touch to it
<object><param name=”movie” value=”http://flash-clocks.com/free-flash-clocks-for-websites/free-flash-clock-8.swf”><embed src=”http://flash-clocks.com/free-flash-clocks-for-websites/free-flash-clock-8.swf” width=”150″ height=”150″ wmode=”transparent”> </embed></object>
7.     Analogue Plus Digital
<object><param name=”movie” value=”http://flash-clocks.com/free-flash-clocks-for-websites/free-flash-clock-28.swf”><embed src=”http://flash-clocks.com/free-flash-clocks-for-websites/free-flash-clock-28.swf” width=”150″ height=”150″ wmode=”transparent”> </embed></object>
8.    A Clicking Digital Clock (The ticking Sound that you hear is from this Clock)
<object><param name=”movie” value=”http://flash-clocks.com/free-flash-clocks-for-websites/free-flash-clock-33.swf”><embed src=”http://flash-clocks.com/free-flash-clocks-for-websites/free-flash-clock-33.swf” width=”150″ height=”150″ wmode=”transparent”> </embed></object>
9.      Simple yet Attracting
<object><param name=”movie” value=”http://flash-clocks.com/free-flash-clocks-for-websites/free-flash-clock-23.swf”><embed src=”http://flash-clocks.com/free-flash-clocks-for-websites/free-flash-clock-23.swf” width=”150″ height=”150″ wmode=”transparent”> </embed></object>


10.     Finally a beautiful Clock with a Think Black Outline
<object><param name=”movie” value=”http://flash-clocks.com/free-flash-clocks-for-websites/free-flash-clock-24.swf”><embed src=”http://flash-clocks.com/free-flash-clocks-for-websites/free-flash-clock-24.swf” width=”150″ height=”150″ wmode=”transparent”> </embed></object>

Learn How To Show Post Summary using The �Read More Link� or �Continue Reading link�

Totally Exceptional!!A good blogger can be identified by the way he manages his blog and organizes his posts. The homepage is the most important part of every blog. The homepage must contain up to 5-6 posts in order to seize the attraction of reader as much as possible. Keeping a reader busy for a longer time is what I call a blogging success. Showing 5-6 posts is load-time and user friendly only if you show a summary of each post. On my homepage you must have seen a Read More Link, clicking which expands the entire post. Look at a screen shot Below,

read-more1
This link just adds beauty to your blog along with some pro spice to it. So lets learn how to summarize your posts and give them the expandable functionality.
The steps that must be followed for planting this TNT are,
  • Go to layout > Edit HTML
layout-edit-html

Now The Most Important Step �> Back Up Your Template
By backing up your template I mean that you must save a copy of your current template in your computer hard drive. If in case something goes wrong, you can restore your template and have everything working as normal as before.
To backup your template click on the link saying Download Full Template , as shown below
backup-template
If suppose something goes wrong , you will simply click the Browse button, locate your saved template and then simply click the Upload button to restore your template back to normal.
  • Click on “Expand Widget Templates” at the top right hand corner of your Edit HTML page
expand-widgets 
  • Now find this code ]]></b:skin> 
Tip: Pressing Ctrl + F  and then paste this code into the search box, as shown below,
Search-code
The search box is an easy way of finding codes in your template.
Just after 
]]></b:skin> copy paste the code below,
Tip: Highlight the code below and then press Ctrl + c to copy the entire code and then pressCtrl + v to paste the code
<style>
<b:if cond=’data:blog.pageType == “item”‘>
span.fullpost {display:inline;}
<b:else/>
span.fullpost {display:none;}
</b:if>
</style>

Now find this code  <data:post.body/>
And just after <data:post.body/> add the code below,
<!–READ-MORE-STARTS–>
<b:if cond=’data:blog.pageType != “item”‘>
<a expr:href=’data:post.url’>
<div style=”text-align: right;”>Read More ->></div></a>
</b:if>
<!–READ-MORE-STOPS–>

You can replace the text in red with anything you like, e.g: Continue ReadingKeep Reading
If you want to shift the “Read More->>” text to the extreme-left side, use this code:
<!–READ-MORE-STARTS–>
<b:if cond=’data:blog.pageType != “item”‘>
<a expr:href=’data:post.url’>
<div style=”text-align: left;”>Read More ->></div></a>
</b:if>
<!–READ-MORE-STOPS–>

Save your template and you are Done!

Read Further to know How to Apply this TNT in your Posts
Now whenever you want to write a post in windows Live Writer, follow the procedure below,
Once you had finished writing your post, as shown below,
Readmore1

Just after completing your post click on the 
source button at the bottom of your windows live writer page,
readmore2
You will see something like this,
 source code for your post
Now use the code below to hide the portion of your post that you don�t want to be shown on your homepage
<span class=”fullpost”>
</span>
Now suppose if you want to show the post only till the lines
I have explained everything in these images so read carefully!
So you will add the codes as shown below,
the highlighted source code refers to the hidden text
You can see in the image above that I have added <span class=”fullpost”> just above the part of the post I wanted to hide. The text that I want to hide is the one below,
�Please use windows live writer only for writing quality posts. This TNT of Read More link works best with windows Live writer. Blogger Editor is simply annoying and this trick simply just don�t work efficiently with it. If you still want to use blogger editor rather than windows live writer than frustration is what you will encounter! �
I added </span> to the part where the entire post completes or source code ends
In short add <span class=”fullpost”> just before the text to be hidden and add </span>just after it
That�s All!
You can use some of the Images below instead of that Read More �>> text
 read-more with a black outline simple readmore text image read-more with a blue drop shadow read more text with black drop shadowread-more black and orange
To add an image instead of text simply replace Read More ->> in the code above with this,
<img border=”0″ alt=”read more” src=”URL Of Your Image”/>
Replace URL Of Your Image with your image link.
Update:-
I have created some high quality Read More Buttons, may be you will like them more. Visit these links,

  1. Blinking Read More Buttons
  2. Animated Read More Buttons
  3. Arrow Head Read More Buttons