HOW TO ADD BORDER TO POST TITLES

Add Border To Post Titles in Blogger: Let’s play with CSS and change the border of post titles in Blogger.You may have noticed the blog titles comes with “text-decoration:none” by default , in simple words no style is applied to the titles of the Blog Posts.Actually we can change the post titles and can decorate it with different CSS
properties but here we gonna apply the border ! Border can be “groove” , “Solid” , “dashed” , or “dotted” having a specific color code and number of pixels.Don’t confuse it is as easy as eating cake.

How To Add Border To Post Titles

  • Go To Blogger Dashboard
  • Click On Template
  • EDIT HTML
  • Search for post-title or .post or only “post”
  • Search until you find the selector “Post Title” as shown below


  • Look at the above snapshot i added there the border Property i.e “border:groove 1px and color” Change these values to your desired values and save the template.You can even change the color of the post title just by simply changing the color code of “COLOR” property in the above script.
  • However here we have selected the border color Groove having gray color and width 1pixel.
  •  That’s it !!

 Note : In many templates the POST TITLE Selector is .post-title but if you can’t find or if this selector is not available then you have to find the exact and matchable selector i.e the selector which matches with the class or ID defined in the div tags! 

 
What’s Up : Actually this hack will add a gray color border to all the post titles having 1 pixel width ,actually it adds 5 stars to the beauty and style of template.It has no effect on blog loading speed.Stay Blessed ,Happy Blogging!

Enjoy Guys! and don’t forget to post your comments. � MyTricksTime.com

A Simple Related Posts Widget For Blogger


In the last tutorial, i’ve been talking about the Related Posts widget that shows related posts along with thumbnails just at the end of your blog articles. Some of the users, however,
would prefer a simpler and cleaner displaying of their related posts so that it would show just the posts titles. So let’s begin adding it!

DEMO BELOW

How to add Related Posts Widget to Blogger


Step 1. Go to Template >> Edit HTML and tick the “Expand Widget Templates” checkbox

Step 2. Find the below tag

</head>


Step 3. And just above it, paste the following code:


<!–Related Posts Scripts and Styles Start–>
<!–Remove–><b:if cond=’data:blog.pageType == &quot;item&quot;’>
<style type=’text/css’>
#related-posts {
float:center;
text-transform:none;
height:100%;
min-height:100%;
padding-top:5px;
padding-left:5px;
margin-top: 20px;
}
#related-posts .widget{
padding-left:6px;
margin-bottom:10px;
}
#related-posts .widget h2, #related-posts h2{
font-size: 17px;
font-weight: normal;
color: black;
font-family: Arial Narrow;
margin-bottom: 0.75em;
padding-top: 0em;
}
#related-posts a{
font-size:16px;
color: #555555;
font-variant:small-caps;
}
#related-posts a:hover{
text-decoration: none;
color: #ffffff;
font-weight: bold;
}
#related-posts ul{
list-style-type:none;
margin:0 0 0px 0;
padding:0px;
text-decoration:none;
text-color:#000000
}
#related-posts ul li{
list-style-type: none;
border-left: 2px solid #1399CF;
border-bottom: 1px dotted #1399CF;
margin-bottom: 3px;
padding-left: 30px;
padding-top:0px;
}

#related-posts ul li:hover{
background-color: #1399CF;
border-left: 2px solid #B3CA3D;
border-bottom: 1px dotted #B3CA3D;
}
</style>
<script type=’text/javascript’>
var relatedpoststitle=&quot;Related Posts&quot;;
</script>
<script src=’http://helplogger.googlecode.com/svn/trunk/related_posts.js’ type=’text/javascript’/>
<!–Remove–></b:if>
<!–Related Posts Scripts and Styles End–>


Note:
– if you want to change the size and color of ‘Related Posts’ title, change the bolded values (17for the font size and black for the color)

-to change the related post title color, replace the value in red;
-to change the background color on mouseover, replace the color value in blue;

Step 4. Now find (CTRL + F) the below line:

    <div class=’post-footer’>


Step 5. Just above it, paste the code below:

<!– Related Posts Code Start–>
<!–Remove–>
<b:if cond=’data:blog.pageType == &quot;item&quot;’>
<div id=’related-posts’> <b:loop values=’data:post.labels’ var=’label’> <b:if cond=’data:label.isLast != &quot;true&quot;’> </b:if> <b:if cond=’data:blog.pageType == &quot;item&quot;’> <script expr:src=’&quot;/feeds/posts/default/-/&quot; + data:label.name + &quot;?alt=json-in-script&amp;callback=related_results_labels&amp;max-results=6&quot;’ type=’text/javascript’/></b:if></b:loop>
<script type=’text/javascript’> var maxresults=5; removeRelatedDuplicates(); printRelatedLabels(&quot;<data:post.url/>&quot;); </script> </div> <!–Remove–></b:if> <!– Related Posts Code End–>


Note: In order to change the number of maximum related posts being displayed for each label, search for the code max-results=5 and change the number “5” to any desired number.
Step 6. Save Template

Enjoy Guys! and don’t forget to post your comments. � MyTricksTime.com

ADD TRANSPARENT NOTIFICATON BAR TO BLOG


Many Popular blogs use a notification bar to show a News feed and latest content because it attracts your visitors attention.

You can add a link to a featured post, your Rss feed, social profile or an affiliate offer. So here I will show you how to add an awesome notification bar with close button. Its very simple and looks very cool.You can use it on a blogger blog and wordpress blog or even in your websites.
Add The Transparent Notification Bar To Blogger

Remember Always Back Up Your Template Before You Make Changes – How To Back Up A Blogger Template 

Step 1. In Your Blogger Dashboard Click Design > Edit Html 

Step 2. Find the following piece of code in your blogs Html : (Click Ctrl and F for a search bar to help find the code – How To Find Code In Blogger Template Template) 

</body>


Step 3. Copy and Paste the following code Directly Above / Before </body>

<!– Notification code start –>
<style type=’text/css’>
#ut-sticky
{
background:url(&#39;http://3.bp.blogspot.com/-7oGSlq30cTw/Tv33CS4WGgI/AAAAAAAAA0w/HxId_tRUae8/s1600/ut-bg.png&#39;) repeat; 

color:#fff;

text-align: center;
margin:0 auto; 

border-top: 1px solid #fff;

height:28px;
font-size:13px;
position:fixed;
bottom:0;
z-index:999;
width:95%;
border-top-left-radius:15px;
border-top-right-radius:15px;
display:block;
font-weight: bold;
font-family: arial,&quot;Helvetica&quot;;

font-color:#fff;

}
#ut-sticky:hover
{background:#333;}
#ut-sticky p{line-height:5px; font-size:13px; text-align:center; width:95%; float:left;}
#ut-sticky p a{ text-decoration:underline; color:#FFFF33;}
.ut-cross{display:block; position:relative; right:15px; float:right;}
.ut-cross a{font-size:18px; font-weight:bold; font-family:&quot;Arial&quot;; color:#FF0000; line-height:30px;}
</style>
<div id=’ut-sticky’>
<p>Add This Transparent Notification Bar To Your Blog <a href=’http://www.pctricksarena.blogspot.com.com’ target=’_blank’>Transparent Notification Bar</a></p>
<div class=’ut-cross’><a href=’javascript:hide_cross();’>X</a></div>
</div>
<script language=’JavaScript’>
function hide_cross() {
crosstbox = document.getElementById(&quot;ut-sticky&quot;);
crosstbox.style.visibility = &#39;hidden&#39;;
}
</script>
<!– End of Notification code, info – http://www.pctricksarena.blogspot.com –>

How to change color and Notification Message.

In this code i have chosen such a color combination so that its looks transparent and whenever you take your mouse on this bar it become more visible.

Change Message – The message and link are highlighted in red above, change as required.
The colors used for the bar are highlighted Enjoy Guys! and don’t forget to post your comments. � MyTricksTime.com

Add Attractive Animated CSS Buttons For Blogger

Today i m  gonna  explain how to add css3 stylish animated  buttons  for your blogger. you can  use  this buttons as  download   buttons, demo buttons, redirect to other page and etc.I m  using  CSS  and HTML for this. you can use this button code in to your blogger post too.Check my  earlier post about  Button
codes here.


1.
 Log in to blogger account and Click drop down. 

2. Now select “Template” Like Below.

3. Now you can see Live on blog, Click EDIT HTML Button”

4. Now click Proceed button.
    
5. Find this tag by using Ctrl+F    ]]></b:skin>

6. Paste below code Before ]]></b:skin> tag

.button{
font:15px Calibri, Arial, sans-serif;
text-shadow:1px 1px 0 rgba(255,255,255,0.4);
text-decoration:none !important;
white-space:nowrap;
display:inline-block;
vertical-align:baseline;
position:relative;
cursor:pointer;
padding:10px 20px;
background-repeat:no-repeat;
background-position:bottom left;
background-image:url('https://lh6.googleusercontent.com/-4cWMlF-uqh4/TltCfL8C4DI/AAAAAAAABhE/qNaNueMVpCU/s144/button_bg.png');
background-position:bottom left, top right, 0 0, 0 0;
background-clip:border-box;
-moz-border-radius:8px;
-webkit-border-radius:8px;
border-radius:8px;
-moz-box-shadow:0 0 1px #fff inset;
-webkit-box-shadow:0 0 1px #fff inset;
box-shadow:0 0 1px #fff inset;
-webkit-transition:background-position 1s;
-moz-transition:background-position 1s;
transition:background-position 1s;
}
.button:hover{
background-position:top left;
background-position:top left, bottom right, 0 0, 0 0;
}
.button:active{
bottom:-1px;
}
/* The three buttons sizes */
.button.big { font-size:30px;}
.button.medium { font-size:18px;}
.button.small { font-size:13px;}
/* BlueButton */
.blue.button{
color:#0f4b6d !important;
border:1px solid #84acc3 !important;
background-color: #48b5f2;
background-image: url('https://lh6.googleusercontent.com/-4cWMlF-uqh4/TltCfL8C4DI/AAAAAAAABhE/qNaNueMVpCU/s144/button_bg.png'), url('https://lh6.googleusercontent.com/-4cWMlF-uqh4/TltCfL8C4DI/AAAAAAAABhE/qNaNueMVpCU/s144/button_bg.png'),
-moz-radial-gradient( center bottom, circle,
rgba(89,208,244,1) 0,rgba(89,208,244,0) 100px),
-moz-linear-gradient(#4fbbf7, #3faeeb);
background-image: url('https://lh6.googleusercontent.com/-4cWMlF-uqh4/TltCfL8C4DI/AAAAAAAABhE/qNaNueMVpCU/s144/button_bg.png'), url('https://lh6.googleusercontent.com/-4cWMlF-uqh4/TltCfL8C4DI/AAAAAAAABhE/qNaNueMVpCU/s144/button_bg.png'),
-webkit-gradient( radial, 50% 100%, 0, 50% 100%, 100,
from(rgba(89,208,244,1)), to(rgba(89,208,244,0))),
-webkit-gradient(linear, 0% 0%, 0% 100%, from(#4fbbf7), to(#3faeeb));
}
.blue.button:hover{
background-color:#63c7fe;
background-image: url('https://lh6.googleusercontent.com/-4cWMlF-uqh4/TltCfL8C4DI/AAAAAAAABhE/qNaNueMVpCU/s144/button_bg.png'), url('https://lh6.googleusercontent.com/-4cWMlF-uqh4/TltCfL8C4DI/AAAAAAAABhE/qNaNueMVpCU/s144/button_bg.png'),
-moz-radial-gradient( center bottom, circle,
rgba(109,217,250,1) 0,rgba(109,217,250,0) 100px),
-moz-linear-gradient(#63c7fe, #58bef7);
background-image: url('https://lh6.googleusercontent.com/-4cWMlF-uqh4/TltCfL8C4DI/AAAAAAAABhE/qNaNueMVpCU/s144/button_bg.png'), url('https://lh6.googleusercontent.com/-4cWMlF-uqh4/TltCfL8C4DI/AAAAAAAABhE/qNaNueMVpCU/s144/button_bg.png'),
-webkit-gradient( radial, 50% 100%, 0, 50% 100%, 100,
from(rgba(109,217,250,1)), to(rgba(109,217,250,0))),
-webkit-gradient(linear, 0% 0%, 0% 100%, from(#63c7fe), to(#58bef7));
}
/* Green Button */
.green.button{
color:#345903 !important;
border:1px solid #96a37b !important;
background-color: #79be1e;
background-image:url('https://lh6.googleusercontent.com/-4cWMlF-uqh4/TltCfL8C4DI/AAAAAAAABhE/qNaNueMVpCU/s144/button_bg.png'), url('https://lh6.googleusercontent.com/-4cWMlF-uqh4/TltCfL8C4DI/AAAAAAAABhE/qNaNueMVpCU/s144/button_bg.png'), -moz-radial-gradient(center bottom, circle, rgba(162,211,30,1) 0,rgba(162,211,30,0) 100px),-moz-linear-gradient(#82cc27, #74b317);
background-image:url('https://lh6.googleusercontent.com/-4cWMlF-uqh4/TltCfL8C4DI/AAAAAAAABhE/qNaNueMVpCU/s144/button_bg.png'), url('https://lh6.googleusercontent.com/-4cWMlF-uqh4/TltCfL8C4DI/AAAAAAAABhE/qNaNueMVpCU/s144/button_bg.png'), -webkit-gradient(radial, 50% 100%, 0, 50% 100%, 100, from(rgba(162,211,30,1)), to(rgba(162,211,30,0))),-webkit-gradient(linear, 0% 0%, 0% 100%, from(#82cc27), to(#74b317));
}
.green.button:hover{
background-color:#89d228;
background-image:url('https://lh6.googleusercontent.com/-4cWMlF-uqh4/TltCfL8C4DI/AAAAAAAABhE/qNaNueMVpCU/s144/button_bg.png'), url('https://lh6.googleusercontent.com/-4cWMlF-uqh4/TltCfL8C4DI/AAAAAAAABhE/qNaNueMVpCU/s144/button_bg.png'), -moz-radial-gradient(center bottom, circle, rgba(183,229,45,1) 0,rgba(183,229,45,0) 100px),-moz-linear-gradient(#90de31, #7fc01e);
background-image:url('https://lh6.googleusercontent.com/-4cWMlF-uqh4/TltCfL8C4DI/AAAAAAAABhE/qNaNueMVpCU/s144/button_bg.png'), url('https://lh6.googleusercontent.com/-4cWMlF-uqh4/TltCfL8C4DI/AAAAAAAABhE/qNaNueMVpCU/s144/button_bg.png'), -webkit-gradient(radial, 50% 100%, 0, 50% 100%, 100, from(rgba(183,229,45,1)), to(rgba(183,229,45,0))),-webkit-gradient(linear, 0% 0%, 0% 100%, from(#90de31), to(#7fc01e));
}
/* Orange Button */
.orange.button{
color:#693e0a !important;
border:1px solid #bea280 !important;
background-color: #e38d27;
background-image:url('https://lh6.googleusercontent.com/-4cWMlF-uqh4/TltCfL8C4DI/AAAAAAAABhE/qNaNueMVpCU/s144/button_bg.png'), url('https://lh6.googleusercontent.com/-4cWMlF-uqh4/TltCfL8C4DI/AAAAAAAABhE/qNaNueMVpCU/s144/button_bg.png'), -moz-radial-gradient(center bottom, circle, rgba(232,189,45,1) 0,rgba(232,189,45,0) 100px),-moz-linear-gradient(#f1982f, #d4821f);
background-image:url('https://lh6.googleusercontent.com/-4cWMlF-uqh4/TltCfL8C4DI/AAAAAAAABhE/qNaNueMVpCU/s144/button_bg.png'), url('https://lh6.googleusercontent.com/-4cWMlF-uqh4/TltCfL8C4DI/AAAAAAAABhE/qNaNueMVpCU/s144/button_bg.png'), -webkit-gradient(radial, 50% 100%, 0, 50% 100%, 100, from(rgba(232,189,45,1)), to(rgba(232,189,45,0))),-webkit-gradient(linear, 0% 0%, 0% 100%, from(#f1982f), to(#d4821f));
}
.orange.button:hover{
background-color:#ec9732;
background-image:url('https://lh6.googleusercontent.com/-4cWMlF-uqh4/TltCfL8C4DI/AAAAAAAABhE/qNaNueMVpCU/s144/button_bg.png'), url('https://lh6.googleusercontent.com/-4cWMlF-uqh4/TltCfL8C4DI/AAAAAAAABhE/qNaNueMVpCU/s144/button_bg.png'), -moz-radial-gradient(center bottom, circle, rgba(241,192,52,1) 0,rgba(241,192,52,0) 100px),-moz-linear-gradient(#f9a746, #e18f2b);
background-image:url('https://lh6.googleusercontent.com/-4cWMlF-uqh4/TltCfL8C4DI/AAAAAAAABhE/qNaNueMVpCU/s144/button_bg.png'), url('https://lh6.googleusercontent.com/-4cWMlF-uqh4/TltCfL8C4DI/AAAAAAAABhE/qNaNueMVpCU/s144/button_bg.png'), -webkit-gradient(radial, 50% 100%, 0, 50% 100%, 100, from(rgba(241,192,52,1)), to(rgba(241,192,52,0))),-webkit-gradient(linear, 0% 0%, 0% 100%, from(#f9a746), to(#e18f2b));
}
/* Orange Button */
.gray.button{
color:#525252 !important;
border:1px solid #a5a5a5 !important;
background-color: #a9adb1;
background-image:url('https://lh6.googleusercontent.com/-4cWMlF-uqh4/TltCfL8C4DI/AAAAAAAABhE/qNaNueMVpCU/s144/button_bg.png'), url('https://lh6.googleusercontent.com/-4cWMlF-uqh4/TltCfL8C4DI/AAAAAAAABhE/qNaNueMVpCU/s144/button_bg.png'), -moz-radial-gradient(center bottom, circle, rgba(197,199,202,1) 0,rgba(197,199,202,0) 100px),-moz-linear-gradient(#c5c7ca, #92989c);
background-image:url('https://lh6.googleusercontent.com/-4cWMlF-uqh4/TltCfL8C4DI/AAAAAAAABhE/qNaNueMVpCU/s144/button_bg.png'), url('https://lh6.googleusercontent.com/-4cWMlF-uqh4/TltCfL8C4DI/AAAAAAAABhE/qNaNueMVpCU/s144/button_bg.png'), -webkit-gradient(radial, 50% 100%, 0, 50% 100%, 100, from(rgba(197,199,202,1)), to(rgba(197,199,202,0))),-webkit-gradient(linear, 0% 0%, 0% 100%, from(#c5c7ca), to(#92989c));
}
.gray.button:hover{
background-color:#b6bbc0;
background-image:url('https://lh6.googleusercontent.com/-4cWMlF-uqh4/TltCfL8C4DI/AAAAAAAABhE/qNaNueMVpCU/s144/button_bg.png'), url('https://lh6.googleusercontent.com/-4cWMlF-uqh4/TltCfL8C4DI/AAAAAAAABhE/qNaNueMVpCU/s144/button_bg.png'), -moz-radial-gradient(center bottom, circle, rgba(202,205,208,1) 0,rgba(202,205,208,0) 100px),-moz-linear-gradient(#d1d3d6, #9fa5a9);
background-image:url('https://lh6.googleusercontent.com/-4cWMlF-uqh4/TltCfL8C4DI/AAAAAAAABhE/qNaNueMVpCU/s144/button_bg.png'), url('https://lh6.googleusercontent.com/-4cWMlF-uqh4/TltCfL8C4DI/AAAAAAAABhE/qNaNueMVpCU/s144/button_bg.png'), -webkit-gradient(radial, 50% 100%, 0, 50% 100%, 100, from(rgba(202,205,208,1)), to(rgba(202,205,208,0))),-webkit-gradient(linear, 0% 0%, 0% 100%, from(#d1d3d6), to(#9fa5a9));
}


7. Go to blogger and click Layout 

8. Click Add Gadget and select ‘HTML/Javascript

9. Paste below code.

(You can use this code anywhere in your post.)

<a class="button big blue" href="Your Link" target="_blank">Live Demo</a>

<a class="button big orange" href="Your Link" target="_blank">Live Demo</a>

<a class="button big green" href="Your Link" target="_blank">Live Demo</a>

<a class="button big gray" href="Your Link" target="_blank">Live Demo</a>

Replace  with your links.

10. Now save your HTML/Javascript‘.you are done…

Enjoy Guys! and don’t forget to post your comments. � MyTricksTime.com

Add Facebook Like Button To Blogger Posts


Hello Friends,
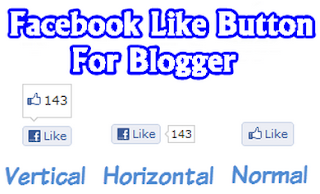
Today is Last Date of this February and after many Days I going to share a small blogger widget (Facebook Like Button). Is is the most common widgets used by millions of Bloggers around  the World.As we all know facebook is one of the largest social media company in the word.If your blog have any fan page then it will help you a lot in increasing traffic on your blog. We are giving all types of facebook like buttons.i.e. vertical count,horizontal count and without count.You can add this button just below of of post tile and below of the post.Just follow my instructions carefully….


Note – This button will not like your fan page it will like and share your post

How To Add Facebook Like Button To Blogger Posts?

  1. Go to Blogger Dashboard > Design > Edit HTML
  2. First take a backup of your template
  3. Tick  the expand widget check box
  4. Find for below code in your template

<data:post.body/>


If you wish to add like button just below of post title the add the below code just before of<data:post.body/>

and if you wish to add this like button just below of your post then add below code justbelow of <data:post.body/>

Facebook Like Button Styles


You can add like button in three styles :


  • Vertical Count
  • Horizontal Count
  • Without Count


1. Vertical Count


<b:if cond=’data:blog.pageType != &quot;static_page&quot;’> <iframe allowTransparency=’true’ expr:src=’&quot;http://www.facebook.com/plugins/like.php?href=&quot; + data:post.canonicalUrl + &quot;&amp;send=false&amp;layout=box_count&amp;show_faces=false&amp;width=55&amp;action=like&amp;font=arial&amp;colorscheme=light&amp;height=62&quot;’ frameborder=’0′ scrolling=’no’ style=’border:none; overflow:hidden; width:55px; height:62px;’/> </b:if>


2. Horizontal Count


<b:if cond=’data:blog.pageType != &quot;static_page&quot;’> <iframe allowTransparency=’true’ expr:src=’&quot;http://www.facebook.com/plugins/like.php?href=&quot; + data:post.canonicalUrl + &quot;&amp;send=false&amp;layout=button_count&amp;show_faces=false&amp;width=90&amp;action=like&amp;font=arial&amp;colorscheme=light&amp;height=21&quot;’ frameborder=’0′ scrolling=’no’ style=’border:none; overflow:hidden; width:90px; height:21px;’/> </b:if>


3. Without Count


<b:if cond=’data:blog.pageType != &quot;static_page&quot;’> <iframe allowTransparency=’true’ expr:src=’&quot;http://www.facebook.com/plugins/like.php?href=&quot; + data:post.canonicalUrl + &quot;&amp;send=false&amp;layout=standard&amp;show_faces=false&amp;width=450&amp;action=like&amp;font=arial&amp;colorscheme=light&amp;height=35&quot;’ frameborder=’0′ scrolling=’no’ style=’border:none; overflow:hidden; width:450px; height:35px;’/> </b:if>


If you faced any problem, please do not hesitate to let me know. 🙂

Enjoy Guys! and don’t forget to post your comments. � MyTricksTime.com