How To Create Facebook Page For Business / Blogger / Blogs | MTT

F           

acebook is a best social media networking site. Have you business, company, blogger, blogs or any website? So create your own facbook page for your business, company, blogger, blogs and website. you can increase your traffic to your business, blogs by creating facebook page for your business or for blogs and there are so many advantages by create facebook page for your business or blogsFacebook is the second largest world among all planets and no. 1 in the world of internet so if you have any type of business or website or any blogs then I recommend that you must have a facebook page related to your business or blogs. So lets we talk about what is the advantage to create facebook page for business or blogs:

Read Also : Customized and stylized subscription widget

  • Drive traffic from facebook to your blogs
  • You will get your fans correspond to your pages
  • If you update anything in your facebook page then it will be in the status update of your all fans.(suppose you have 1K fans and you share your blog link it will be placed in front of 1K person so higher possibility for visit to your blog.
  • You can message to all your fans by just one click
  • Surely it will give you some professional work for your blog
  • (new feature) you can use your facebook as your facebook page( suppose you comment on any friends status then it show this comment by YOUR NAME but now instead of YOUR NAME you can use your FACEBOOK PAGE NAME so higher possibility to click on your FACEBOOK PAGE NAME and then to your blog.
  • Get visibility in major search engines.(for some keywords google shows my blog through our facebook page. See the preview:

Now let’s come to the main point;

How To Add Facebook Page For Business / Blogger / Blogs | MTT

Log into Facebook and then click here on Create a Page on Facebook . Then you will see some option for your facebook pages so choose for which you want to create your facebook page. If you want to create facbook page for blogs or website then choose Brand or Product now you will see as below preview,


choose website option and write your Blog Title below the option and tick facebook pages term and click on Get Started.
Now your page have been created on Facebook. You will see Get Started tab in your facebook page but it will show only for you and if any other visitors comes to your facebook page then they will see your wall by default. In the Get Started page you will see some instruction as 1,2,3, .. so as you complete your this started tab automatically remove ok forget about it. Firstky click on Edit Page(see right top side), see below preview


Click on Basic Information now choose again Websites & blogs in category and in the subcategory choose which is suitable to your blog and fill all the field properly as description and about your blog and don’t forget to write your blog URL under website option and then Save Changes.
Now click on Profile Picture and upload your blog picture. Now Click on View Page (see right top side). Now you can Invite your friends and Post Status Updates by first going to click on wall(see left panel) and write and post.
Now what will be the next for Import your blogs to facbook page through facebook notes

You done!

Enjoy Guys! and don’t forget to post your comments. � MyTricksTime.com

How To Show Blogger Gadget/ Widget In Specific Pages

In this tutorial im going to explain How To Show 

Blogger Gadget/ Widget In Specific Pages. When we designing the 

blogger templates. sometime we want to change out gadget/

widget.Sometime need to show gadget/ widget homepage 

only.some time inside post only. At that time we don’t have

any option for customize like that. We need to understand 

about code.But most of are not good at coding.So in this 

tutorial will helps to arrange your gadget/ widget as you want.

follow these steps.


1. Log in to blogger account and Go to Design >> Edit HTML
    (make sure backup your template first)

2. Put checked mark in Expand Widget Templates

3. Now you have to press  Ctrl+F  key and type the unique  title that you gave to gadget or widget.
Lets say you gave title as Subscribe, the code will show like this.

<b:widget id='HTML1' locked='false' title='Subscribe' type='HTML'>
<b:includable id='main'>
<!-- only display title if it's non-empty -->
<b:if cond='data:title != ""'>
<h2 class='title'><data:title/></h2>
</b:if>
<div class='widget-content'>
<data:content/>
</div>
<b:include name='quickedit'/>
</b:includable>


So,code start with <b:includable id=’main’>  and end with </b:includable>
you have to find this both code.
lets see how to show this gadget in specific pages.

How to show blogger gadget in home page and other pages.(Except post pages.)

So,show gadget in home page and other pages.You have to add that red code like below.

<b:includable id='main'>
<b:if cond='data:blog.pageType == &quot;index&quot;'>
<!-- only display title if it's non-empty -->
<b:if cond='data:title != ""'>
<h2 class='title'><data:title/></h2>
</b:if>
<div class='widget-content'>
<data:content/>
</div>
<b:include name='quickedit'/>
</b:if>
</b:includable>


How to show blogger gadget in Post pages only.

<b:includable id='main'>
<b:if cond='data:blog.pageType == &quot;item&quot;'>
<!-- only display title if it's non-empty -->
<b:if cond='data:title != ""'>
<h2 class='title'><data:title/></h2>
</b:if>
<div class='widget-content'>
<data:content/>
</div>
<b:include name='quickedit'/>
</b:if>
</b:includable>


How to show blogger gadget in only specific page

<b:includable id='main'>
<b:if cond='data:blog.url == &quot;URL of the page&quot;'>
<!-- only display title if it's non-empty -->
<b:if cond='data:title != ""'>
<h2 class='title'><data:title/></h2>
</b:if>
<div class='widget-content'>
<data:content/>
</div>
<b:include name='quickedit'/>
</b:if>
</b:includable>


you can replace URL of the page with URL which you want to show the gadget only that page.

7. Now save your template
 you are done.
Enjoy Guys! and don’t forget to post your comments. � MyTricksTime.com

Customized and Stylized Subscription Widget

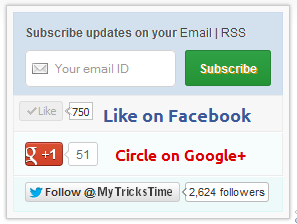
Many of this blog readers asked me which plugin/code I�m using in sidebar for Stylized Subscription Widget. So today I decide to share this with you! because It�s almost more than 2 months. I�ve not shared any Stylized Subscription for Widget Blogger and WordPress Widget.
Coming back to topic this widget simple uses HTML and CSS. 
It�ll keep your sidebar clean! ;) It contains FeedBurner Form, Twitter Follow Button, Facebook and Google buttons.

Adding Customized And Stylized Subscription Widget

You just need to place a code to your blog widget Follow following steps to add Customized and Stylized Subscription Widget to WordPress and Blogger both!
Adding Subscription Widget To Blogger
  1. Go to Dashboard > Design > Page Elements.
  2. Click Add A Gadget. In window, select HTML/Javascript .
  3. Copy the code below and paste it inside the box.
  4. Save the gadget. Drag the gadget and reposition it under Blog Posts gadget.
  5. Click Save button.
Adding Subscription Widget To WordPress
  1. Go to Dashboard > Appearance > Widgets > Available Widgets.
  2. Drag Text widget into a sidebar.
  3. Paste in the code.
  4. Save.

Code for Stylized Subscription Widget

<style>

#ABT-mashable-bar {
background-color: #f9f9f9; box-shadow: 0 0 3px #b0b0b0;
border:1px solid #ccc;
padding:6px;
width: 270px;

}

#subscribe-box .fb-like-box { border: 1px solid #EBEBEB; padding: 5px; background:#f7f7f7;}
#subscribe-box .gplusone { background: #f7fcfc; border: 1px solid #EBEBEB; border-top: 1px solid #fff; color: #000; font-size: 10px; line-height: 1px; padding: 9px 11px;}
#subscribe-box .twitter-follow { background: #eef9f9; border: 1px solid #dff6f6; border-top: 1px solid #fff; padding:5px 11px;}

#subscribe-box .email-box {
border-right: 1px solid #C7DBE2;
border-left: 1px solid #C7DBE2; background: #d3e0ed;

border: 1px solid #ccdaed; padding:11px; margin-bottom: -4px;}

#subscribe-box .email-box h4{color: #555;font-family: Arial;font-size: 12px; margin: 0 0 10px;}

#subscribe-box .email-box .txt,#subscribe-box .email-box .txt:focus{

border: 1px solid #d2d2d2;

color: #a19999; font-size: 12px;

border-radius: 5px;
-moz-border-radius: 5px;
-webkit-border-radius: 5px;

height:21px;

padding: 6px 28px 8px; width: 93px;

}

#subscribe-box .email-box .btn,#subscribe-box .email-box .btn:focus{ float:right;

margin-top: 0px;

background: #30a146; background: linear-gradient(top, #30a146 0%, #249334 100%); background: -moz-linear-gradient(top, #30a146 0%, #249334 100%); background: -webkit-gradient(linear, left top, left bottom, color-stop(0%, #30a146), color-stop(100%, #249334)); background: -webkit-linear-gradient(top, #30a146 0%, #249334 100%); text-shadow: 1px 1px 0 rgba(0, 0, 0, .4); font-weight:bold; font-family: "Droid Sans","Lucida Grande",Tahoma,sans-serif;

font-family: "Arial","Helvetica",sans-serif;
border-radius:3px;
-moz-border-radius:3px;
-webkit-border-radius:3px;
border:1px solid #248334 ;
color:white;
text-shadow:#d08d00 1px 1px 0;
padding:8.5px 10px;
margin-left:3px;
font-weight:bold;
font-size:12.2px;
cursor:pointer;
border-image: initial;}

#subscribe-box .email-box .btn:hover{

opacity: .8;
border-radius:3px;
-moz-border-radius:3px;
-webkit-border-radius:3px;
border:1px solid #248334 ;
color:#FFFFFF;
text-shadow:#d08d00 1px 1px 0}

</style>

<div id="ABT-mashable-bar">
<div id="subscribe-box">
<div class="email-box">
<h4>Subscribe updates on your <a href="http://feedburner.google.com/fb/a/mailverify?uri=
MyTricksTime" target="_blank">Email</a> | <a href="http://feeds.feedburner.com/MyTricksTime" target="_blank">RSS</a></h4>
<form action="http://feedburner.google.com/fb/a/mailverify" method="post" onsubmit="window.open('http://feedburner.google.com/fb/a/mailverify?uri=
MyTricksTime', 'popupwindow', 'scrollbars=yes,width=700px,height=700px');return true" target="popupwindow">
<input class="txt" style="background: #FFF url('http://i.imgur.com/2BCD0.png') no-repeat 6px !important;" onfocus="if (this.value == 'Your email ID ') {this.value = '';}" onblur="if (this.value == '') {this.value = 'Your email ID ';}" type="text" name="email" value="Your email ID " />

<input type="hidden" name="uri" value="
MyTricksTime" />

<input type="hidden" name="loc" value="en_US" />

<input class="btn" style="margin-left: 4px;" type="submit" value="Subscribe" />
<div style="clear: both;"></div>
</form></div>

<div class="fb-like-box"><iframe style="border: none; overflow: hidden; width: 80px; height: 21px;" src="//www.facebook.com/plugins/like.php?href=http%3A%2F%2Fwww.facebook.com%2
MyTricksTime&send=false&layout=button_count&width=80&show_faces=false&action=like&colorscheme=light&font&height=21" frameborder="0" scrolling="no" width="320" height="240"></iframe><a style="color: #3b5998; font-family: ubuntu; font-size: 18px; font-weight: bold; line-height: 20px;" href="http://www.facebook.com/MyTricksTime" rel="nofollow" target="_blank"> Like on Facebook </a>
<div class="clear"></div>
</div>

<div class="gplusone">
<div style="float: left; width: 90px;">
<div id="___plusone_0" style="height: 24px; width: 106px; display: inline-block; text-indent: 0pt; margin: 0pt; padding: 0pt; background: none repeat scroll 0% 0% transparent; border-style: none; float: none; line-height: normal; font-size: 1px; vertical-align: baseline;"><iframe id="I1_1322986463651" style="position: static; left: 0pt; top: 0pt; width: 106px; margin: 0px; border-style: none; height: 24px; visibility: visible;" title="+1" name="I1_1322986463651" src="https://plusone.google.com/_/+1/fastbutton?url=http%3A%2F%2Fwww.MyTricksTime.com%2F&size=standard&count=true&annotation=&hl=en-US&jsh=m%3B%2F_%2Fapps-static%2F_%2Fjs%2Fwidget%2F__features__%2Frt%3Dj%2Fver%3D-8uDua_W7bo.en_GB.%2Fsv%3D1%2Fam%3D%218NuGo4ypxRCIwtBaLA%2Fd%3D1%2F#id=I1_1322986463651&parent=http%3A%2F%2Fwww.
MyTricksTime.com&rpctoken=511986996&_methods=onPlusOne%2C_ready%2C_close%2C_open%2C_resizeMe" frameborder="0" marginwidth="0" marginheight="0" scrolling="no" width="100%" height="240"></iframe></div>
</div>
<a style="color: #dd0000; font-family: ubuntu; font-size: 16px; font-weight: bold; line-height: 24px;" href="https://plus.google.com/
102588571388484646448" rel="author" target="_blank">Circle on Google+</a>
<div class="clear"></div>
<!-- Place this render call where appropriate -->

<script type="text/javascript">// <![CDATA[
(function() {

var po = document.createElement('script'); po.type = 'text/javascript'; po.async = true;

po.src = 'https://apis.google.com/js/plusone.js';

var s = document.getElementsByTagName('script')[0]; s.parentNode.insertBefore(po, s);

})();
// ]]></script></div>
<div class="twitter-follow">
<iframe style="width: 300px; height: 20px;" title="" src="http://platform.twitter.com/widgets/follow_button.html#_=1322986464549&button=blue&id=twitter-widget-22&lang=en&screen_name=
MyTricksTime" frameborder="0" scrolling="no" width="320" height="240"></iframe>

<script type="text/javascript" src="//platform.twitter.com/widgets.js"></script></div>
<div id="mashable" style="height: 12px; background: #f9f9f9; border: 0px solid #CCC; border-top: 1px solid white; text-align: right; border-image: initial; font-size: 10px;"><span class="author-credit" style="font-family: Arial, Helvetica, sans-serif;"><a href="http://www.MyTricksTime.com" target="_blank">Widget �</a></span></div>
</div>
</div>
If you face any problem with code. Please Let Us Know Contact US

Customization!

Due to some issue. I can�t highlight changes you�ve to make in above code. Hope you won�t mind ;) . Now look for bold letter above and replace it with your Username, IDs like;
  • Replace MyTricksTime with your feedburner Feed URL.
  • Replace MyTricksTime with your facebook Page URL.
  • Replace MyTricksTime with your twitter url.
  • Replace www.MyTricksTime.com with your blog URL.
  • And at least replace https://plus.google.com/102588571388484646448 with your Google+ Profile Link.

Credits!

This widget is first shared on MyTricksTime. Readers are requested to link back if you�re going to share this widget on their blog!
That�s all. I hope you�ll like this widget. Let me know if I missed anything or you face any issue!
Happy Blogging :D
Enjoy Guys! and don’t forget to post your comments. � MyTricksTime.com

7 Killer SEO Steps to Optimize Your Website in SERP

SEO optimize your blog or make it appear on top Search Engine Results to enhance the traffic on your site.
Basically, the thing matters here, is to figure out the keywords on which you want the visitors to reach your site through Search Engine Results Page (SERP).
If you are new to blogging and SEO in particular, you should be aware of some basic SEO tips to improve your site�s ranking in the SERPs.

7 Killer SEO Steps to Optimize Your Website in SERP

1. Keywords in Title Tag

Title Tag is one of the most significant elements to position your webpage higher in your chosen keyword. This tag gets visible in the clickable link on the SERPs. It�s better to start your title with a long-tail keyword having less competition. Try to use your Keyword within the range of 65 characters, as search engine don�t consider anything after 65 character limit. Don�t repeat your Keyword in your title; otherwise your site could be penalized.

2. Use Keywords in Header Tags

Header tags are one of the most imperative On-page search engine optimization factors. Use the similar keywords in all heading tags. This way, you can easily bring focus of the page on a sole keyword while getting superiority in the Search Engines. You should better utilize your main keyword in first heading tag while trying to keep the Keyword at first.

3. Use Keywords in Image Alt tag

Images can express many words but SE Spiders don�t translate images, they only read the alt tag to understand the image with textual description. Therefore, it is vital to provide a significant description of an image with using keywords. It will optimize the images used in your content and rank them higher in image searches.

4. The Power of Internal Linking

One significant factor of SEO that is often ignored is Internal Linking. The better approach is to reactivate and revitalize the old posts in archive, as compared to link them in your fresh posts. Don�t miscalculate the authority of internal linking in the distribution of page rank.

5. Links from Directories

Planting in directories, such as Yahoo, DMOZ and other article and content listings can be quite helpful to achieve positive ranking overall. Some people believe that it�s not possible to list your content on DMOZ, especially if you don�t have much credible data, but if you could, it may bring you positive results.

6. Use Meta Description

Though Google is now giving less importance to meta-tags, there are two meta-tags that still matter in SEO, But, Meta description Tag still has importance from a human and search engine perspective. Description meta-tag is what you use to illustrate your website. In fact, this description is what the visitors see when your site appears on the search results.

7. Use Keywords Meta Tag

Fill your Keyword tags with relevant keywords while avoiding replicas and Keyword stuffing. The Keywords you mention in the keyword tag should be relevant to the context of your page. Keywords used in meta-keywords-tag must somehow appear somewhere within the body of text. Otherwise, your webpage can be penalized for irrelevant content.

Enjoy Guys! and don’t forget to post your comments. � MyTricksTime.com

How To Get Maximum Benefit From Your Guest Post

Getting more and more traffic is a dream of all bloggers. This dream comes true only when you do hard work properly. Blogging is not an easy job to do. Well it�s not so hard when you do it properly. Guest posting is really a superb way to get maximum traffic to your blog. But if you don�t know how to guest post and where to guest post than your guest post will not generate a good number of traffic to you. There are some secret tips and some guidelines which you have to follow and you will absolutely get a good number of traffic towards your blog.

1. Choose A Right Blog

This is most important part to get maximum benefit from your guest post. The blog must have PR (Google PageRank) Must be 3 or greater. Alexa rank must be less than 1 lack. This blog (ComLuv) is a heaven of guest blogger and you will get a huge lot of traffic from here so this is a highly recommended blog for guest posting. If you choose a worst blog which have no traffic then definitely you are not getting even a single visitor to your blog from it so be safe that the blog you choosen for guest post is right and it will bring you a good traffic.

2. Content Is King

I think you heard this sentence at least 20 times before you started blogging and now again. Why it�s so important? It�s because readers read the blog for getting knowledge not for wasting their time. Why the content of a guest post must be quality? It�s because you have to get approval for the post to be live on that blog. Its not the only reason but there is a more. If you will write superb content then the post will be popular on that blog for sure. It will be in light and more people will attract to it. They will read your post and will be impressed from it. They would like to read more posts by you and your blog have them so readers will go to your blog.

3. Building Backlinks

Backlinks give you help in two ways. They attract new readers to your blog and they also help in Search Engine Optimization. To rank first in search engines, High PR backlinks are necessary to have and they are also hard to build. So choose a blog which gives you minimum 2 backlinks in author bio and 1 in article.

4. Author Bio

First impression is last impression.� Your bio must be spectacular and your blog�s link must be there. If people like your post then they will surely like to know more about you and connect with you and your blog to get such unique articles daily so try to make an author bio which attracts people use catchy words in it. You are about to get maximum so you also have to do maximum. Make the author bio blossom so people will surely like to visit your blog.

My Final Words

In every job you have to work hard and in blogging you also have to do so. No one can lead success without hard work. Do as more as you can for your blog and one day you will be in top. Yes, never lose hope. �Try and try but don�t cry.� Here is another small tip that before you put your post for review, Do read it as a visitor of a blog not like you who wrote the post. Check the post as someone else written it and you are reading it. Do change where you think its need to be changed and that�s it. So now do the guest post and get maximum benefit from it.
Enjoy Guys! and don’t forget to post your comments. � MyTricksTime.com