Realtime Online Visitor Counter Inside Browser For Any Website


Here is the Great Stat counter plugin & extension for browser which will show your online visitors it will count and show you in written form without do any thing no need to install widgets into blog or websites.
you just need to install this extension inside your browser any brows it�s available for chrome and Firefox if you will install so it can count online visitors on website.

About Extension & Developers

This extension interfaces with http://whos.amung.us. If you use our widget on your website, the extension gets how many users are on your website and puts the count in your browser bar. To configure this after it has been installed, open up the options page for the extension, and enter your 8-12 character key which is found in the html or javascript code you were given. Save options, and soon thereafter your user count will be updated in real time

Get it for Firefox Here

Shows how many people are currently on your website in accordance with our widget use. Visit our website for more info.
Just install this into Firefox once you have installed this restart your Firefox you can see the online visitors stat on the bottom of the browser bar.

Get it for Google Chrome Click Here

Free Realtime Visitor Counter plugin details
Now you can see live visitor stat and count how much live peoples online are seeing page on a website or blog with a free and open source firefox extension i don�t think it is available for chrome but i has shared a link for firefox it is open source and free for every one.

Once it is installed you can see a tab in topbar and open any website then you will be able to see how much peoples are online on a website.
I hope you may like this tip it is also one of good blogging tool.

Enjoy Guys! and don’t forget to post your comments. � MyTricksTime.com

HOW TO ADD BORDER TO POST TITLES

Add Border To Post Titles in Blogger: Let’s play with CSS and change the border of post titles in Blogger.You may have noticed the blog titles comes with “text-decoration:none” by default , in simple words no style is applied to the titles of the Blog Posts.Actually we can change the post titles and can decorate it with different CSS
properties but here we gonna apply the border ! Border can be “groove” , “Solid” , “dashed” , or “dotted” having a specific color code and number of pixels.Don’t confuse it is as easy as eating cake.

How To Add Border To Post Titles

  • Go To Blogger Dashboard
  • Click On Template
  • EDIT HTML
  • Search for post-title or .post or only “post”
  • Search until you find the selector “Post Title” as shown below


  • Look at the above snapshot i added there the border Property i.e “border:groove 1px and color” Change these values to your desired values and save the template.You can even change the color of the post title just by simply changing the color code of “COLOR” property in the above script.
  • However here we have selected the border color Groove having gray color and width 1pixel.
  •  That’s it !!

 Note : In many templates the POST TITLE Selector is .post-title but if you can’t find or if this selector is not available then you have to find the exact and matchable selector i.e the selector which matches with the class or ID defined in the div tags! 

 
What’s Up : Actually this hack will add a gray color border to all the post titles having 1 pixel width ,actually it adds 5 stars to the beauty and style of template.It has no effect on blog loading speed.Stay Blessed ,Happy Blogging!

Enjoy Guys! and don’t forget to post your comments. � MyTricksTime.com

A Simple Related Posts Widget For Blogger


In the last tutorial, i’ve been talking about the Related Posts widget that shows related posts along with thumbnails just at the end of your blog articles. Some of the users, however,
would prefer a simpler and cleaner displaying of their related posts so that it would show just the posts titles. So let’s begin adding it!

DEMO BELOW

How to add Related Posts Widget to Blogger


Step 1. Go to Template >> Edit HTML and tick the “Expand Widget Templates” checkbox

Step 2. Find the below tag

</head>


Step 3. And just above it, paste the following code:


<!–Related Posts Scripts and Styles Start–>
<!–Remove–><b:if cond=’data:blog.pageType == &quot;item&quot;’>
<style type=’text/css’>
#related-posts {
float:center;
text-transform:none;
height:100%;
min-height:100%;
padding-top:5px;
padding-left:5px;
margin-top: 20px;
}
#related-posts .widget{
padding-left:6px;
margin-bottom:10px;
}
#related-posts .widget h2, #related-posts h2{
font-size: 17px;
font-weight: normal;
color: black;
font-family: Arial Narrow;
margin-bottom: 0.75em;
padding-top: 0em;
}
#related-posts a{
font-size:16px;
color: #555555;
font-variant:small-caps;
}
#related-posts a:hover{
text-decoration: none;
color: #ffffff;
font-weight: bold;
}
#related-posts ul{
list-style-type:none;
margin:0 0 0px 0;
padding:0px;
text-decoration:none;
text-color:#000000
}
#related-posts ul li{
list-style-type: none;
border-left: 2px solid #1399CF;
border-bottom: 1px dotted #1399CF;
margin-bottom: 3px;
padding-left: 30px;
padding-top:0px;
}

#related-posts ul li:hover{
background-color: #1399CF;
border-left: 2px solid #B3CA3D;
border-bottom: 1px dotted #B3CA3D;
}
</style>
<script type=’text/javascript’>
var relatedpoststitle=&quot;Related Posts&quot;;
</script>
<script src=’http://helplogger.googlecode.com/svn/trunk/related_posts.js’ type=’text/javascript’/>
<!–Remove–></b:if>
<!–Related Posts Scripts and Styles End–>


Note:
– if you want to change the size and color of ‘Related Posts’ title, change the bolded values (17for the font size and black for the color)

-to change the related post title color, replace the value in red;
-to change the background color on mouseover, replace the color value in blue;

Step 4. Now find (CTRL + F) the below line:

    <div class=’post-footer’>


Step 5. Just above it, paste the code below:

<!– Related Posts Code Start–>
<!–Remove–>
<b:if cond=’data:blog.pageType == &quot;item&quot;’>
<div id=’related-posts’> <b:loop values=’data:post.labels’ var=’label’> <b:if cond=’data:label.isLast != &quot;true&quot;’> </b:if> <b:if cond=’data:blog.pageType == &quot;item&quot;’> <script expr:src=’&quot;/feeds/posts/default/-/&quot; + data:label.name + &quot;?alt=json-in-script&amp;callback=related_results_labels&amp;max-results=6&quot;’ type=’text/javascript’/></b:if></b:loop>
<script type=’text/javascript’> var maxresults=5; removeRelatedDuplicates(); printRelatedLabels(&quot;<data:post.url/>&quot;); </script> </div> <!–Remove–></b:if> <!– Related Posts Code End–>


Note: In order to change the number of maximum related posts being displayed for each label, search for the code max-results=5 and change the number “5” to any desired number.
Step 6. Save Template

Enjoy Guys! and don’t forget to post your comments. � MyTricksTime.com

Add Facebook Like Button To Blogger Posts


Hello Friends,
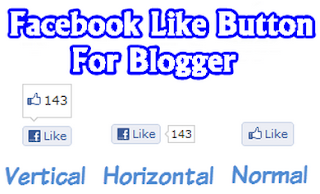
Today is Last Date of this February and after many Days I going to share a small blogger widget (Facebook Like Button). Is is the most common widgets used by millions of Bloggers around  the World.As we all know facebook is one of the largest social media company in the word.If your blog have any fan page then it will help you a lot in increasing traffic on your blog. We are giving all types of facebook like buttons.i.e. vertical count,horizontal count and without count.You can add this button just below of of post tile and below of the post.Just follow my instructions carefully….


Note – This button will not like your fan page it will like and share your post

How To Add Facebook Like Button To Blogger Posts?

  1. Go to Blogger Dashboard > Design > Edit HTML
  2. First take a backup of your template
  3. Tick  the expand widget check box
  4. Find for below code in your template

<data:post.body/>


If you wish to add like button just below of post title the add the below code just before of<data:post.body/>

and if you wish to add this like button just below of your post then add below code justbelow of <data:post.body/>

Facebook Like Button Styles


You can add like button in three styles :


  • Vertical Count
  • Horizontal Count
  • Without Count


1. Vertical Count


<b:if cond=’data:blog.pageType != &quot;static_page&quot;’> <iframe allowTransparency=’true’ expr:src=’&quot;http://www.facebook.com/plugins/like.php?href=&quot; + data:post.canonicalUrl + &quot;&amp;send=false&amp;layout=box_count&amp;show_faces=false&amp;width=55&amp;action=like&amp;font=arial&amp;colorscheme=light&amp;height=62&quot;’ frameborder=’0′ scrolling=’no’ style=’border:none; overflow:hidden; width:55px; height:62px;’/> </b:if>


2. Horizontal Count


<b:if cond=’data:blog.pageType != &quot;static_page&quot;’> <iframe allowTransparency=’true’ expr:src=’&quot;http://www.facebook.com/plugins/like.php?href=&quot; + data:post.canonicalUrl + &quot;&amp;send=false&amp;layout=button_count&amp;show_faces=false&amp;width=90&amp;action=like&amp;font=arial&amp;colorscheme=light&amp;height=21&quot;’ frameborder=’0′ scrolling=’no’ style=’border:none; overflow:hidden; width:90px; height:21px;’/> </b:if>


3. Without Count


<b:if cond=’data:blog.pageType != &quot;static_page&quot;’> <iframe allowTransparency=’true’ expr:src=’&quot;http://www.facebook.com/plugins/like.php?href=&quot; + data:post.canonicalUrl + &quot;&amp;send=false&amp;layout=standard&amp;show_faces=false&amp;width=450&amp;action=like&amp;font=arial&amp;colorscheme=light&amp;height=35&quot;’ frameborder=’0′ scrolling=’no’ style=’border:none; overflow:hidden; width:450px; height:35px;’/> </b:if>


If you faced any problem, please do not hesitate to let me know. 🙂

Enjoy Guys! and don’t forget to post your comments. � MyTricksTime.com

Google Drive Can Now Host Your Static Webpage

Google Drive has turned on a feature that lets the cloud storage service become a limited web host.

It’s long been possible to allow others to access data stored in the service, which can produce a URL for files. The new tweak means it’s possible to ask for a �Preview� of an HTML file stored in Google Drive. Doing so renders the page and produces a URL that, once copied and pasted, can be used by anyone to access the page.

The feature is sophisticated enough that a quick bit of coding produced this page, with a lengthy JavaScript and graphics stored in the same Google Drive folder appearing just as the code intends. We’ve not tested the promised ability to handle CSS.

The Cloud Storage provider’s have not said how far the service will scale, but it seems unlikely that will be much of a problem given this is hardly a heavyweight hosting platform. Google’s not alone in offering a simple service: Amazon Web Services allows users of its simple storage service to serve static HTML from the �buckets� it uses to contain files.

Amazon charges for the privilege of doing so. Google does not, unless one uses paid versions of its Apps.

In these days of widget-populated free blogging platforms and Facebook it is hard to imagine a stampede towards this new service. Developers, however, may appreciate the extra collaborative opportunities it presents.
Enjoy Guys! and don’t forget to post your comments. � MyTricksTime.com