But over the coming weeks i have lined up some very unique Slideshow options including the one in this post that not only can slide through images but also accepts html as slides !
The main advantage of this is you can actually have YouTube videos (Or Any Videos) as part of the slideshow.That’s not a thumbnail or image linking to the video it’s the actual video that can be played within the slideshow, How cool is that.
The slider is called the ‘Anything Slider’ and was created by Chris Coyier of Css Tricks, Check them out.There are tons more features but first Lets look at the live demo, you will notice every second slide i have set to be a video.

As you will have seen the slideshow has some cool extra features on the face such as it is both auto scroll and manual scroll, numbered tabs to jump to each slide are below, a start stop option is also available, the slide will also stop when your cursor hovers over a slide.
Add The Anything Slider To Blogger
Step 1. In Your Blogger Dashboard Click Design > Edit Html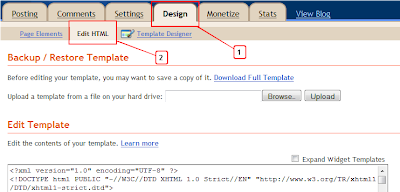
Step 2. Find the following piece of code in your blogs Html : (Click Ctrl and F for a search bar to help find the code – More Info)
]]></b:skin>
Step 3. Copy and paste the following code directly Above / Before ]]></b:skin>
/*
AnythingSlider v1.4
By Chris Coyier: http://css-tricks.com
with major improvements by Doug Neiner: http://pixelgraphics.us/
based on work by Remy Sharp: http://jqueryfordesigners.com/
*/
/******* SET DEFAULT DIMENSIONS HERE ********/
div.anythingSlider {
margin: 0 auto;
}
/****** SET COLORS HERE *******/
/* Default State */
div.anythingSlider .thumbNav a.cur, div.anythingSlider .thumbNav a {
background: #777;
}
div.anythingSlider .anythingWindow {
border-top: 3px solid #777;
border-bottom: 3px solid #777;
}
/* Active State */
div.anythingSlider.activeSlider .thumbNav a.cur, div.anythingSlider.activeSlider .thumbNav a {
background-color: #7C9127;
}
div.anythingSlider.activeSlider .anythingWindow {
border-color: #7C9127;
}
/**** DO NOT CHANGE BELOW THIS LINE ****/
/* anythingSlider viewport window */
div.anythingSlider .anythingWindow {
overflow: hidden;
position: relative;
width: 100%;
height: 100%;
}
/* wrapper: 45px right & left padding for the arrows, 28px @ bottom for naviagation */
div.anythingSlider {
position: relative;
padding: 0 45px 28px 45px;
}
/* anythingSlider base UL */
ul.anythingBase {
background: transparent;
list-style: none;
position: absolute;
top: 0; left: 0;
margin: 0;
}
ul.anythingBase li.panel {
background: transparent;
display: block;
float: left;
padding: 0;
margin: 0;
}
/* Navigation Arrows */
div.anythingSlider .arrow {
top: 50%;
position: absolute;
display: block;
}
div.anythingSlider .arrow a {
display: block;
height: 120px;
margin-top: -60px;
width: 45px;
text-align: center;
outline: 0;
background: url(http://1.bp.blogspot.com/-GFdaM-H1TYo/TdCQntHQapI/AAAAAAAAD2w/ryWohRj6nqk/s1600/arrows-default.png) no-repeat;
text-indent: -9999px;
}
div.anythingSlider .forward { right: 0; }
div.anythingSlider .back { left: 0; }
div.anythingSlider .forward a { background-position: 0 -40px; }
div.anythingSlider .back a { background-position: -88px -40px; }
div.anythingSlider .forward a:hover, div.anythingSlider .forward a.hover { background-position: 0 -240px; }
div.anythingSlider .back a:hover, div.anythingSlider .back a.hover { background-position: -88px -240px; }
/* Navigation Links */
div.anythingSlider .thumbNav { margin: 0; }
div.anythingSlider .thumbNav li { display: inline; }
div.anythingSlider .thumbNav a {
color: black;
font: 11px/18px Georgia, Serif;
display: inline-block;
text-decoration: none;
padding: 2px 8px;
height: 18px;
margin: 0 5px 0 0;
background-image: url(http://4.bp.blogspot.com/-pd65Ao94js4/TdCOO4r6x_I/AAAAAAAAD2o/1xcQwMVsJDA/s1600/cellshade.png);
background-repeat: repeat-x;
text-align: center;
outline: 0;
-moz-border-radius-bottomleft: 5px;
-moz-border-radius-bottomright: 5px;
-webkit-border-bottom-right-radius: 5px;
-webkit-border-bottom-left-radius: 5px;
}
div.anythingSlider .thumbNav a:hover { background-image: none; }
/* slider autoplay right-to-left, reverse order of nav links to look better */
div.anythingSlider.rtl .thumbNav a { float: right; } /* reverse order of nav links */
div.anythingSlider.rtl .thumbNav { float: left; } /* move nav link group to left */
/* div.anythingSlider.rtl .start-stop { float: right; } */ /* move start/stop button – in case you want to switch sides */
/* Autoplay Start/Stop button */
div.anythingSlider .start-stop {
z-index: 10;
background: green url(http://4.bp.blogspot.com/-pd65Ao94js4/TdCOO4r6x_I/AAAAAAAAD2o/1xcQwMVsJDA/s1600/cellshade.png) repeat-x center top;
color: white;
padding: 2px 5px;
width: 40px;
text-align: center;
text-decoration: none;
float: right;
-moz-border-radius-bottomleft: 5px;
-moz-border-radius-bottomright: 5px;
-webkit-border-bottom-right-radius: 5px;
-webkit-border-bottom-left-radius: 5px;
}
div.anythingSlider .start-stop.playing { background-color: red; }
div.anythingSlider .start-stop:hover, div.anythingSlider .start-stop.hover { background-image: none; color: #ff0 }
/*end slider css http://www.spiceupyourblog.com for info*/
Note – Width And Height Are Highlighted At The Top Of The Code and can be easily changed.Those comfortable enough to do so can also change some of the appearance options.
Step 4. Find the following piece of code in your blogs Html : (Click Ctrl and F for a search bar to help find the code – More Info)
</head>
Step 5. Copy and paste the following code Directly Above / Before </head>
<script src=’http://ajax.googleapis.com/ajax/libs/jquery/1/jquery.min.js’ type=’text/javascript’/>
<script src=’http://spiceupyourblogextras.googlecode.com/files/jquery.easing.1.2.js’ type=’text/javascript’/>
<script charset=’utf-8′ src=’http://spiceupyourblogextras.googlecode.com/files/jquery.anythingslider.js’ type=’text/javascript’/>
<script type=’text/javascript’>
var slider2 = ['Recipe', 'Quote', 'Image', 'Quote #2', 'Image #2'];
function formatText(index, panel) {
return slider2[index – 1];
}
$(function () {
$('#slider1').anythingSlider({
width : 800, // Override the default CSS width
easing: 'easeInOutExpo'
});
$('#slider2').anythingSlider({
width : 600, // if resizeContent is false, this is the default width if panel size is not defined
height : 350, // if resizeContent is false, this is the default height if panel size is not defined
resizeContents : false, // If true, solitary images/objects in the panel will expand to fit the viewport
autoPlay : false, // This turns off the entire slideshow FUNCTIONALY, not just if it starts running or not
navigationFormatter : formatText // Format navigation labels with text
})
$("#slide-jump").click(function(){
$('#slider2').anythingSlider(4);
return false;
});
});
</script>
<!–end slider scripts info : http://www.spiceupyourblog.com/–>
Step 5. Save your template.
We have now added the Css, jQuery and javascript to make the Featured Slider work next we need to add the actual content.
Adding The Slider And Content
You will want to add the slider below your header across your blog.This position is known as ‘crosscol’ or Cross Column.
Some templates may not have that section available, if your blog doesn’t you can see how to make it available here – Full Width Cross Column Gadget.
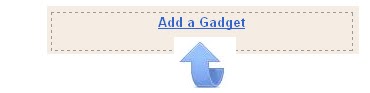
We all have it now so you can click ‘Add A Gadget’ and choose ‘Html/Javascript’.
Adding slides could not be easier, in your html/javascript gadget you add an opening tag which is <ul id=”slider1″> at the top and a closing tag </ul> at the bottom and the images or videos go in the middle wrapped in list tags :
<ul id=”slider1″>
<li>Place Image Or Video Code Here</li>
<li>Place Image Or Video Code Here</li>
<li>Place Image Or Video Code Here</li>
<li>Place Image Or Video Code Here</li>
<li>Place Image Or Video Code Here</li>
<li>Place Image Or Video Code Here</li>
<li>Place Image Or Video Code Here</li>
<li>Place Image Or Video Code Here</li>
<li>Place Image Or Video Code Here</li>
<li>Place Image Or Video Code Here</li>
</ul>
This is the code for the slider on the demo page :
<ul id=”slider1″>
<li><iframe width=”640″ height=”390″ src=”http://www.youtube.com/embed/FFVSa4HEW1k?rel=0″ frameborder=”0″ allowfullscreen></iframe></li>
<li><a href=”http://www.spiceupyourblog.com/”><img src=”http://2.bp.blogspot.com/-bw_c8KpBko4/TdK2lnRjg8I/AAAAAAAAD4A/A-RjX-DdeQw/s1600/slide-civil-2.jpg” alt=”” /></a></li>
<li><iframe width=”480″ height=”385″ src=”http://www.youtube.com/embed/DbtrJmjXMOk?rel=0″ frameborder=”0″ allowfullscreen></iframe></li>
<li><a href=”http://www.spiceupyourblog.com/”><img src=”http://3.bp.blogspot.com/-xPits9ZP8Z0/TdK2yoE0JaI/AAAAAAAAD4I/0DhxMUWbQEw/s1600/slide-civil-1.jpg” alt=”” /></a></li>
<li><iframe width=”640″ height=”390″ src=”http://www.youtube.com/embed/bz9LOf9j-DA?rel=0″ frameborder=”0″ allowfullscreen></iframe></li>
<li><a href=”http://www.spiceupyourblog.com/”><img src=”http://2.bp.blogspot.com/-6A5FpvDIeYA/TdK2_sYHuHI/AAAAAAAAD4Q/YzR7KrrWDEo/s1600/slide-env-2.jpg” alt=”” /></a></li>
</ul>
Highlighted in yellow you can see how the videos were added and highlighted in red you can see how the images were added.That’s it, a unique jQuery featured slider for both images and video.
Thanks to Css Tricks for the very cool Slideshow and there is actually another few versions of this slider we may cover in the future.
Drop Your Comments And Questions Below.