Offline Blogging With Windows Live Writer

Windows live writer
Yes! you can blog offline. With growing technology like Windows Live Writer blogging is no more limited to your dashboard. You can write, save and publish posts right from your computer without signing in your blogger account. Blogger HTML editor lacks many features when it comes to writing a good looking post. On contrary windows live writer is a software built by Microsoft Corporation which contains every feature that Blogger lacks.
I hate blogging without Windows Live Writer! I am sure many bloggers would agree with me on this point.
Some of the things you can�t do with Blogger HTML editor are,

  • You can not write HTML code just the way it looks in blogger editor because the code is interpreted as a command and blogger editor converts it to how it may look in a browser.
  • You can�t resize an image to whatever size you like because you are provided with only three options i.e Small, Medium and Large size.
  • The font type and font size is limited.
  • You can not undo what you have done (Going backward).
  • You can�t align images to the left or right of your intro paragraph.
  • You can not add effects to your images, like shadow effect, rounded corners, emboss, blur etc.
  • You can not post an image in its original size
  • You can not insert tables in your posts because no table option exists
  • You can not open a link in a new window unless you edit the HTML
  • You can not add a world map to your posts
  • And much more�����

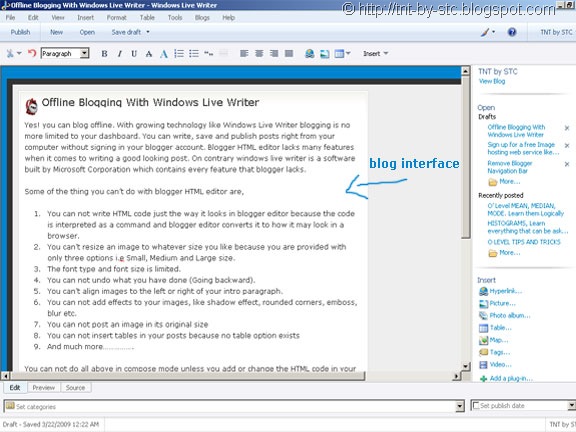
You can not do all above in a compose mode unless you add or change the HTML code in your HTML editor. But editing HTML would seem difficult for a newbie whilst pretty easy for a professional. Since most people like me have limited knowledge about editing HTML, blogger editor is of little use to all of us. Luckily! Windows Live Writer comes to our rescue. It can to do what ever blogger editor can not. It contains every feature a blogger is looking for. One of the best things I like about it is that it saves a copy of your blog interface/theme and when you write posts, it will be just like writing a post straight into your blog. See the image below to understand what I mean to say,
windows live writer interface
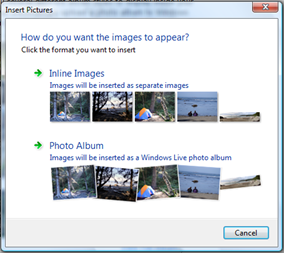
Moreover your images can be displayed in two different ways look below,
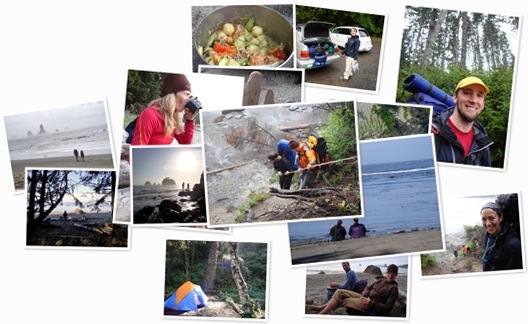
image thumbnail in windows live writerSelecting the photo album option will display your images in a scattered style (with a view album link below your scattered images),
Scattered album with windows live writer
So go and download it right now by clicking the link below.
DOWNLOAD WINDOWS LIVE WRITER NOW!
To download the Latest version directly from windows live site then click here
TROUBLESHOOT:
If you get an error saying that �your windows installer is out dated� then run the following setup (below) before windows live setup (above)
Download Latest Windows installer here

Create Blogger Backup For Images And Get Image URLs

Backup-Images-in-BloggerMany bloggers including some professional ones suggest to store Blogger images on services likewww.Photobucket.com , www.tinypic.cometc. but I really don�t understand why would someone do that when one has unlimited Image storage and bandwidth inside Picasa web albums that is where Blogger saves all your images. Well its time to change the way people use Blogger and we are here to let you help make better use of resources available to you.

Today I will share a different way of managing all your images in blogger by letting you know how to create a Backup for all your images and we will also learn how to get Unique URLs for images. This tutorial will also help you in reducing your blog load time by 40% i.e 150-200kb

To create an Image Backup you will need to do the following,

  • Go To Blogger
  • Create a draft Post and name it Backup For Images
  • Now start uploading all your images to blogger using the normal method. These images can be images that you have saved elsewhere and have link to it in your blogger template. For example: Background Image, Sidebar Headers, Icons, Header Background etc. If you scan your template you will find many image URLs inside the CSS part that starts from <b:skin> and ends at </b:skin>. An image URL/link can end as .gif  | .png  |  .jpeg   |  .bmp etc. Open each URL/link in your browser and save the image in your Hard Drive by right clicking on it and then choosing �Save Image As�
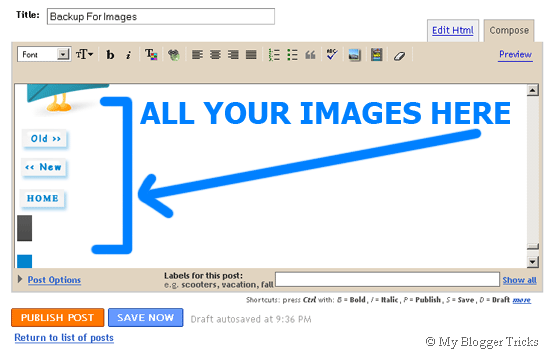
  • Once you have uploaded all your images, your backup will look like that of mine,

BACKUP FOR IMAGES

  • Now Comes the interesting part. In order to get Image URLs and use them somewhere inside your blog template or sidebar widgets, you will need to do the following,
    • Make sure you are using Firefox Browser
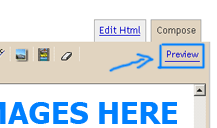
    • Click the Preview Link at the top-right corner of your Backup post

    Preview-link

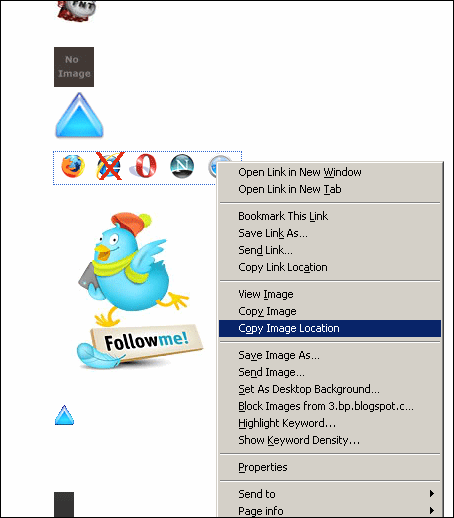
    • Once the images are displayed below the draft post, simply right click on your desired image and then choose �Copy Image Location�Copy-Image-Location
    • Now paste this Image URL inside your Browser Address bar,

Paste-Image-URL-in-Browser-

  • Your Image URL will look something like the one below,
http://4.bp.blogspot.com/_7wIwo/Spr1Lxjk6I/AABu0/uS0zY4/s400/MyTricksTime.jpg

The important part in this link is s400 . If you want the image to appear in full size then change s400 to s1600 . The image will appear in its original size.

Now this is how I store all my images and get their unique URLs. This way you will never loose images. By adding such image URLs to your blogger templates, you will observe a significant decrease in the load time of your blog.
I will publish a detailed post tomorrow on how to reduce Blog Load time. Make sure you don�t miss it.

13 Killer SEO Tips For Beginner Bloggers

13 killer SEO tipsAre you planning to launch a new website or blog, then you must know what the SEO is. SEO stands for Search Engine Optimization which means the process of improving the visibility of a website or a web page in the search engines like Google, Yahoo, Bing etc. via the paid or unpaid means. SEO may target different kinds of search including image search, local search, video search, academic search, news search and many more. You should not be successful in your career if don�t obey SEO plus it is necessary for every webmaster to be listed in top results and directory. Therefore, below I am going to share some tips and tricks which helps you in improving your website/Blog rank in Alexa and Google search.

Top 13 Killer SEO Tips and Tricks

1. Use of proper Meta Tags in your website or Blog
Meta tags is the special HTML tag that provides information about a Web page. Unlike normal HTML tags, meta tags do not affect how the page is displayed. Instead, they provide information such as who created the page, description of the site, rss, what the page is about, and which keywords represent the page’s content. Many search engines use this information when building their indices. for example:
<meta name=”description” content=”Find Quality Widgets For Blogger, Free Blogger Gadgets, Magazine Templates, Learn SEO and Blogging tips.” />
2. Use Rich Keywords according to your website niche
Well! keywords are words that are used to reveal the internal structure and niche of the website. We can use as many keywords to describe our website content like to describe Hacking website, we use hack,learn hacking,crack etc. in the meta tags..
3. Social Media
This is very important term in building the good repo in the search engines. Many websites such as Technorati, Digg, Stumbleupon, Facebook, Google Buzz, Twitter, Flickr etc. comes into play to do it. All you have to make an account at that sites and connect your site to them and start uploading articles to have an good increase in ranking.

4. Sharing your site with some Directories
Submit your website link to some directories such as DMoz, Bloggers Directory, Technorati etc.. to start seeing your articles results with them and people can explore it.

5. Internal Linking and External Linking to your website
We should clearly understand the balance of internal and external linking. Hence, we should inter-link website pages to each other to enjoy the flow of Page rank juice and use no follow tag to our external linking.

6. Unique and relevant Content
Google robots love to visit and enjoy unique content in order to serve its users with relevant and quality content. Good quality articles brings you a lot of traffic while posting same articles.

7. Reducing the Bounce rate of your website
Bounce rate means that how much visitors come to your website and skip. To Reduce it, you should follow some tips-
  • Attractive template and design of website 
  • Do not make your website a fish of ads and advertisements. 
  • Fast loading time is also an another factor. 
  • At last, Unique and good quality content.
8. Never rename your webpage name unless your website is new
For established and popular websites, renaming your webpages will kill your rank in the search engines, you are essentially starting from scratch in terms of SEO. So if you are redesigning your site, remember keep the old file names.

9. Link Building is also an another factor
In real, Google and Alexa determines sites repo and rank with the linking of the website with another. You can also buy links with some companies to enjoy good PR.

10. Easy Sharing
This means that you can make videos at YouTube and upload them to bring traffic, join Forums and doing tweetning at twitter and many more sites.

11. Ads and Advertisements
Now you can advertise your website with Google Adwords, Facebook ads etc. on the payment seats to bring more successful traffic and good SEO results to your website.

12. Submit your Website sitemaps to the popular search engines
Hence Sitemaps refers to the list of website posts and articles and submitting that to Google,yahoo,Bing will bring your all posts in search results by scrolling them.

13. Allow Guest Posting and play Contests
Start Guest posting by other people and give them chance to post on your website and enjoy a link to their websites. Also play contests on your website to engage people to take part in it and win prizes.
Note: If you implement of the above tips and tricks in your website, then you will definitely get a Google Page rank and good Alexa rank in short period of time. Thanks!

How To Create and Track Google Analytics Campaigns

Create and Track Google Analytics Campaigns
How To Create and Track Google Analytics Campaigns

Google Analytics is no doubt the No.1 Website Analytics service. It provides enterprise class services to its users at free of cost. Later in 2005, Google bought the Urchin Tracking Service and re-labeled it as Google Analytics. Nowadays, there is no website who doesn�t use the Google Analytics. 
Google Analytics does not just give you the analytics data of your site, but it gives you a thorough report of your site, which no other tracking service offers now. Being a Google Product, it has so many advanced features which lets you see the deeply insight data of your site. However, some users do not take advantage of such features and use it only to track the amount of visitors.

One of the feature provided in Google Analytics is, CampaignsUTM (Urchin Tracking Module) tagging allows you to track the source of the links and provides data accordingly. By suffixing your site URLs with UTM tags, you can track the usage of that specific link with Google Analytics. The normal URL of any webpage would look like this MyTricksTime.com

This way, the site owner can know the referral of the link if he has already added these parameters in the URL.

Creating the UTM Tags is easy and you don�t want to be a geek to get it done. All you need to have is the basic knowledge of URLs. Thereafter, Go to http://utm.to. It is an online service which allows you to easily create the Google Analytics UTM tags. Additionally, It provides shortlinks of the URLwith the parameter added. Follow these instructions on the UTM.to website in order to create the URL.

On the homepage of the UTM. To, you will find few fields. In the first field, fill in the URL of the webpage of which you want to be tagged with UTM tags. Then, in the Source field, enter the source of the site, e.g., MyBlogName, etc. Then, add the medium of the link, e.g., postlink or banner. You can enter anything here, as it doesn�t affect the process. After filling out all the fields, just press the Generate button. Voila ! You have now come up with a UTM tagged URL and you can grab the shortlink for that, too. 

This is a free of cost service provided by the UTM to website and it really helps the webmasters totrack their site usage and to get the most insight data of the site.You can also check out Top 5 Free Web Traffic Analytics Tools and Services

How can I edit labels on multiple posts at once?

The Edit Posts page includes options for displaying posts by label, and for applying or removing labels on batches of posts. To get there, visit the Posting | Edit Posts tab, or just click the Manage Posts link on your dashboard


This page has all labels in use by this bloglisted on the left-hand side. Each individual post also has its particular labels marked in green next to its title. By default, posts with all labels are shown.


 (Note: You’ll only see the labels here if you have at least one post already labeled. You can label an individual post on the posting form.)
If you click the label links on the left-hand side, the list of posts will be narrowed down to show only posts with that particular label.
Each post has a checkbox next to it. If you want to make a change to multiple posts, first check all the ones that you want to affect. Then select an option from the “Label Actions…” menu.


This menu includes options for adding any of your labels to the select posts, as well as for removing labels already on the posts. You can also select “New Label…” if you want to create a label that you don’t already have.
If you want to edit a label across all posts, you can do so by removing it and then adding a new one. For instance, say you want to change the label “Books” to “Reading.” Just follow these steps:

  1. Click the “Books” label link on the left side of the page.
  2. Click the “Select All” link at the top of the list of posts.
  3. From the “Label Actions…” menu, choose “Remove label > Books.”
  4. From the “Label Actions…” menu, choose “Apply label > New Label…”
  5. Enter “Reading” as your new label. (If you already have some posts with the label “Reading,” you can simply apply that label, without making a new label.)