Social Bookmarking Buttons With Spinning Effect for Blogger

Till now many social bookmarking widgets has been released for Blogger. Simply, social bookmarking buttons and icons helps you to make your blog socialize and get more traffic. Adding social bookmarking buttons is cool way to get more readers and targeted audience.

Before using social bookmarking option, you must be aware of icons design how much clickable is it. Your readers are likely to click social bookmarking button containing in your blog if they find the buttons really cool. If you haven’t such buttons, so here is something special for you.

Social bookmarking buttons with spinning hover effect. Buttons are cool itself and when your reader hover the mouse over it, it spins a round.

Here is how to add these cool buttons to your Blogger blog:

Login to Blogger > Design > Edit HTML > Expand widget templates. Find the following code in your template:

<data:post.body/>


Just below that add the following group of codes:

<b:if cond=’data:blog.pageType == “item”‘>
<div class=’spinning_icons’>
<a class=’twitter’ expr:data-text=’data:post.title’ expr:data-url=’data:post.url’ href=’http://twitter.com/share’ rel=’nofollow’ target=’_blank’ title=’Twitter’>Twitter</a>
<a class=’delicious’ expr:href=’&quot;http://del.icio.us/post?url=&quot; + data:post.url + &quot;&amp;title=&quot; + data:post.title’ target=’_blank’ title=’Delicious’>Delicious</a>
<a class=’digg’ expr:href=’&quot;http://digg.com/submit?phase=2&amp;url=&quot; + data:post.url + &quot;&amp;title=&quot; + data:post.title’ target=’_blank’ title=’Digg’>Digg</a>
<a class=’facebook’ expr:href=’&quot;http://www.facebook.com/sharer.php?u=&quot; + data:post.url + &quot;&amp;title=&quot; + data:post.title’ target=’_blank’ title=’Facebook’>Facebook</a>
<a class=’stumbleupon’ expr:href=’&quot;http://www.stumbleupon.com/refer.php?url=&quot; + data:post.url + &quot;&amp;title=&quot; + data:post.title’ target=’_blank’ title=’Stumbleupon’>Stumbleupon</a>
<a class=’rss’ href=’http://feeds.feedburner.com/hacktutors‘ target=’_blank’ title=’RSS’>RSS</a>
</div>
</b:if>


Replace hacktutors with your feedburner username. Again, find the following code:

]]></b:skin>


Just above that code, past the following:


.spinning_icons a{
    width:48px;
    height:48px;
    display:inline-block;
    text-indent:-9999em;
    background-position:0 0;
    background-repeat:no-repeat;
    z-index:2000;
    overflow:hidden;
}
.twitter{ background:url(‘http://4.bp.blogspot.com/-KxcARTmAlQI/TwCDycGOXVI/AAAAAAAABis/rBrMzmoyN6c/s1600/twitter_32.png’); }
.delicious{ background:url(‘http://4.bp.blogspot.com/-82J7zeYp1s8/TwCEN_HoAhI/AAAAAAAABkQ/t1wtld8lNA4/s1600/delicious_32.png’); }
.digg{ background:url(‘http://1.bp.blogspot.com/-MtS4dU0fY4A/TwCENEQUQvI/AAAAAAAABkE/glAaVSTKJDM/s1600/digg_32.png’); }
.facebook{ background:url(‘http://4.bp.blogspot.com/-Sxhuf0CW8OY/TwCEMpoaq0I/AAAAAAAABkA/PfhoKDMBcBQ/s1600/facebook_32.png’); }
.rss{ background:url(‘http://4.bp.blogspot.com/-Q5bYfx3dD2g/TwCEKQfYMQI/AAAAAAAABjw/XrXOvdFeZZs/s1600/rss_32.png’); }
.stumbleupon{ background:url(‘http://3.bp.blogspot.com/-hwn17i1SLNU/TwCEJNfyIWI/AAAAAAAABjo/TBb8oc2KHGs/s1600/stumbleupon_32.png’); }
.spinning_icons a:hover{
    transform: rotate(360deg);
    -webkit-transform: rotate(360deg);
        -moz-transform: rotate(360deg);
    transition: transform 0.2s ease-out;
    -webkit-transition: -webkit-transform 0.2s ease-out;
        -moz-transition: -moz-transform 0.2s ease-out;
}


Now save the template and your are done! Have a look at your cool new bookmarking button that appears at the bottom of your post.

Thanks to Paulund for this cool CSS3 bookmarking button spinning effect.
Enjoy Guys! and don’t forget to post your comments. � MyTricksTime.com

How Blog Design Manage your Readers and Visitors


When somebody visits your blog, he/she may just notice your blog design but not a content. If your visitor found the useful stuff, they may definitely return back to your blog for more important stuffs. Unfortunately, if they found your blog’s poor design, they may not return back again even you have most unique content.

I practically done many test to know how blog design effects our readers and visitors. And found the final conclusion. You have unique content to show it to your readers but if you haven’t care about your blog design then you are doing wrong.

I’ll show you why you are doing wrong even you are providing unique content and without caring the blog design. Some days before I started a new thread in Digital Point forum. I got many response from the peoples told that I have a good blog design!

Bad Design
The first time visitor never return back to the blog having poor design. In Digital Point forumone of the person ask for review of his blog. And here is one response:

Click on the Image to Enlarge


His design was not so good, thats why he got such kinds of response and feedback. The man who respond to his thread supposed that due to his bad blog design, he will never return back to that blog.

Good Design
Got a good blog design? Even if you have not good content on your blog, you can be listed on perfect web designers index! And this can be the good source of traffic, readers and visitors. Its better if you have both good design and unique content. Your first time visitor converts into loyal reader and subscriber as well. And this is how your can get lots of benefits by making attractive blog design!

Conclusion
Simply, you can increase the traffic by using time to design your blog. If you have poor design you must change it. After you done, ask for the blog review on Digital Point forum or any other you like. If you get the positive feedback, be happy and keep promoting your blog as usual. 

How about using the theme created by HackTutors? I already made 3 professional designed Blogger Template and here are they:

  1. Flash News Blogger Template
  2. Platinum Blogger Template
  3. Thesis Blogger Template

If you have checked my previous Blogger Templates, Thesis Blogger Template is the most popular template ever I created!
Enjoy Guys! and don’t forget to post your comments. � MyTricksTime.com

How Add a Reply Button To Blogger Comments

Hi friends you would have seen a reply button to each particular comment in wordpress blogs, and we also want blogger to add this feature in blogger comments and make blogger comments more useful.But they busy in adding more blogger features to blogger blogs to make it more easy and useful.As its not possible to make hack to have this reply button in blogger comments as wordpress blogs, but we have come with small hack like this to make reply button which would make look blogger comment system look better than before.

Other hacks to improve blogger comment system are highlight blog author comments andnumbering blogger comments which can be quite useful for you to make blogger comment system more useful and beautiful.

Now lets continue to how adding reply button to each comment in blogger.


Let now continue to tutorial how to add this to blogger comment system.

Step 1 : Go To dashboard Click Design > Edit Html > Tick the ‘Expand Widget templates’ box.

Step 2 : Press Ctrl + F and search for below code
<data:commentPostedByMsg/>


And place the below codes after it
.

<span><a expr:href=’&quot;https://www.blogger.com/comment.g?blogID=YOUR-BLOG-ID&amp;postID=&quot; + data:post.id + &quot;&amp;isPopup=true&amp;postBody=%40%3C%61%20%68%72%65%66%3D%22%23&quot; + data:comment.anchorName + &quot;%22%3E&quot; + data:comment.author + &quot;%3C%2F%61%3E#form&quot;’ onclick=’javascript:window.open(this.href, &quot;bloggerPopup&quot;, &quot;toolbar=0,location=0,statusbar=1,menubar=0,scrollbars=yes,width=450,height=450&quot;); return false;’>[Reply]</a></span>


You must need to change the YOUR-BLOG-ID with your blog id.Now how to get your blog id.Just got to blogger Design > Page Elements.
Now see for adress bar in your browser.You will get link like this.


Just get the id number in pink border and replace in the above code.And you have done now and just save your template.Now you will be able to see the reply button in each blogger comments.

Now Some customization to reply button.

Some users will like to want to keep reply button instead of text [reply].So just replace [Reply] in red in above codes with below image link and you will get reply image instead of that text.

<img src=”http://3.bp.blogspot.com/_v5IxGTiMTD8/TDDXeKfwaaI/AAAAAAAACe8/lI2Jj9VdMFs/s1600/reply%5B1%5D.gif”/>


Just to have your own image change the image link with yours to have your own image.

Advantages

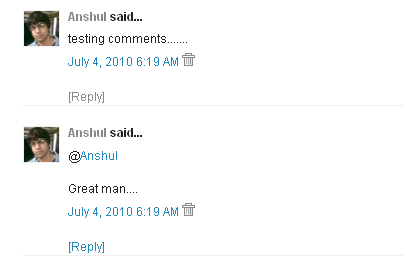
As now your readers just need to hit the reply button to any particular comment and a pop window will open like below and just need to write comment there and publish it.As it will make comments publish fast and easily.


Just type your comment after the text written in window above and publish it.

Comparison To WordPress

As in WordPress when doing comments using reply button, the comment get publish after the comment u replied to but in this hack the comment get publish as usual in last as blogger does, not like wordpress 🙂

But still i feel many will like this for sure to make look here blogger comment system look good and making easy for readers o reply.

If you have any further questions leave your comment below i will try to solve your issues.

Enjoy Guys! and don’t forget to post your comments. � MyTricksTime.com

Scroll Bar Widget For Blogger

Scroll Bar Widget For Blogger i.e to add a scrolling bar to sidebar of blogger text or labels if list is too long.This scroll bar helpful if you have so many categories or want many posts to be seen in short space.

Lets Make a Scrolling Bar menu for your Blog

First of all sign in your blog and go to Layout section. Now you have to click on Add a Page Element Where you want to add the scrolling bar widget.

Click Image To enlarge

Select HTML JAVASCRIPT to add the page element .

Now You have to add some html codes to his page element to show of the scroll bar menu widget to the sidebar of your blogger.


<div class=”widget-content”>
<ul style=”height:150px;width:150px; overflow:auto; “>

<li><a href=”http://www.MyTricksTime.com“>Your Text</a></li>
<li><a href=”http://www.MyTricksTime.com“>Your Text</a></li> <span style=”font-weight:bold;”></span>

</ul></div>

Copy this codes and paste it to page element and save it.

Now preview your blog.

You can change your links and text in the codes to show of yours links and posts.

Note:-In the codes you can edit height and width in red to adjust it to your blog.

replace www.MyTricksTime.com to your site

How Make Contact Form For Blogger

Hi friends as every blog uses contact page in there blog to allow readers to contact them for the queries and difficulties they face or wanting some help or wanna sponsor there site etc.Many use to write only there email id in contact page to contact them, but u need an form too to look more proffesional and make communication easy between you and your readers.As its now not difficult to add contact form to blogger as previously have to write codes for making form and then hosting it and all and then form get made.But now there are various sites started this service which give ready made forms to you.

What you have to do is just go to these sites, need to sign up there and get the codes for the form.After getting the codes just go to edit pages in your blog and make new page.There publish the codes to form and write also if you want to write something and publish it.Its very easy.

Services that provide you to use there contact forms for free.

1) Kontactr


Just go to this site.Sign up there,get the codes and add them to blogger pages and publish it to make an contact page.

2) Emailmeform


Just go there sign up and get the codes of form.As here you will get more features in form than other sites.As they also give option to every type of form and also an option for readers to upload some stuff to the form and send you.

3) FoxyForm


No need of sign up there just go to this site fill the details, customize the colors,give email and get codes.

4)Wufoo


This also the good service you can just try it also for sure.But gives 100 entries per month only to fill.

Other services available providing free form but me never tried are :-

123contactform
Freecontactform
Webformdesigner
Mycontactform
Wrasap

Installation


Just from all the services above , select one you want to use.Sign up there and get the codes for the form.

Now just Go to blogger Posting > Edit Pages > New Page.
Give the title to page as contact and post the form codes in post and publish it.Your contact form is ready now to run.Enjoyyy !!!!!