How to easily Root any Android MTK6589 quadcore phone inlcuding – Micromax A116, Wammy titan 2, Wammy Passion Y, Micromax A110Q canvas 2, Xolo Q800,Xolo Q1000, Zen Ultraphone 701 HD . Zopo C2,Zopo 980 , UMI, Gionee and Many others..

There are several auto-root tools that work with older MTK devices and older versions of Android, but up until a couple days ago, there was no Auto-Root option for MTK6589 and the newer android versions (4.1/4.2)

So far this has been tested with Micromax A116, Wammy titan 2, Wammy Passion Y, Micromax A110Q canvas 2, Xolo Q800,Xolo Q1000, Zen Ultraphone 701 HD . Zopo C2,Zopo 980 , UMI, Gionee. We invite you to test this on unrooted ROMs on your device and add your results here and to the thread in the forum for future users.

The files you�ll need:

1) Download and Install MTK Drivers
2) Auto Root Files

Read also :

Trick To Reset Password For Samsung Mobile Phone

 
What to do:

  1.     Make sure USB debugging is enabled. Go to settings > developer options > enable USB
        debugging
  2.     Download AND Install MTK Drivers
  3.     Extract the MTK6589 Auto Root folder from the .rar download
  4.     Connect your phone to PC visa USB
  5.     Run run.bat from the extracted MTK6589 Auto Root folder
  6.     Press any key and wait while it roots your phone
  7.     After finished, now reboot
  8.     Bam, you�re rooted. Verify root with a �Root Checker� app from Play, or run any app you
        know requires root and you should see a root permissions request.

Enjoy Guys! and don’t forget to post your comments. � MyTricksTime.com

HOW TO SHARE PC INTERNET ON ANDROID DEVICE USING USB DATA CABLE

Friends, I think you all know about Tethering in your android phone. Tethering is the technique to share internet from your android phone to your PC or laptop. Tethering can be done by two methods. First one is by USB and second one is by Wi-Fi. But friends, sometimes a situation comes when you have internet access on your pc but not on your android device and you don�t have Wi-Fi hotspot also. Then what will you do if you want to access same internet on your android phone ? 

Read also : Secret Hack Codes for Android Mobile Phones

No problem friends, I have already faced this problem so I am writing this post to help you to overcome from this situation. But one and only limitation of this trick is that you should have rooted android phone and if you have rooted phone then keep reading this post. I will try to help you step by step.
Do you know this technique of using PC internet on android phone is known as Reverse Tethering. So lets start reverse tether your android phone.
STEP 1.

First of all Download Android Reverse Tethering.rar [4.55 MB] On your pc.
Now Extract The folder 
using password � way2hacking

STEP 2.
When you will extract the folder you�ll see some files in that folder but you have to open AndroidTool.exe as shown in below screenshot.

STEP 3.
Now just enable DEBUGGING MODE in your android device and connect it with your pc using your data cable.
STEP 4.
Now refresh the device list in the AndroidTool.exe as shown in below screenshot and you will see your device there. After getting your device in list just click on that and then click on connect. Wait for some seconds and done. Enjoy your pc internet on your android device. If you still have any problem then feel free to ask below in comment section.

Enjoy Guys! and don’t forget to post your comments. � MyTricksTime.com

How To Increase Ram In Android

Hello friends, today in this post i�m introducing a new technique and some tips How To Increase Ram In Android. This difference in hardware can greatly affect your phone, you can not use bigger size apps, and can not play heavy games or you can not run multiple application at the same time or the hanging problem and many more.
But everyone can not afford the high range phones. And majority of this problem is due to the processor and the ram size. So in this post, i�m talking about how to increase ram in android phone and you also play heavy games and use multiple applications

Note: Increasing ram does not mean that you are internally adding some hardware to your Android phone. Its not possible for a normal man to alter the hardware of Android device so as to increase its Ram. Its been risky and one need to be professional to change the hardware. And also manufacturer has some guidelines for this.  But don�t worry there is some simple way to increase ram in Android, you just need to follow the instruction. And you can easily increase your ram in maximum 10-15 minutes. Using this method or trick you can increase your ram upto 4 GB.

Requirements:

  • 1. SD card as you want but class 4 or higher SD Card will give excellent speed to your Phone.
  • 2. Rooted smartphone.
  •     Or Rooted Tablet (If you want to increase RAM and Internal Memory of it.)
  • 3. SD card reader
  • 4. Windows PC
  • 5. An internet connection for downloading a few softwares or you can get it from somewhere else also.

Partition Your SD Card:

First step you have to do is to partition your SD Card and for doing this you have to,
1. Download Mini tool Partition from Here
2. Install the application on your PC and connect your SD card to your PC with Card Reader.
3. Open Mini Tool Partition in your PC and when the wizards open click on your SD Card and select Delete option. (Note: This will format your SD Card completely mean that it will erase your data permanently, so previous to doing this backup your data at any place in PC or other Storage device.)
4. When the Formatting of your SD Card is completed then, you have whole of space of your SD Card as unallocated then Right click SD Card and select make option.
5. A popup box will open giving you options for making partition; select the partition as primary and file system as FAT if SD Card is less than 4GB or FAT32 if your SD Card is more than 4GB.
6. Leave about 512 MB or more space (your choice) for making the next partition.
7. Then select done and do right click on unallocated space of your SD Card and again click make option. Select Primary partition but change the file system to Ext2, Ext3 or Ext4.
Note: (Ext2 is not compulsory as most ROMs work fine with it).

How To Make Ram Of SD Card Android:

1. Click Apply Changes and then process goes on for the few minutes and then partition is completed.
2. Install Link2sd from Google Play or download and install the .apk format file from here to your phone.
3. On the first launch of the app, it will question for root permissions and then, it will question you the file system of the .ext partition that you had before made, choose the option as you had choose in the partitioning steps.
4. Sort the apps according to size and start linking them.

Enjoy Guys! and don’t forget to post your comments. � MyTricksTime.com

LG G3 vs Galaxy S5 (part 1): design, display and UI


If you’re not the kind of smartphone fan that gets weak in the knees when you see metallic phones like the HTC One (M8) or glass phones like the Xperia  Z2, then plastic is where it’s at. Plastic is not only lighter and cheaper to produce, it also absorbs shock better than rigid materials like glass or metal.
So, how does the LG G3 stack up to Samsung’s big hitter, the Galaxy S5? In this first part we’ll compare design, display and user interface. The next part will deal with G3 and S5 software features, hardware and cameras.

                                  The Galaxy S5 (left) and the LG G3 (right) go head to head in the looks department.

Design

The Galaxy S5 is not, by any stretch of the imagination, a beautiful-looking device. When it launched, the first thing many reviewers thought was: Band-Aid. Sure, the rubberized back panel feels better than other Galaxy devices, but that dimpling was not attractive. The S5 sticks to Samsung’s familiar design language, with physical home button, silver plastic trim and side-mounted power and volume keys. On the back there’s the camera lens sitting atop the dual-LED flash/heart rate monitor combo and the charging port is covered by a water-resistant flap.
                 Design is a personal preference, but most agree the LG G3 (left) is prettier than the Galaxy S5 (right)

The G3 is not water-resistant and has no heart rate monitor or fingerprint scanner. It also does without physical buttons of any sort on the front or sides. LG has opted instead for the rear-key setup that they claim puts the buttons where your fingers naturally are, and after a little period of getting used to, they do feel quite natural. They can also be used as shortcuts to the camera and note-taking apps from a screen-off state. The front of the G3 is all glass, with tiny bezels and a metallic-look plastic curved behind that sits nicely in the hand. The camera lens is flanked by a dual-LED flash and laser auto-focus module and none of the ports are covered. Both devices have rear-mounted speakers.


Both devices have a metallic-look plastic trim, but the G3 (right) looks a bit more sophisticated.


The Galaxy S5 (bottom) has a water-resistant flap over the USB 3.0 port. The G3 has USB 2.0.


While design and styling is a matter of personal preference, I don’t think the Galaxy S5 design is impressing anyone in particular, including Samsung, who have ”relocated” the man responsible to another job. The S5 looks like the S4 looks like the S3. The G3 certainly follows a lot of the design language of the G2, but it has been refined and perfected in important ways, from the better backing material, which is much less of a fingerprint magnet, to the increased screen-to-body-ratio up front (it’s now 76.4% screen). Both devices have removable back panels with replaceable batteries and microSD card slots, but to my mind the LG G3 is the clear winner in the looks department.


                                             Even if you don’t like QHD, the G3 (left) has an amazing screen.

Display

Samsung didn’t really bring too much of interest to the table with the Galaxy S5 display. With just a 0.1-inch bump in screen diagonal, they stuck with the same Full HD resolution as the S4, which watered down the pixel density a bit. Samsung use a Super AMOLED display which produces rich blacks but suffers a little when under direct sunlight, due to the lack of full-screen illumination (AMOLED displays only light up the colored pixels, black pixels remain ”off”). Samsung displays are unbeatable as far as bright, luscious colors go, and the Galaxy S5 is no slouch on that front, with insanely bright and rich colors, even if they are a bit over-saturated.
Samsung distribute the front-facing camera and sensors around the earpiece and the S5 also has an IR blaster. If you look at the icons, you can see they are a little less defined than on the G3.
LG has bumped the screen diagonal on the G3 by 0.3 inches over the 5.2-inch G2, bringing the G3’s screen to a whopping 5.5 inches. By keeping with their tiny bezels and increasing the display ratio on the front though, the G3 doesn’t feel like a phablet in the hand. It is only marginally larger than the Galaxy S5, but has almost a half-inch bigger screen. The G3’s display is an IPS LCD, which means it is great in direct sunlight but produces ”illuminated” blacks, making them less dark and ”true” than blacks found on an AMOLED display. The G3 doesn’t have the vividness of the Galaxy S5’s display, but it does bump the resolution to Quad HD, giving it almost double the pixels (the S5 has just over 2 million pixels, the G3 just under 3.7 million pixels) as the S5.

The LG G3’s earpiece lines up with the selfie camera and sensors, with the IR blaster just visible up top. Even in this picture, you can see just how incredibly sharp the QHD diplsay is

While many are still out to lunch on whether or not QHD makes any sense because the human eye can’t perceive the difference and so on, in reality the QHD resolution is very visible. You may not notice when you’re scrolling through menus or settings, but when you look at high-quality games, pictures or video it is utterly unbeatable. If LG’s claims that their various optimizations mean the QHD demands on power and processors are equivalent to those for Full HD, then there’s clearly no decision: why wouldn’t you want art book quality visuals if you don’t have to pay the price in battery and processor consumption? The Samsung display has crazy color reproduction, but bright colors can’t really compete with incredible clarity and sharpness. The G3 has a pixel density of 538 ppi compared to the S5’s 432 ppi, if you like numbers.


Here’s a screengrab from LG’s presentation of the G3, showing the difference between AMOLED and IPS with a nod to the QHD IPS found on the G3 (right)

User interface

In all fairness, the G3 in my possession does not have final software on it, and is a Korean pre-production model. Having said that though, you can still get a good idea of what LG has done with the new Optimus UI and how Android 4.4.2 runs on the G3. The UI is cleaner, simpler and more crisp than its previous version. LG has opted for subdued and ”mature” coloring and tried to avoid excessive vividness and over-saturation in the new minimal design. Major apps have been color-coded for task awareness and there’s all new circular and square icons. You can see the major UI features in the pictures.

                          Notifications shades of the new Optimus UI (left) and the new TouchWiz (right).

Samsung did a pretty good job of overhauling TouchWiz for the Galaxy S5, which also runs the latest Android version, but as I said at the time I first saw it, it all feels kind of rushed and unfinished. It’s certainly better than previous TouchWiz versions, but it lacks consistency. Perhaps the next update will allow Samsung to tighten up the new UI but until then it’s a bit patchy with bright, bold icons in the settings, a different look in the notifications shade and other aspects that still look a little like the old TouchWiz. Samsung do big and bright tremendously well, so their UI tends to the brighter end of the spectrum and in all honesty looks good for it, but the inconsistency is an issue

                         Despite squeezing more apps into the app drawer, the G3 (left) doesn’t look cramped.

Preferences for user interface is equally as personal a choice as design and material preference. I personally prefer the clean layout and simplicity of the new Optimus UI. I was however, impressed by Samsung’s attempt to overhaul TouchWiz, if not their final execution. It feels like a step in the right direction to be sure, but it seems as though they didn’t quite take enough steps before they released it. As a stock Android fan, I don’t much like any manufacturer skins, but if all we look at is consistency and unity, it’s clear that LG have done a better job with the new Optimus UI, whether you like the particular look of it or not

                                  
                                      Samsung (right) opts for a dark theme, while LG (left) goes for a lighter UI.

Conclusion

It all boils down to a simple trifecta for me in this part: the G3 looks better than the G2, the S5 looks the same (or worse) than the S4; LG’s Optimus UI is polished and clean, while the new TouchWiz is irregular and feels unfinished; and LG made a significant improvement on their display, in terms of size and resolution, while Samsung stuck to basically the same screen as the S4. Of course, not everyone wants a 5.5-inch screen or QHD, so that last one is up for debate, giving us a two wins and a draw result for LG. Let me know your opinions on these comparisons in the comments below and stay tuned for part two where we’ll look at the G3 and S5 software, hardware and the all-important camera.

Enjoy Guys! and don’t forget to post your comments. � MyTricksTime.com

Motorola does the budget phone one better with the new Moto E

Motorola reinvented the low-cost Android smartphone � with something you’d actually want to use � and now it’s pushing things even further with the $129 Moto E. Available in more than 80 countries, the Moto E takes the specs (and thus the cost) down yet another level, while still keeping its excellent design aesthetic and its flair for doing things just a little different.

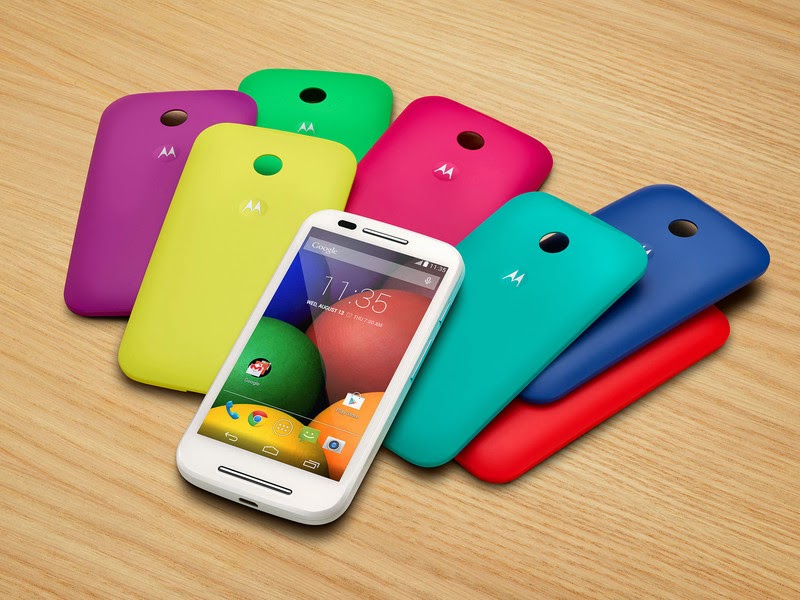
Moto E, like its Moto G cousin, has interchangeable shells. It’s got a smaller, lower-resolution display, and it’s lacking LTE. But The price … try to beat it.
We’ve got full specs after the break.

Moto E specs

Operating system Android� 4.4, KitKat�
Processor Qualcomm� Snapdragon� 200 with 1.2GHz dual-core A7 CPU Adreno 302 400MHz single-core GPU
Capacity 4GB user storage
MicroSD slot supports up to 32GB expandable memory
RAM 1GB
Dimensions 124.8×64.8×12.3mm (6.2mm at edges)
Weight 142g
Display 4.3 inches, 540 x 960 qHD, 256ppi
Features anti-smudge coating and Corning� Gorilla� Glass 3
Connectivity MicroUSB, supports USB 2.0
3.5 mm headset jack
Micro SIM
Dual-SIM option
Battery Built-in rechargeable lithium-ion, 1980mAh
Mixed usage up to 24 hours
Rear camera 5 MP
Video capture and playback Capture 30fps FWVGA (MP4, H.264, H.263)
Up to 720p playback capable FWVGA (MP4, H.264, VC-1, WMV-9, DivX 4/5/6)
Audio playback AMR-NB, AMR-WB, AAC, AAC+, eAAC+, MP3, PCM,FLAC, MIDI, QCELP, EVRC, OGG/Vorbis
Networks UMTS 850/900/1900/2100
AWS 850/1700/1900 (2100) + QGSM 850/900/1800/19000
GSM 850/900/1800/1900
CDMA 800/850/1900
Wi-Fi 802.11 b/g/n, 2.4GHz
Bluetooth� Technology Version 4.0 LE
Location services GPS, GLONASS, BeiDou
In the box Moto E in black or white
USB cable
Quick start guide

Enjoy Guys! and don’t forget to post your comments. � MyTricksTime.com