How to secure your iPhone or iPad from unauthorized pairing using Apple Configurator

Apple was recently accused of creating �backdoor� services in iOS that make it easier for government agencies to spy on users without their knowledge, although the iPhone maker promptly denied those claims in an official response issued yesterday, and followed it up by publishing a support document that provides information about the diagnostic services. Regardless of what you choose to believe, we  prepared this step-by-step guide on how to secure your iPhone or iPad from unauthorized pairing using Apple Configurator. 

Forensic scientist and iPhone jailbreak expert Jonathan Zdziarski who had raised the concerns  recommends pair-locking your iPhone, iPad, and iPod touch using the Apple Configurator tool to prevent anyone from dumping your private data, installing malicious apps, or doing anything malicious.
Keep in mind that by following these instructions, you will be inhibiting the ability to pair your iPhone or iPad with another device and its services. If you regularly sync your iOS device with iTunes on a Mac or PC, this solution might not be ideal for you. But if you are determined to maintain your privacy and value the comfort of knowing your personal information is safe, read ahead to learn how to secure your device.

You can download Apple Configurator for free from the Mac App Store.

Disclaimer
By changing your iOS device�s profile with Apple Configurator, it might force the latest iOS version to be installed and could wipe your content or remove your jailbreak as such.
Jailbreakers:
Jailbreakers can install the PairLock jailbreak app from Cydia which was released by Zdziarski last year, when he had first raised this issue.
How to disable unauthorized pairing on iPhone or iPad
Step 1: Open Apple Configurator.
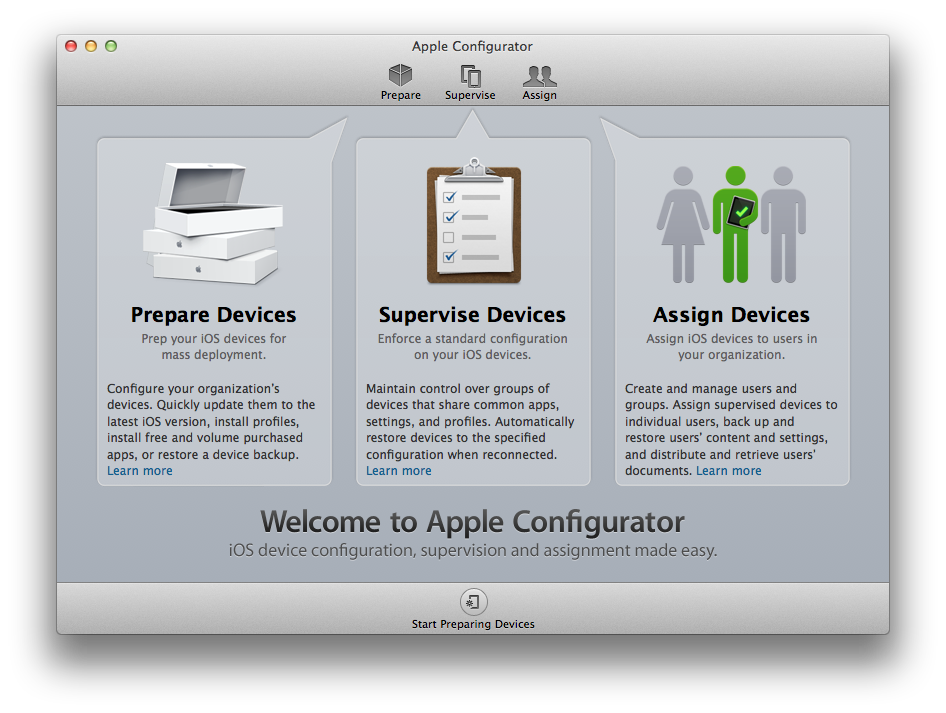
Step 2: Click on the Prepare button in the top menu.
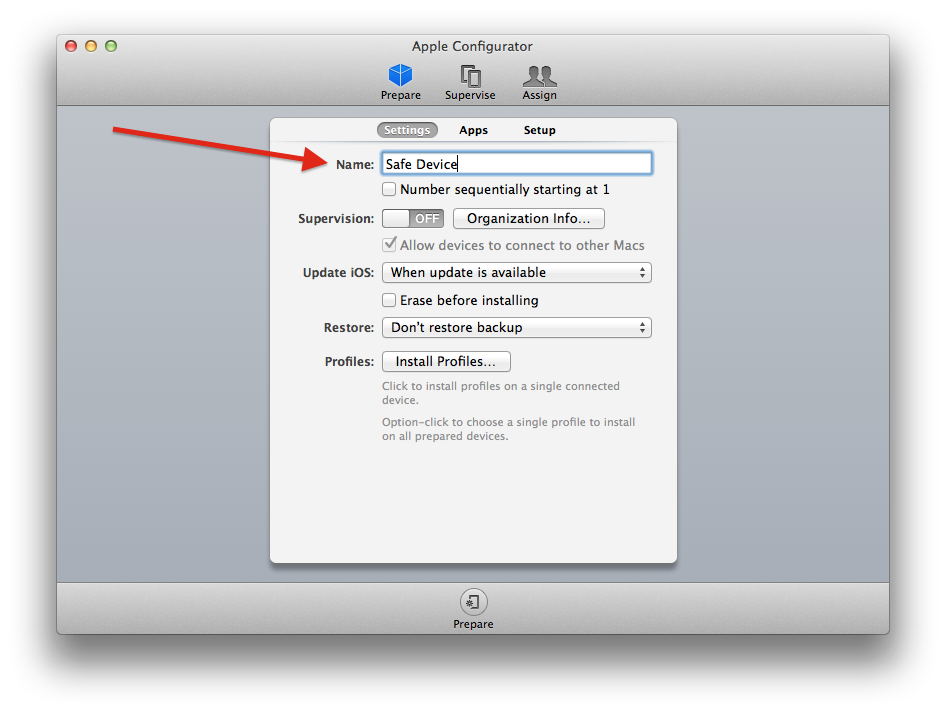
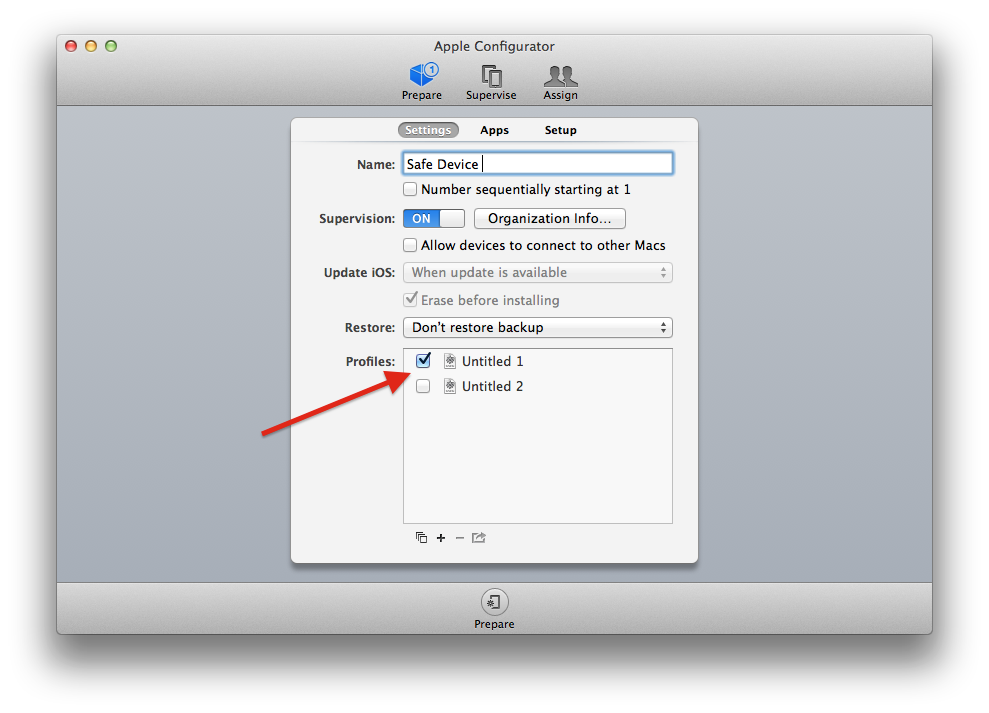
Step 3: Give the device a name � it doesn�t matter what you choose.
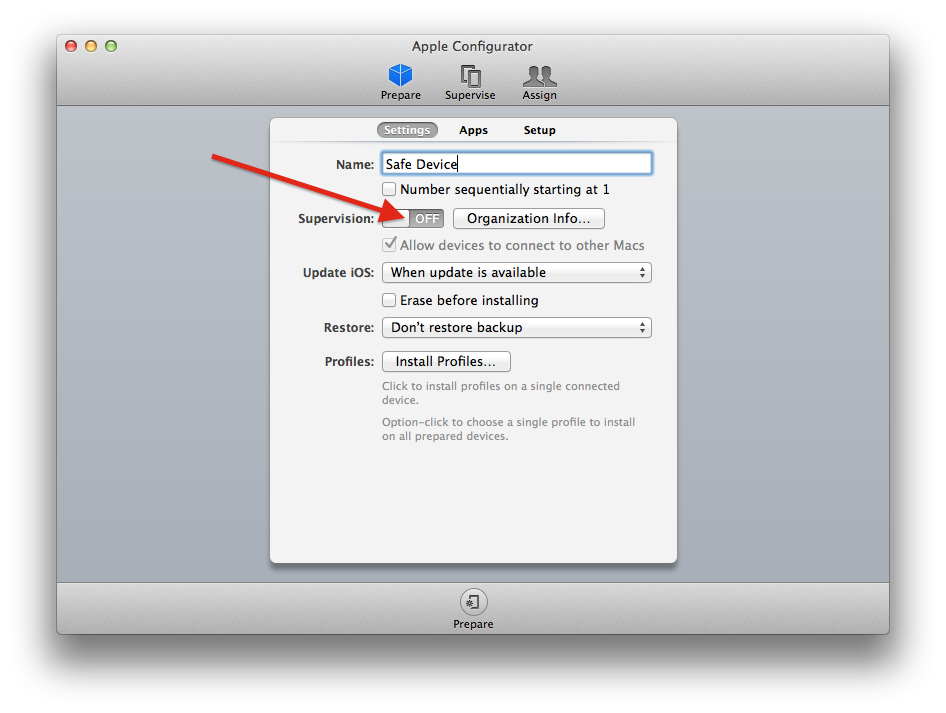
Step 4: Turn on the Supervision toggle switch.
Step 5: Uncheck the box for �Allow devices to connect to other Macs.�
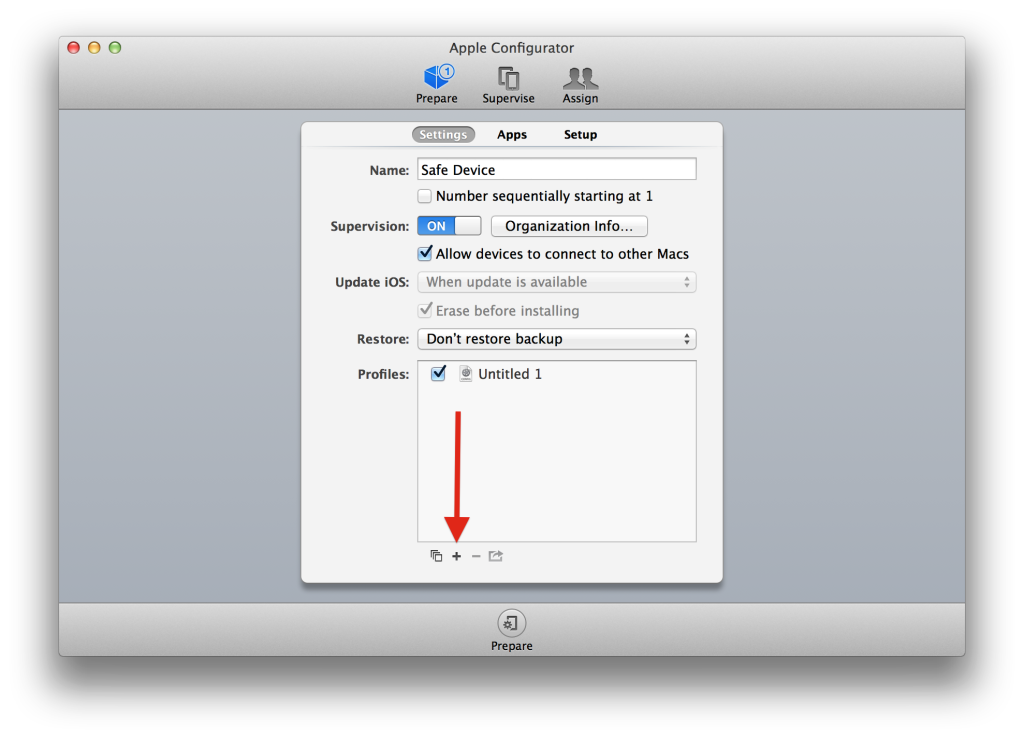
Step 6: Click on the + sign at the bottom of the window.
Step 7: Click on �Create New Profile��
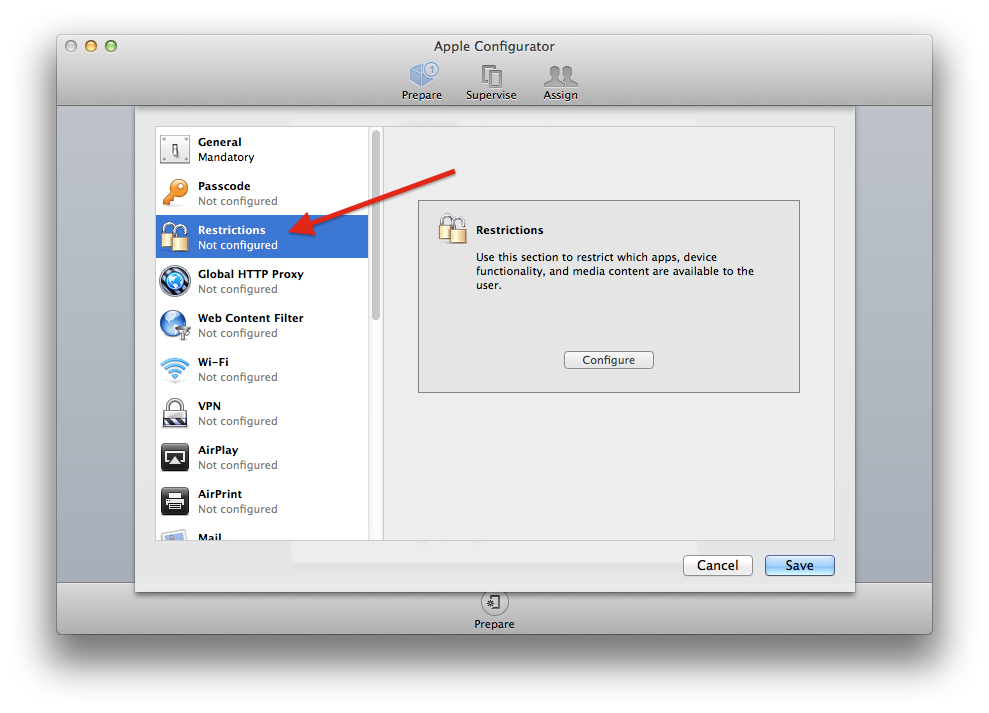
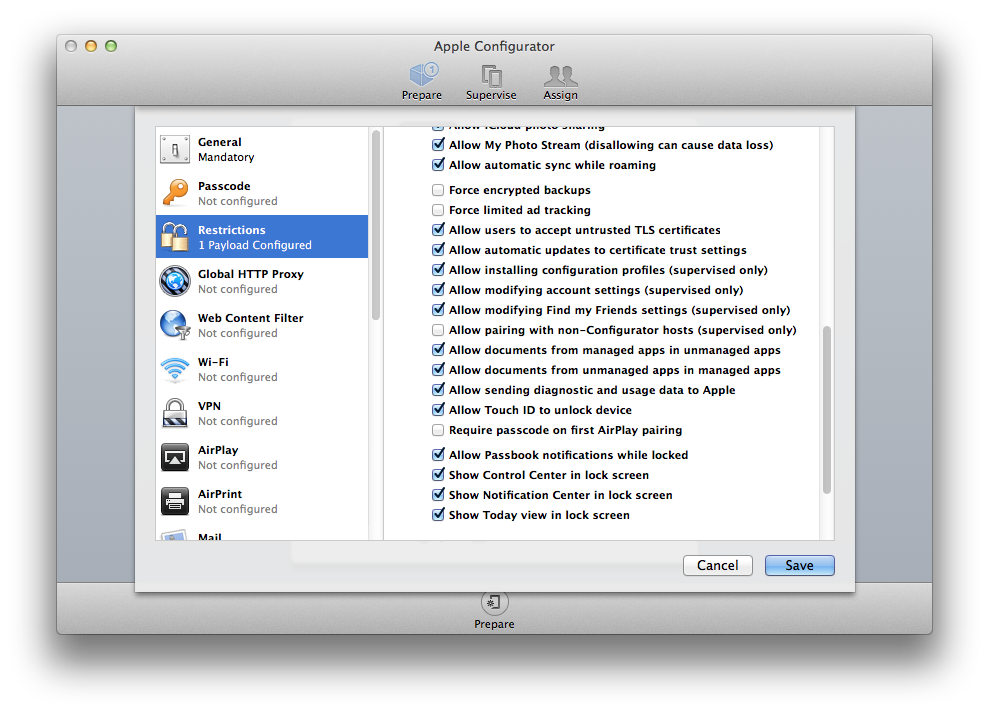
Step 8: Click on the Restrictions menu.
Step 9: Click on the Configure button.
Step 10: Scroll down and uncheck the box next to �Allow pairing with non-Configurator hosts (supervised only)�
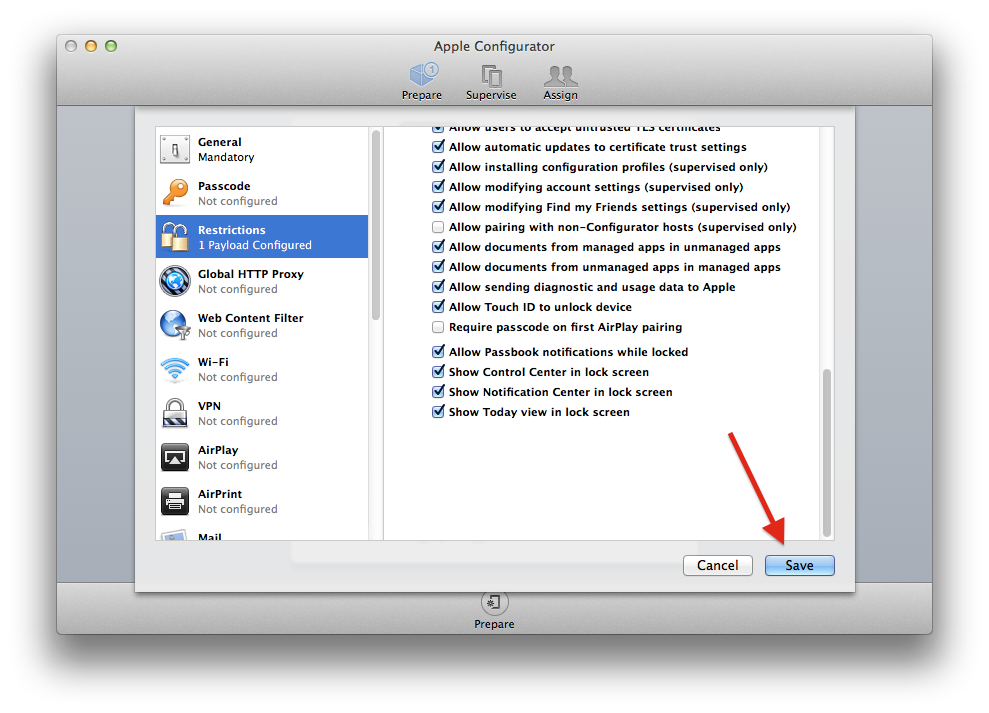
Step 11:  Click on the Save button.
Step 12: Check off the box next to the profile you just created. It should be called Untitled unless you named it.
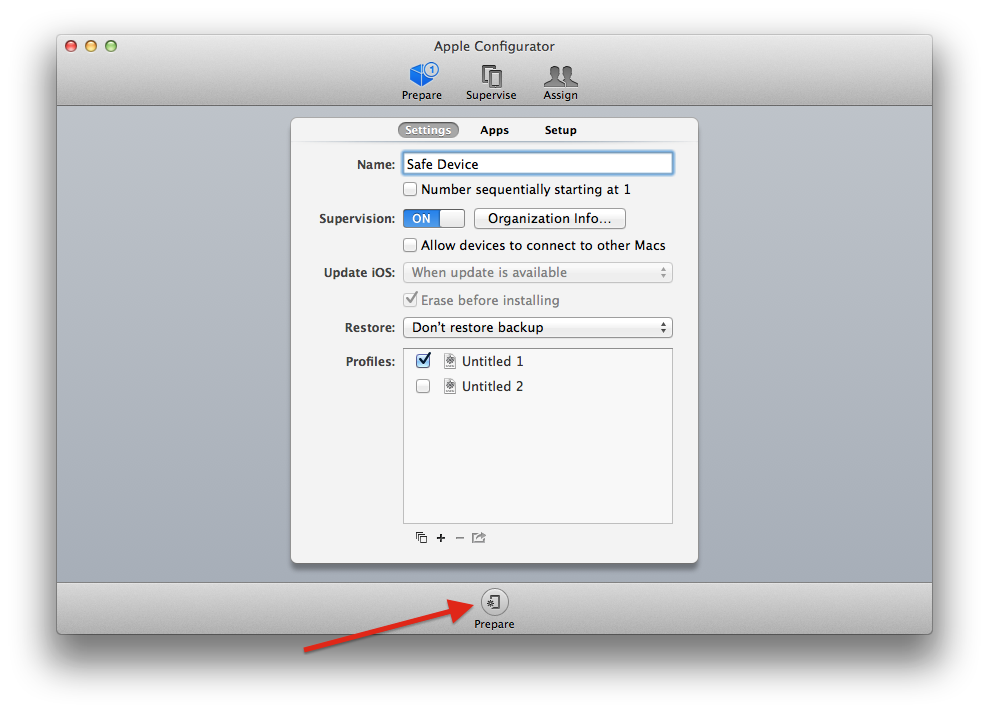
Step 13: Click on the Prepare button.
Step 14: Fill in the organization information with whatever details you wish, even if they are not accurate.
Step 15: Click on the Done button.
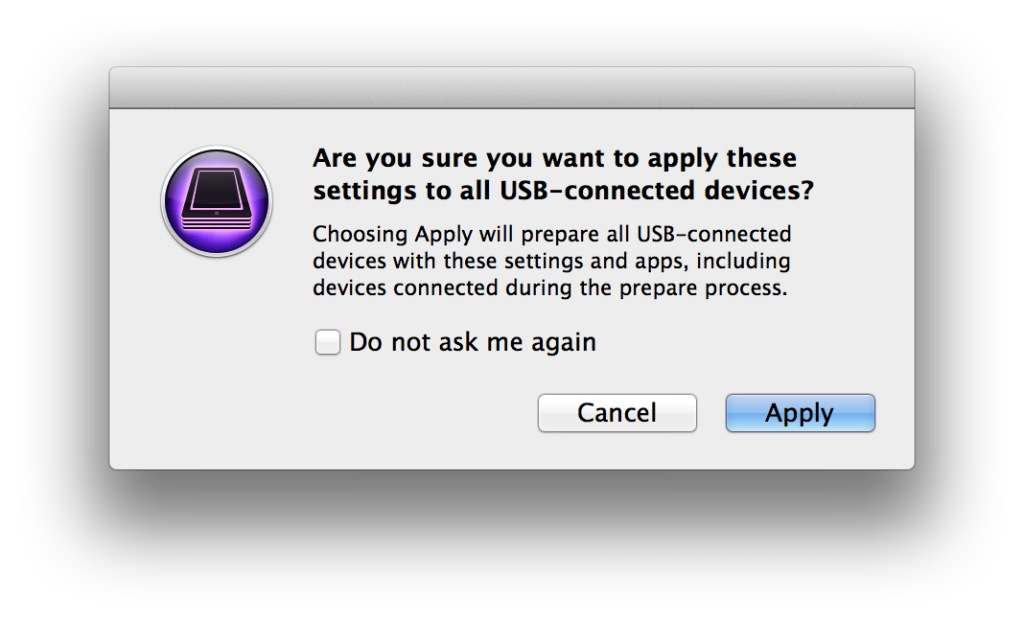
Step 16: With your iOS device plugged in to your Mac or PC via sync cable, click the Apply button.
It is also recommended that you take additional security measures to protect your iOS device against unwanted usage or data snooping, by enabling two-step authentication and setting a strong password in conjunction with a password manager like 1Password.

Enjoy Guys! and don’t forget to post your comments. � MyTricksTime.com

HOW TO BROWSE FREE WITH YOUR AIRTEL SIM CARD

Airtel Internet
For those of you guys who have Airtel sim card and it has been lying useless for several days because there’s no money for data subscription. I’ll congratulate you because there is a code to get free megabyte and of course, free browsing! This code is offered legally by the Airtel network as a bonus and it is very short and direct.
One thing you should note about this is that once you dial the code, you’ll be given 10 megabyte which you can use for just 7days, and after the 7days are over, your airtel code can not be dialed again to give you another 10 megabyte that’ll last for another 7days free.

Now the code. Just dial *141*
13*1#
and your airtel sim will be bestowed with 10 megabyte!
Three gbosa for airtel!

Enjoy Guys! and don’t forget to post your comments. � MyTricksTime.com

How to Save Google Maps for Offline Use

Modern smartphones have proven themselves to be substitutes for several handheld gadgets. They are no more just devices to make a call and send messages. They are a technological wonder that is used for browsing the net, listening to music, watching movies, playing games, capturing pictures and videos and so on. Equipped with a plethora of

sensors, they are also used as portable navigation devices.

Since smartphones and network and data oriented devices, they require a working connection to do things.Whether you are a frequent or occasional user of maps while travelling, the Google Maps is undoubtedly an indispensable tool for all. Whether you want to find the quickest route to a destination, or lost your way, the Google Maps is always there to help you, save the fact that you have a working data connection.
However, there might be situations when you are in an area with no cell connection, terrible network signal or no WiFi connection and you need the assistance of Google Maps. What would you do then? Fortunately, there is a way you can save Google Maps for offline use. Having saved certain map location or areas on you device, you can view them later when your device is offline.

Note:

However, there are certain limitations with the saved maps on your device. Google maps features like satellite, terrain, indoor maps, and 3D buildings are not available offline. The maximum size of a map area you can download in Google Maps is 50 x 50 KM.

How to Save Google Maps for Offline Use

Actually, we are not going to tell about anything new, we are just sharing the tip. The Google Maps app has this feature built-in. Now here�s how you can save Google Maps for offline use:
  1. First of all, make sure your device has a working data or WiFi connection.
  2. Then open Google Maps app.
  3. Tap the search bar (at the top of the screen), type the desired location/area name and tap the search button.
  4. When the map for that location is loaded, pull up the place info bar.
  5. Now tap the Save map to use offline option. Please note that only the area visible on the map will be saved. You can zoom in or out to select a smaller or larger area of the map. Also, if you notice The on-screen map area is too large issue while trying to save the map, try to zoom in the map to select a smaller area.
                                         
  6. Alternatively, you can also save a specific map area using this method: Search for it and when the map shows up on the screen, type ok maps in the search area. You will see options for saving the map for that area.
                                          
  7. Another Tip: Open Google Maps app, tap and hold the area.location you want to save, you will see an address or drop pin. Just tap on the address and you will see Save map to use offline option.
  8. Okay, now give a name to the map and tap the Save button. The map for the selected area will be save to your device and you can use it later.
  9. To use your saved maps later, just tap the side menu button, select Your places and tapOffline maps to see and manage saved maps. If you do not find these option by sliding the menu bar, tap the person icon on the search bar in Google Maps to access offline maps.
                             

We just hope the tips given above would help you enjoy your device better! Do you have more suggestions? Please do inform us via your valuable comments! In case you want more tips and tricks for your device or Android in general, please let us know!

Some More Apps for Offline Navigation:

Enjoy Guys! and don’t forget to post your comments. � MyTricksTime.com

Samsung Galaxy Grand 2 now has a gold version Samsung Galaxy Grand 2 now has a gold version

Samsung Galaxy Grand 2 now has a gold versionSamsung doesn�t usually release gold color versions of mid-end smartphones, but it�s making an exception in the case of the Galaxy Grand 2. Initially launched in January (in black and white), the Grand 2 currently costs around $300, and, according to recent data, it�s one of Samsung�s best-selling handsets of this year. 


The gold variant of the Grand 2 is available only in a few Asian markets for now (including Malaysia), and will be released in others (like India) pretty soon. Obviously, the new color doesn�t change the handset�s specs, and neither its price. So you�re getting the same features that the black and white versions are offering: a 5.25-inch display with 720 x 1280 pixels, dual SIM capabilities, 1.9 MP front-facing camera, 8 MP rear camera with LED flash, quad-core 1.2 GHz Snapdragon 400 processor, 1.5 GB of RAM, and 8 GB of expandable storage space. 

The Grand 2 was recently updated to Android 4.4 KitKat (from Android 4.3 Jelly Bean). To find out more about the handset, you should check out our Samsung Galaxy Grand 2 review here

Samsung Galaxy Grand 2 in gold

Enjoy Guys! and don’t forget to post your comments. � MyTricksTime.com

The iPhone 5s tracks your movements for 4 days after the battery dies

For those of you who are concerned about privacy and big companies tracking you, the focus of those fears tend to be Google and Facebook, but it looks like you have to add Apple to the list as well. A new report is claiming that the iPhone 5s (and likely the new iPads that also feature the M7 coprocessor) can track your movements for up to 4 days after the device’s battery dies.

This is anecdotal and hasn’t been confirmed yet, but Reddit user Glarznak has interesting evidence. Apparently, Glarznak was on vacation in Europe and his iPhone battery died. His charging cable had broken, so he decided to just go without his phone for a while. He was also someone who used the Argus app to track his steps. And, when he was finally charged his iPhone, he found that Argus had somehow gotten his movement data for four days after his battery died. This makes it seem as though the M7 motion coprocessor was able to function with the device turned off and using the reserve power in the battery for four days. 
Of course, some will find this to be “creepy”, but we try to be more nuanced on these issues. First of all, yes the iPhone continued tracking movements after the battery died, but it only did so because Glarznak had the device set to track him in the first place, which is something you can turn off if you are truly concerned. Also, as we have pointed out before when people complain about Google’s policies, this isn’t a matter of taking your data, this is a trade where you get value in return. Although, until Apple comments, we don’t know what use this feature would be, because the M7 coprocessor is not tied to the GPS, so it would not be tied to “Find My Phone”. 
Whatever the explanation, it does prove that users need to be more knowledgeable about their devices, what information is tracked, and what steps to take to opt-out of tracking if that is what you want. 

Enjoy Guys! and don’t forget to post your comments. � MyTricksTime.com