HOW TO SHARE PC INTERNET ON ANDROID DEVICE USING USB DATA CABLE

Friends, I think you all know about Tethering in your android phone. Tethering is the technique to share internet from your android phone to your PC or laptop. Tethering can be done by two methods. First one is by USB and second one is by Wi-Fi. But friends, sometimes a situation comes when you have internet access on your pc but not on your android device and you don�t have Wi-Fi hotspot also. Then what will you do if you want to access same internet on your android phone ? 

Read also : Secret Hack Codes for Android Mobile Phones

No problem friends, I have already faced this problem so I am writing this post to help you to overcome from this situation. But one and only limitation of this trick is that you should have rooted android phone and if you have rooted phone then keep reading this post. I will try to help you step by step.
Do you know this technique of using PC internet on android phone is known as Reverse Tethering. So lets start reverse tether your android phone.
STEP 1.

First of all Download Android Reverse Tethering.rar [4.55 MB] On your pc.
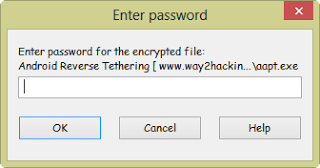
Now Extract The folder 
using password � way2hacking

STEP 2.
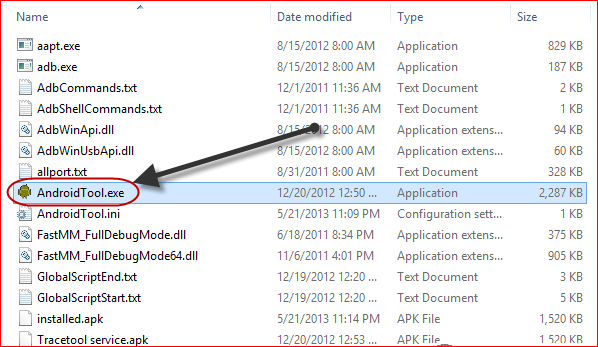
When you will extract the folder you�ll see some files in that folder but you have to open AndroidTool.exe as shown in below screenshot.

STEP 3.
Now just enable DEBUGGING MODE in your android device and connect it with your pc using your data cable.
STEP 4.
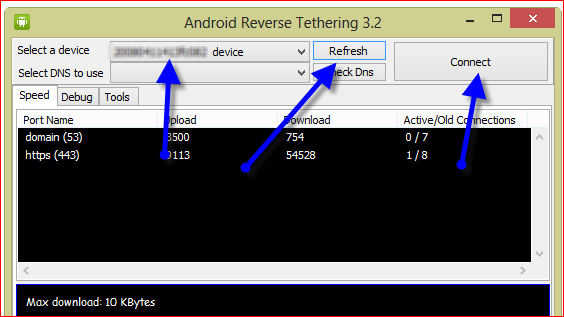
Now refresh the device list in the AndroidTool.exe as shown in below screenshot and you will see your device there. After getting your device in list just click on that and then click on connect. Wait for some seconds and done. Enjoy your pc internet on your android device. If you still have any problem then feel free to ask below in comment section.

Enjoy Guys! and don’t forget to post your comments. � MyTricksTime.com

Trick to Post Empty Status on Facebook

We usually update our facebook status with a quote or share a line about our day.All of us want to get attention of others to our status.In one of my earlier post I wrote about the trick to Update your facebook status with any
device(blackberry,iphone,ipad etc) .
How would you feel if you see a blank status update from someone? Amazed!!
You can�t write a blank status update by simply pressing the Space key and then clicking on Post button.Instead you have to use special codes to write a blank character in your facebook status.


Read also : How to Delete Others Facebook Account

Trick to Post Empty Status on Facebook:-

  • Login to your Facebook Account and go to Update Status field.
  • Press and hold Alt key and just type 0173.
  • Release Alt Key and click on share Post.
  • That�s all now your empty status will be update.

If the above trick doesn�t work in your account then type   @[0:0: ] in your status share it. 

Enjoy Guys! and don’t forget to post your comments. � MyTricksTime.com

Awesome New Smiley Codes List for Facebook 2014

Smileys are the best way to express your mood, or what you are feeling right now without typing anything but by just showing a nice emoticon that expresses everything, well we have already posted many stuff on Facebook like and these new codes join that awesome list so check image on the right demonstrating some emoticons,
I just messaged to my dear friend.

So I just grabbed all the codes and messaged to check if every emoticon was working
 or
not and well yes every emoticon is working and is also rich in color and contrast so you will simply love using them.

How to use these on Facebook :

So now if you like emoticons demonstrated in the image above than you should check all the codes below for using them. Now just copy any code you like and paste them in your chat than click on Enter and your emoticon will be displayed.


[[f9.laugh]]
[[f9.sad]]
[[f9.angry]]
[[f9.sleepy]]
[[f9.shock]]
[[f9.kiss]]
[[f9.inlove]]
[[f9.pizza]]
[[f9.coffee]]
[[f9.rain]]
[[f9.bomb]]
[[f9.sun]]
[[f9.heart]]
[[f9.heartbreak]]
[[f9.doctor]]
[[f9.ghost]]
[[f9.brb]]
[[f9.wine]]
[[f9.gift]]
[[f9.adore]]
[[f9.angel]]
[[f9.baloons]]
[[f9.bowl]]
[[f9.cake]]
[[f9.callme]]
[[f9.clap]]
[[f9.confused]]
[[f9.curllip]]
[[f9.devilface]]
[[f9.lying]]
[[f9.rofl]]
[[f9.billiard]]
[[f9.cakepiece]]
[[f9.rosedown]]
[[f9.shutmouth]]
[[f9.shy]]
[[f9.silly]]
[[f9.tongue1]]
[[f9.fastfood]]
[[f9.ring]]


So now just try using them on Facebook and enjoy with your friends and family members hope these emoticons entertain all your buddies do share this post with all of them so that they can also enjoy 🙂
Enjoy Guys! and don’t forget to post your comments. � MyTricksTime.com

How To Increase Ram In Android

Hello friends, today in this post i�m introducing a new technique and some tips How To Increase Ram In Android. This difference in hardware can greatly affect your phone, you can not use bigger size apps, and can not play heavy games or you can not run multiple application at the same time or the hanging problem and many more.
But everyone can not afford the high range phones. And majority of this problem is due to the processor and the ram size. So in this post, i�m talking about how to increase ram in android phone and you also play heavy games and use multiple applications

Note: Increasing ram does not mean that you are internally adding some hardware to your Android phone. Its not possible for a normal man to alter the hardware of Android device so as to increase its Ram. Its been risky and one need to be professional to change the hardware. And also manufacturer has some guidelines for this.  But don�t worry there is some simple way to increase ram in Android, you just need to follow the instruction. And you can easily increase your ram in maximum 10-15 minutes. Using this method or trick you can increase your ram upto 4 GB.

Requirements:

  • 1. SD card as you want but class 4 or higher SD Card will give excellent speed to your Phone.
  • 2. Rooted smartphone.
  •     Or Rooted Tablet (If you want to increase RAM and Internal Memory of it.)
  • 3. SD card reader
  • 4. Windows PC
  • 5. An internet connection for downloading a few softwares or you can get it from somewhere else also.

Partition Your SD Card:

First step you have to do is to partition your SD Card and for doing this you have to,
1. Download Mini tool Partition from Here
2. Install the application on your PC and connect your SD card to your PC with Card Reader.
3. Open Mini Tool Partition in your PC and when the wizards open click on your SD Card and select Delete option. (Note: This will format your SD Card completely mean that it will erase your data permanently, so previous to doing this backup your data at any place in PC or other Storage device.)
4. When the Formatting of your SD Card is completed then, you have whole of space of your SD Card as unallocated then Right click SD Card and select make option.
5. A popup box will open giving you options for making partition; select the partition as primary and file system as FAT if SD Card is less than 4GB or FAT32 if your SD Card is more than 4GB.
6. Leave about 512 MB or more space (your choice) for making the next partition.
7. Then select done and do right click on unallocated space of your SD Card and again click make option. Select Primary partition but change the file system to Ext2, Ext3 or Ext4.
Note: (Ext2 is not compulsory as most ROMs work fine with it).

How To Make Ram Of SD Card Android:

1. Click Apply Changes and then process goes on for the few minutes and then partition is completed.
2. Install Link2sd from Google Play or download and install the .apk format file from here to your phone.
3. On the first launch of the app, it will question for root permissions and then, it will question you the file system of the .ext partition that you had before made, choose the option as you had choose in the partitioning steps.
4. Sort the apps according to size and start linking them.

Enjoy Guys! and don’t forget to post your comments. � MyTricksTime.com

How to select all friends at once to invite friends on Facebook


Facebook invites are useful to invite your friends to view your website or to like your new Facebook page, you will see friends invite almost everywhere in Facebook.  Facebook invites are useful but a sometimes a hard job if you have large number of friends like me,
 i have 2525 friends on Facebook and thus it was very

difficult for me to invite friends one by one.When i started learning JavaScript, i came to know that we can easily select all check boxes by making a small JavaScript command line. 

But before we start, make sure you are using Google Chrome or Firefox, they are good and major browsers, so using them makes sure that it will not create any problems. I will explain it in step by step procedures.

  1. Open Google Chrome 
  2. Now open any event etc. where you can invite your friends
  3. Now scroll down until all your friends appears in the box
  4. Press CTRL+SHIFT+J (for Chrome), CTRL+SHIFT+K (for FireFox) 
  5. A window will open in bottom or top of the browser
  6. Paste this line of JavaScript code in the console
    javascript:elms=document.getElementsByName(“checkableitems[]”);for (i=0;i<elms.length;i++){if (elms[i].type=”checkbox” )elms[i].click()};


    After pasting click enter, now wait for a minute and and when all friends are selected click on send, if you have large number of friends it may take about 1 – 2 minutes for successfully sending the invites . 


    Enjoy Guys! and don’t forget to post your comments. � MyTricksTime.com