 Hello Readers today I am sharing many secret codes for Nokia here which are working fine�with�many�Nokia phone models. I also tested some of them on my own Nokia 5233 and Nokia 5310 Express music phone. Most of them did wonders so I hope they do well for you too. and you will find something new here.
 Rahul Gaur
Nokia MobiLe Secret Code
-
TAC = Type approval code
-
FAC = Final assembly code
-
SNR = Serial number
-
SP = Spare
-
1ST Line = Software revision
-
2ND Line = The date of the software release
-
3RD Line = Phone type
-
Serial number (IMEI)
-
Production date (MM/YY)
-
Purchase date (MM/YY) You can only enter the date once.
-
Date of last repair (0000=No repair)
-
Transfer user data to another Nokia phone via Infra-Red
-
Check your software version. You can only continue if you have v4.33, v4.73 or v5.24.
-
Take apart the phone.
-
De-solder the EEPROM (ATMEL AT 24C64).
-
Read out the data with an EEPROM programmer and save it to a file (Backup).
-
If you have v.33 or v4.73, change the address “03B8” from “00” to “FF”.
-
If you have v5.24 then change the address “0378” from “00” to “FF”.
-
Write the new data to the EEPROM and solder it back to the phone,
-
Power on your phone and you should have “Netmonitor” enabled.
-
Carrier number
-
MS RX Level in DBM
-
Received signal quality
-
MS TX power level
-
C1 (Path loss criterion, used for cell selection and reselection). The range is -99 to 99.
-
RTL (Radio link timeout).
-
Timeslot
-
Indication of the transmitter status
-
Information on the Network parameters.
-
TMSI (Temporary Mobile Subscriber Identity).
-
Cell identification (Cell ID, Number of cells being used).
-
MCC (Mobile country code)
-
MCN (Mobile network code)
-
LAC (Location area code)
-
Ciphering (On/Off)
-
Hopping (On/Off)
-
DTX (On/Off)
-
Discard cell barred information
-
COUNTRY-LOCK
-
NETWORK-LOCK
-
PROVIDER-LOCK
-
SIMCARD-LOCK
-
# = DOUBLE-CROSS
-
W = PRESS “*” THREE TIMES
-
P = PRESS “*” FOUR TIMES
-
+ = PRESS “*” TWO TIMES
-
MASTERCODE = 1234567890
-
Y = NUMBER 1 TO 4
-
#PW+1234567890+1# = GIVES PROVIDER-LOCK STATUS
-
#PW+1234567890+2# = GIVES NETWORK-LOCK STATUS
-
#PW+1234567890+3# = GIVES COUNTRY-LOCK STATUS
-
#PW+1234567890+4# = GIVES SIM-CARD-LOCK STATUS.
Download Windows 7 Themes
Windows 7 has around seven inbuilt themes.But with passing time we get bored with same look and feel of our windows.Microsoft has been regularly releasing themes for windows 7 so that users have a freedom of choice .Themes have been arranged in various categories
like Animals,Arts,Movies,Games etc.Recently they have addedAngry Birds and Kunfu panda 2 themes.These themes will only work in Windows 7 Home Premium, Professional, Enterprise, or Ultimate editions
- Visit Microsoft Themes Gallery by Clicking Here
- Download any theme of your choice.
- Click on the theme setup.It will Automatically get installed.
- You can change the themes from Start->Control Panel->Appearance and Personalization->Change The Theme
How to Activate BSNL 3G on Mobile
How to Activate BSNL 3G on Mobile
You own a BSNL 3G SIM? Here are few simple steps following which you can set BSNL 3G on your 3G enabled mobile.
How to Set BSNL 3G on Mobile
1. Make sure your mobile phone is set to work on 3G network mode settings. If you see �3G� or appears symbol written somewhere on your phone screen if it is connected to 3G network.
2. Go to Connection settings, create new connection profile and now you are only required to specify ACCESS POINT NAME (APN) and you are done.
3. The APN for BSNL 3G settings is
* gprsnorth3g.bsnlmobile.in
* gprssouth3g.bsnlmobile.in
* gprswest3g.bsnlmobile.in
* gprseast3g.bsnlmobile.in
Choose the above according to your circle.
4. After this now you can use BSNL 3G on Mobile phone. You can also set BSNL 3G internet setting free on your mobile phone
For 3G settings :
Send �Mobile Brand and Model� TO 58355 ( toll free no.)
– Example :- NOKIA E72 TO 58355
How to Change your Blog WordPress To Blogger…???

So, lets see how you can do it –

Step I.
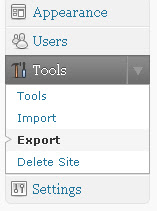
Create an export file of your wordpress blog. If your blog is quite big I would suggest downloading the file separately for each month. All you have to do download the posts and pages separately rather than as ‘All Content’, don’t worry each post will carry its details and comments with it.
Step II.
Now that you have got your xml file you have to make it compatible for blogger. This can be done at – http://wordpress2blogger.appspot.com/
You have to upload your wordpress xml file there and it will convert it to Blogger format and you can download it then. But there is a limit of size of 1 mb. That’s why I suggested to download your posts separately and select dates such that each file is less than 1 mb.
Step III.
Now that you have a Blogger compatible version of your WordPress blo, all you have to do is import it to Blogger.
Goto your Dashboard >> Settings >> Other and Click on ‘Import Blog’
I suggest to uncheck the ‘Automatically Publish all Imported Post’ so that you can review them before publishing.
Repeat the Steps 2 and 3 until you have imported all your WordPress export files to Blogger. And after that you are done, go publish it on Blogger.


