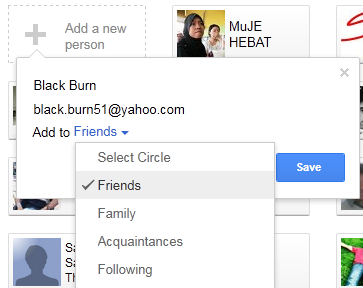
How to find and Invite Friends In Google Plus?
-
Visit Google Plus
-
Log into your account
-
At the right side you will see suggestions. Click the link that says “Show All“


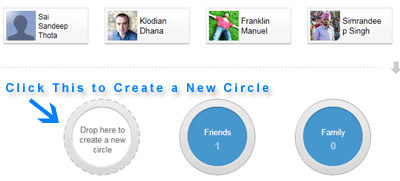
How to create Circles and add Friends to Circles?


According to my own blog statistics, out of every 500 page impressions at least 50 impressions belong to internal blog search.
Adding a search box to your blog is very easy. Simply Go to Layout and click on Add a Gadget, and select it as Search Box.
But just in case you want to edit/modify the search box, then you should better add it as an HTML element.
So go to Blogger ->
Layout -> click on Add a Gadget and select it as HTML/JavaScript
and paste this code in to it:
<div>
<form action=’http://bloggerstop.net/search’ id=’searchthis’ method=’get’ style=’display:inline;’>
<span>Search This Blog</span>
<input id=’b-query’ maxlength=’255′ name=’q’ size=’20’ type=’text’/>
<input id=’b-searchbtn’ type=’submit’ value=’Search’/>
</form>
</div>
NOTE: Replace the code in RED with your blog’s address. You may customize the widget by modifying the text in BLUE.
That’s it save the widget.
#header {
…..
…..
…..
}
And immediately BELOW/AFTER it, paste this code:
#header .searchbox {
text-align:$endSide; //$endSide = Right & $startSide = Left
margin: 25px; // Distance from right or left side
}
Now search these lines:
<div class=’descriptionwrapper’>
<p class=’description’><span><data:description/></span></p>
</div>
Add the blue code BELOW it, like this:
<div class=’descriptionwrapper’>
<p class=’description’><span><data:description/></span></p>
</div><div class=’searchbox’><form action=’http://bloggerstop.net/search’ id=’searchthis’ method=’get’ style=’display:inline;’><input id=’b-query’ maxlength=’255′ name=’q’ size=’20’ type=’text’/><input id=’b-searchbtn’ type=’submit’ value=’Search’/></form></div>
That’s it, save the widget and let your visitors freely roam around your blog !
For displaying the thumbnails you need not to worry about anything, this thing is taken care by the widget automatically, but you must have at-least one image in the post.
Follow the steps to display Related Posts Widget in Blogger With Thumbnails.
Step 1: First Login to your blogger dashboard and navigate to Layout > Edit HTML and check the “Expand Widget Templates” checkbox.
Step 2: Find the
</head>
Step 3: Replace it with
<!–Related Posts with thumbnails Scripts and Styles Start–>
<b:if cond=’data:blog.pageType == “item”‘>
<style type=”text/css”>
#related-posts {
float:center;
text-transform:none;
height:100%;
min-height:100%;
padding-top:5px;
padding-left:5px;
}
#related-posts h2{
font-size: 1.6em;
font-weight: bold;
color: black;
font-family: Georgia, �Times New Roman�, Times, serif;
margin-bottom: 0.75em;
margin-top: 0em;
padding-top: 0em;
}
#related-posts a{
color:black;
}
#related-posts a:hover{
color:black;
}
#related-posts a:hover {
background-color:#d4eaf2;
}
</style>
<script src=’http://blogergadgets.googlecode.com/files/relatedthumbs21.js’ type=’text/javascript’/>
</b:if>
<!–Related Posts with thumbnails Scripts and Styles End–>
</head>
Step 4: Find the either line given below
<div class=’post-footer-line post-footer-line-1′>
OR
<p class=’post-footer-line post-footer-line-1′>
Step 5: Put the code given below immediately after the above one.
<!– Related Posts with Thumbnails Code Start–>
<b:if cond=’data:blog.pageType == “item”‘>
<div id=’related-posts’>
<b:loop values=’data:post.labels’ var=’label’>
<b:if cond=’data:label.isLast != “true”‘>
</b:if>
<b:if cond=’data:blog.pageType == “item”‘>
<script expr:src='”/feeds/posts/default/-/” + data:label.name + “?alt=json- in-script&callback=related_results_labels_thumbs&max-results=6″‘ type=’text/javascript’ /></b:if></b:loop>
<script type=’text/javascript’>
var currentposturl=”<data:post.url/>”;
var maxresults=5;
var relatedpoststitle=”Related Posts”;
removeRelatedDuplicates_thumbs();
printRelatedLabels_thumbs();
</script>
</div><div style=’clear:both’/>
</b:if>
<!– Related Posts with Thumbnails Code End–>
Now Save Template and View your blog you will find Results, if you don’t see the images then keep patient it will show you withing 24 Hours.
Note: You can adjust the maximum number of related posts being displayed by editing this line in the code.
5.To edit the title of the widget you can change this line of code:
If you have any issue please comment here.
So if these widgets are not present in your blog, then follow these steps to add them yourself :
First log in to Blogger.com
Go to Layout -> Click on Edit HTML tab
Now search (CTRL+F) for these code line:
<div id=’footer-wrapper’>
<b:section class=’footer’ id=’footer’/></div>
REPLACE the entire red line in the above code, with this new code:
<div id=’footer-column-container’>
<div id=’footer2′ style=’width: 30%; float: left; margin:0; text-align: left;’>
<b:section class=’footer-column’ id=’col1′ preferred=’yes’ style=’float:left;’/>
</div>
<div id=’footer3′ style=’width: 40%; float: left; margin:0; text-align: left;’>
<b:section class=’footer-column’ id=’col2′ preferred=’yes’ style=’float:left;’/>
</div>
<div id=’footer4′ style=’width: 30%; float: right; margin:0; text-align: left;’>
<b:section class=’footer-column’ id=’col3′ preferred=’yes’ style=’float:right;’/>
</div>
<div style=’clear:both;’/>
<div id=’footer-bottom’ style=’text-align: center; padding: 10px; text-transform: lowercase;’>
<b:section class=’footer’ id=’col-bottom’ preferred=’yes’>
<b:widget id=’Text2′ locked=’false’ title=” type=’Text’/>
</b:section>
</div>
<div style=’clear:both;’/>
</div>
Now PREVIEW the template, and if no errors are displayed, then carry on:
Find this code:
]]></b:skin>
Then immediately BEFORE / ABOVE it, paste these lines:
#footer-column-container {
clear:both;
}
.footer-column {
padding: 10px;
}
Save the template, go to “Page Elements“, and add content to the three new widgets !
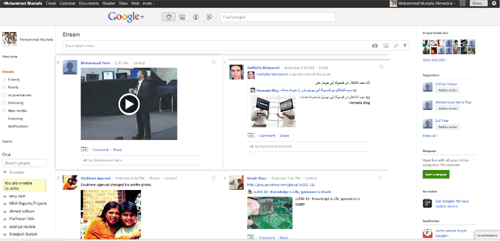
 Google Plus is heard everywhere now. This great social networking site is expected to soon take over major social networks like Facebook. Developers everywhere are engaged in bringing more interesting codes to customize the look and feel of Google+ . I cam across an interesting Mozilla Firefox Add-on and Chrome extension created by Stylish. The code splits your Google+ homepage into two columns neatly. You will see your friends status updates in two wide columns thus making the experience more interesting. This add on can easily be installed. Just follow the easy steps below.