Most of the time, default Adobe Photoshop�s patterns just could not satisfied designers needs. Minutes later you will be creating your own custom pattern for buttons, interfaces, photo scan-lines, etc.
Download this sample
1. Create A Pattern Image
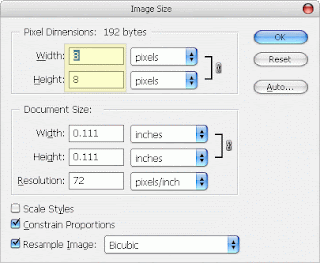
Fire up a new canvas. It should be small (in terms of height x width). Image you are creating here will duplicate itself to form your pattern in the later stage. For this example, I�ll be using 8�8 pixel canvas, zoomed them up and create a small pattern like this.Enjoy Guys! and don’t forget to post your comments. � MyTricksTime.com
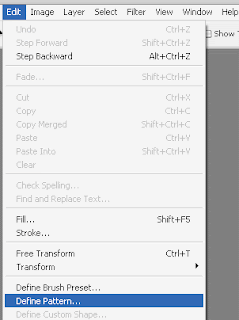
Let�s define it as pattern so it can be used at anytime. Select Edit ->Define Pattern
 Rename it to something you can remember (especially useful when you have a lot of custom patterns in future). I�ll call it Stripe5x because it will give me a stripe effect and 5px is how thick each stripes are. Click OK and you�ve just have your custom pattern defined.
3. Using Custom Pattern
Create a new canvas to try out the custom pattern. With your new canvas selected, Select Edit -> Fill.
In the Fill dialog box, select Pattern from the dropdown, find the pattern you�ve just created in Custom Pattern and click OK.
The canvas will now be filled with pattern you�ve just created. Tweak the colors and it should look fine.
Misc: Alternative Way To Call Custom Pattern
Another way to call up the custom pattern. (Right Click) layer name -> Blending Options
Check Pattern Overlay, select your pattern
Misc � Delete Custom Pattern
Anywhere in the pattern selection box, (Right Click), choose Delete.


